


Struggling to build strength and flexibility in one yoga pose without losing balance or form?
The Extended Side Angle Pose often feels confusing because your legs work hard while your upper body tries to stay open at the same time. I know how easily the chest can collapse or the front knee can drift inward when you rush the shape.
You will understand how to set up the pose, align it correctly, and feel both stability and stretch together. I will help you break it down simply so you can practice with more control and confidence in your yoga routine
| Disclaimer: This article is for informational and educational purposes only. It does not constitute medical advice and should not replace consultation with a qualified healthcare provider. Always consult a doctor before making changes to your exercise routine, especially if you have existing knee, back, neck, or shoulder concerns. |
| Difficulty | Beginner to Intermediate |
| Duration | 5 to 10 breaths per side |
| Props Needed | Mat, yoga block (optional), wall for balance support |
| Best Time | Morning or as part of a standing flow |
| Avoid If | Recent knee, hip, back, or shoulder injury; high or low blood pressure without modification |
What is Extended Side Angle Pose?
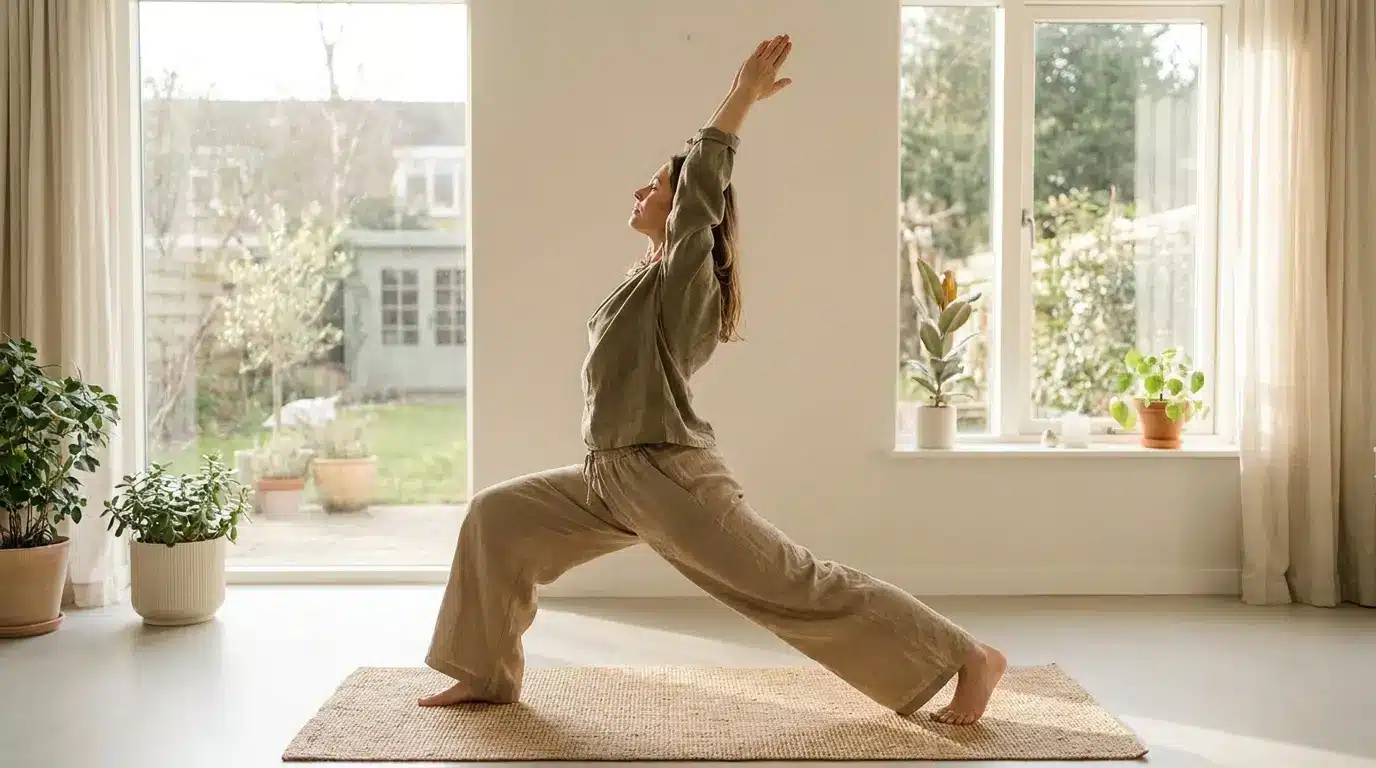
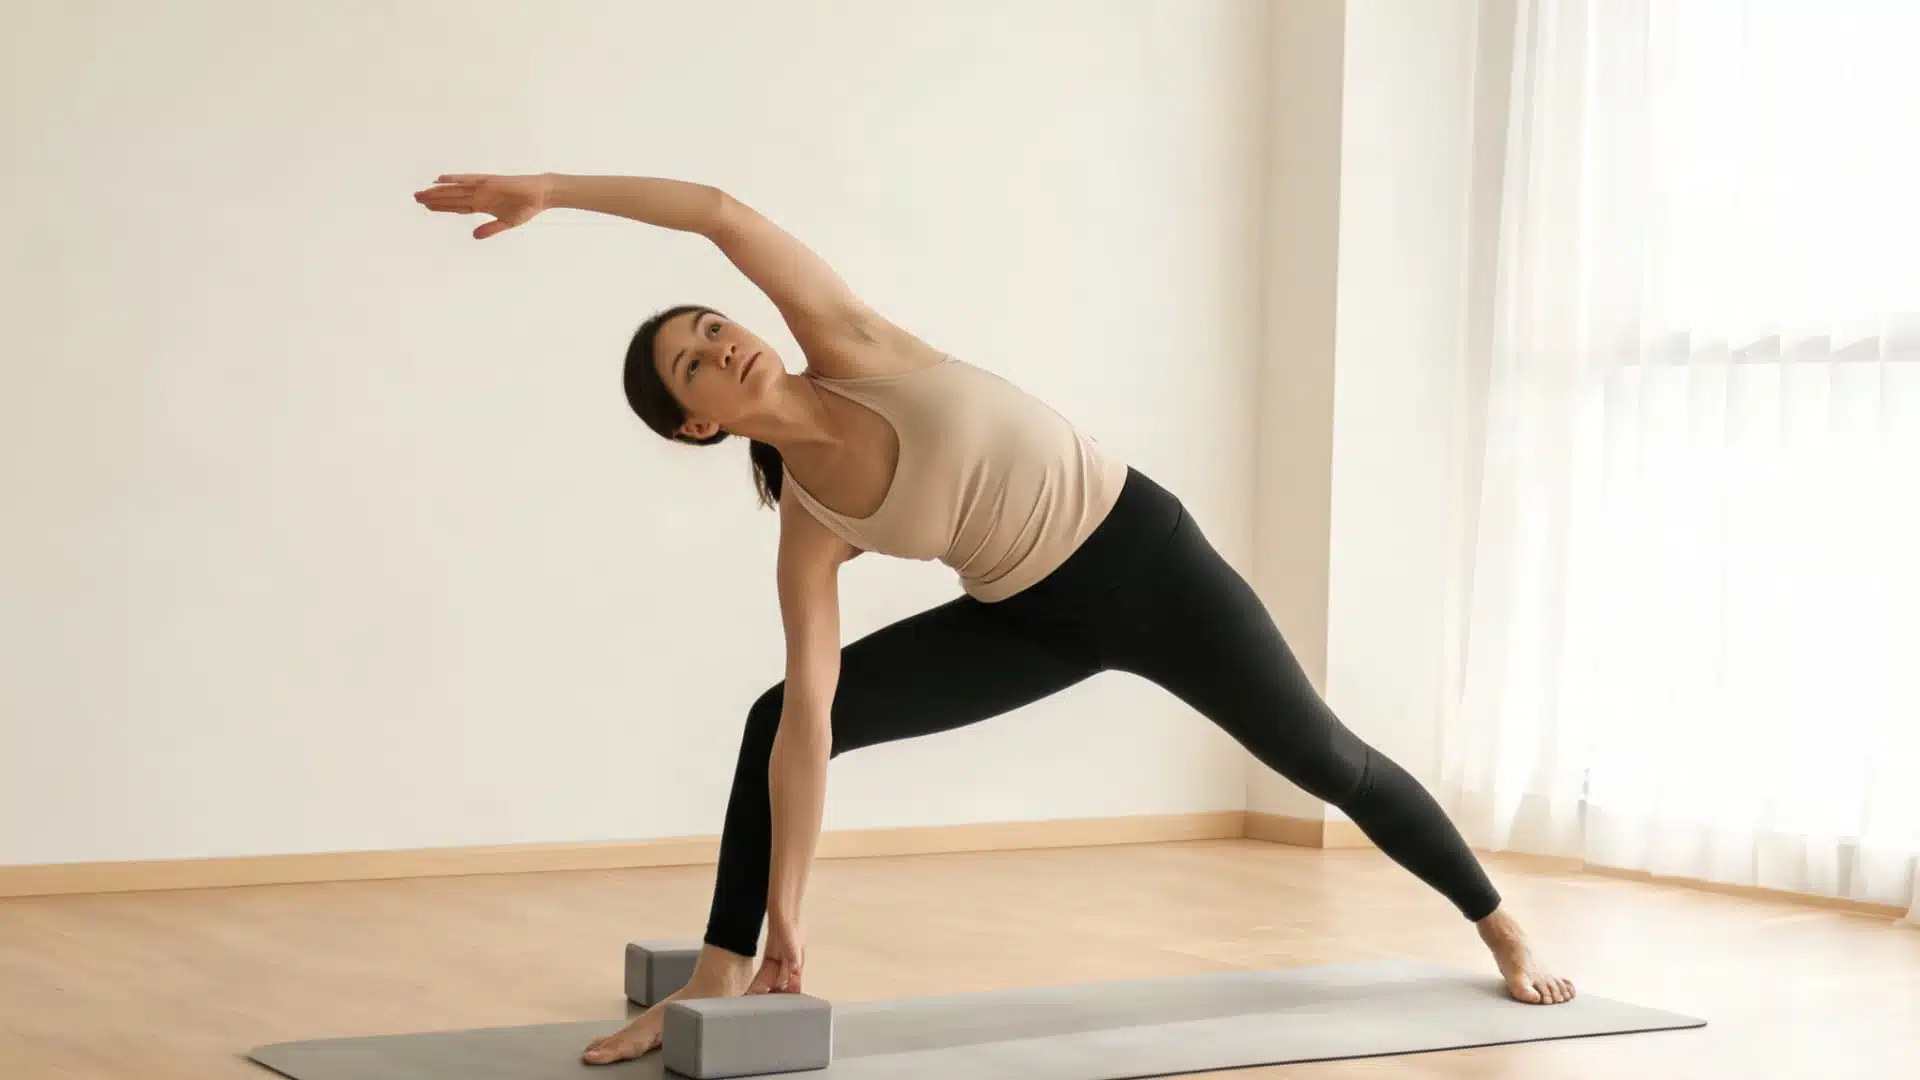
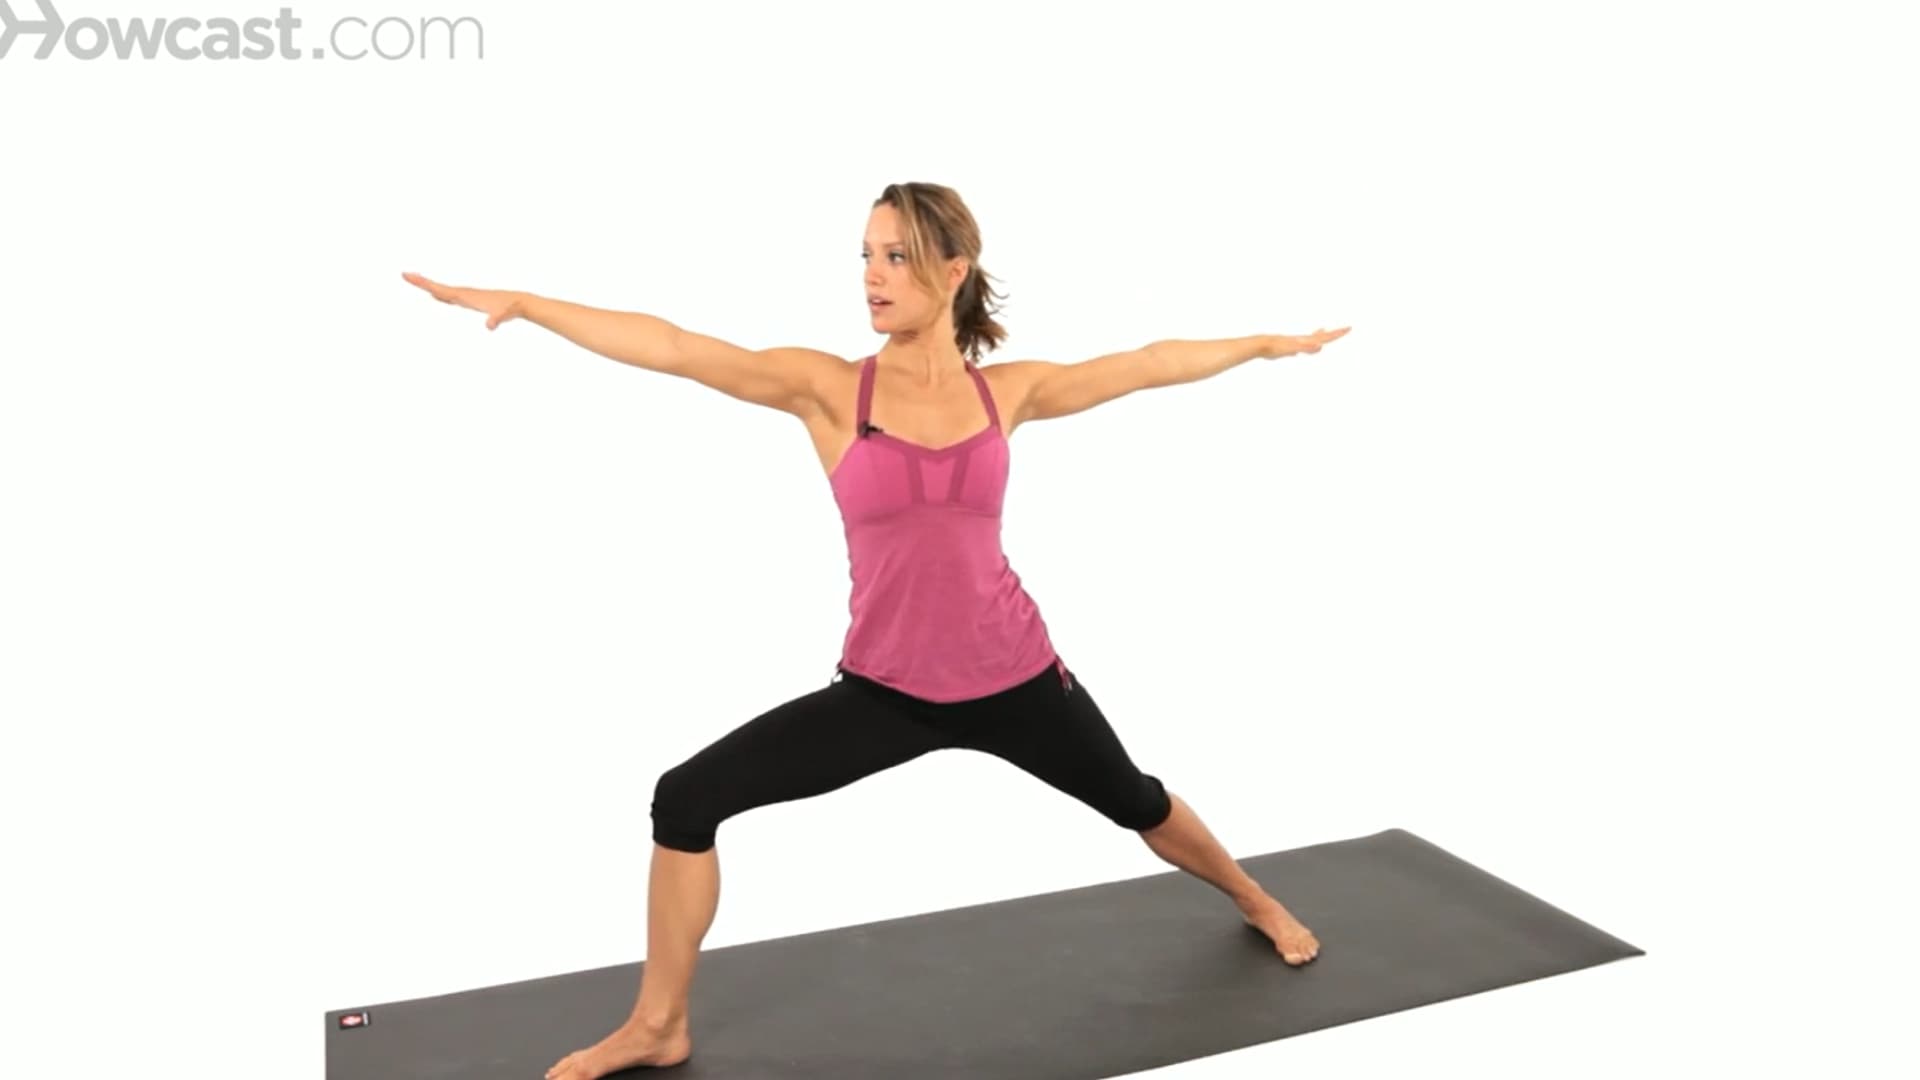
Known in Sanskrit as Utthita Parsvakonasana, extended side angle pose is a foundational standing posture from the warrior sequence that combines leg strength, hip opening, and lateral spinal extension in a single shape.
The front knee bends deeply while the back leg stays fully active, creating a wide and grounded base. From there, the torso extends sideways, and the top arm reaches either up or over the ear, creating one long line from the outer back heel through the fingertips.
The pose first appeared in twentieth-century yoga through Krishnamacharya’s Mysore system and was developed further by B.K.S. Iyengar and Pattabhi Jois. Today, it appears in Vinyasa, Hatha, and Ashtanga classes as a key standing sequence pose, usually following Warrior II.
Why Extended Side Angle Pose Works: The Physiology
This pose works because it asks your body to do two different things at once. The lower body drives into the ground, building compression and stability through the quadriceps, glutes, and ankles.
The upper body responds by lengthening away from that base, creating a decompressive stretch through the obliques, intercostals, and side waist.
That contrast is what makes the pose effective. The front hip externally rotates as the knee tracks outward, which stretches the inner thigh and hip flexor simultaneously.
The back leg presses the outer heel into the mat, engaging the calf and the glute med to create a counterforce that keeps the pelvis from rotating too far forward. When both legs do their job, the torso can extend with less strain on the lower back.
The obliques and deep core muscles engage to prevent the torso from collapsing onto the bottom arm. That core engagement also protects the lumbar spine by keeping it long rather than compressed. The chest rotates slightly upward, creating space across the rib cage and helping the lungs expand more fully with each breath.
Extended Side Angle Pose Benefits
The extended side-angle pose offers a range of physical benefits that support both strength and mobility. Holding the pose for multiple breaths builds muscular endurance and flexibility, which is why it earns a place in both strength- and mobility-focused practices.
| Benefit | What It Does |
|---|---|
| Strengthens Lower Body | Builds sustained strength in the quadriceps, glutes, calves, and ankles through an active lunge hold |
| Opens Hips | Stretches the inner thigh and hip flexor through external rotation of the front hip |
| Lengthens Side Body | Creates a long lateral stretch through the obliques, intercostals, and side waist |
| Builds Core Stability | Engages the obliques and deep abdominal muscles to support the torso without collapsing |
| Expands Chest and Rib Cage | Opens the thoracic spine and intercostal muscles to support fuller breathing |
| Improves Balance and Body Awareness | Trains foot pressure, knee tracking, and torso control together in a single standing shape |
| Builds Endurance | Holding the pose for multiple breaths increases stamina for longer standing sequences |
The combination of strengthening the legs while stretching the side body is what makes the extended side angle pose a genuinely useful pose rather than a decorative one. Both actions happen at the same time, which is harder and more rewarding than either in isolation.
How to Do the Extended Side Angle Pose Step By Step
Set up each stage slowly. The pose is built from the ground up, and the foundation shapes everything above it. Your hand does not need to touch the floor for this to be a complete and effective practice.
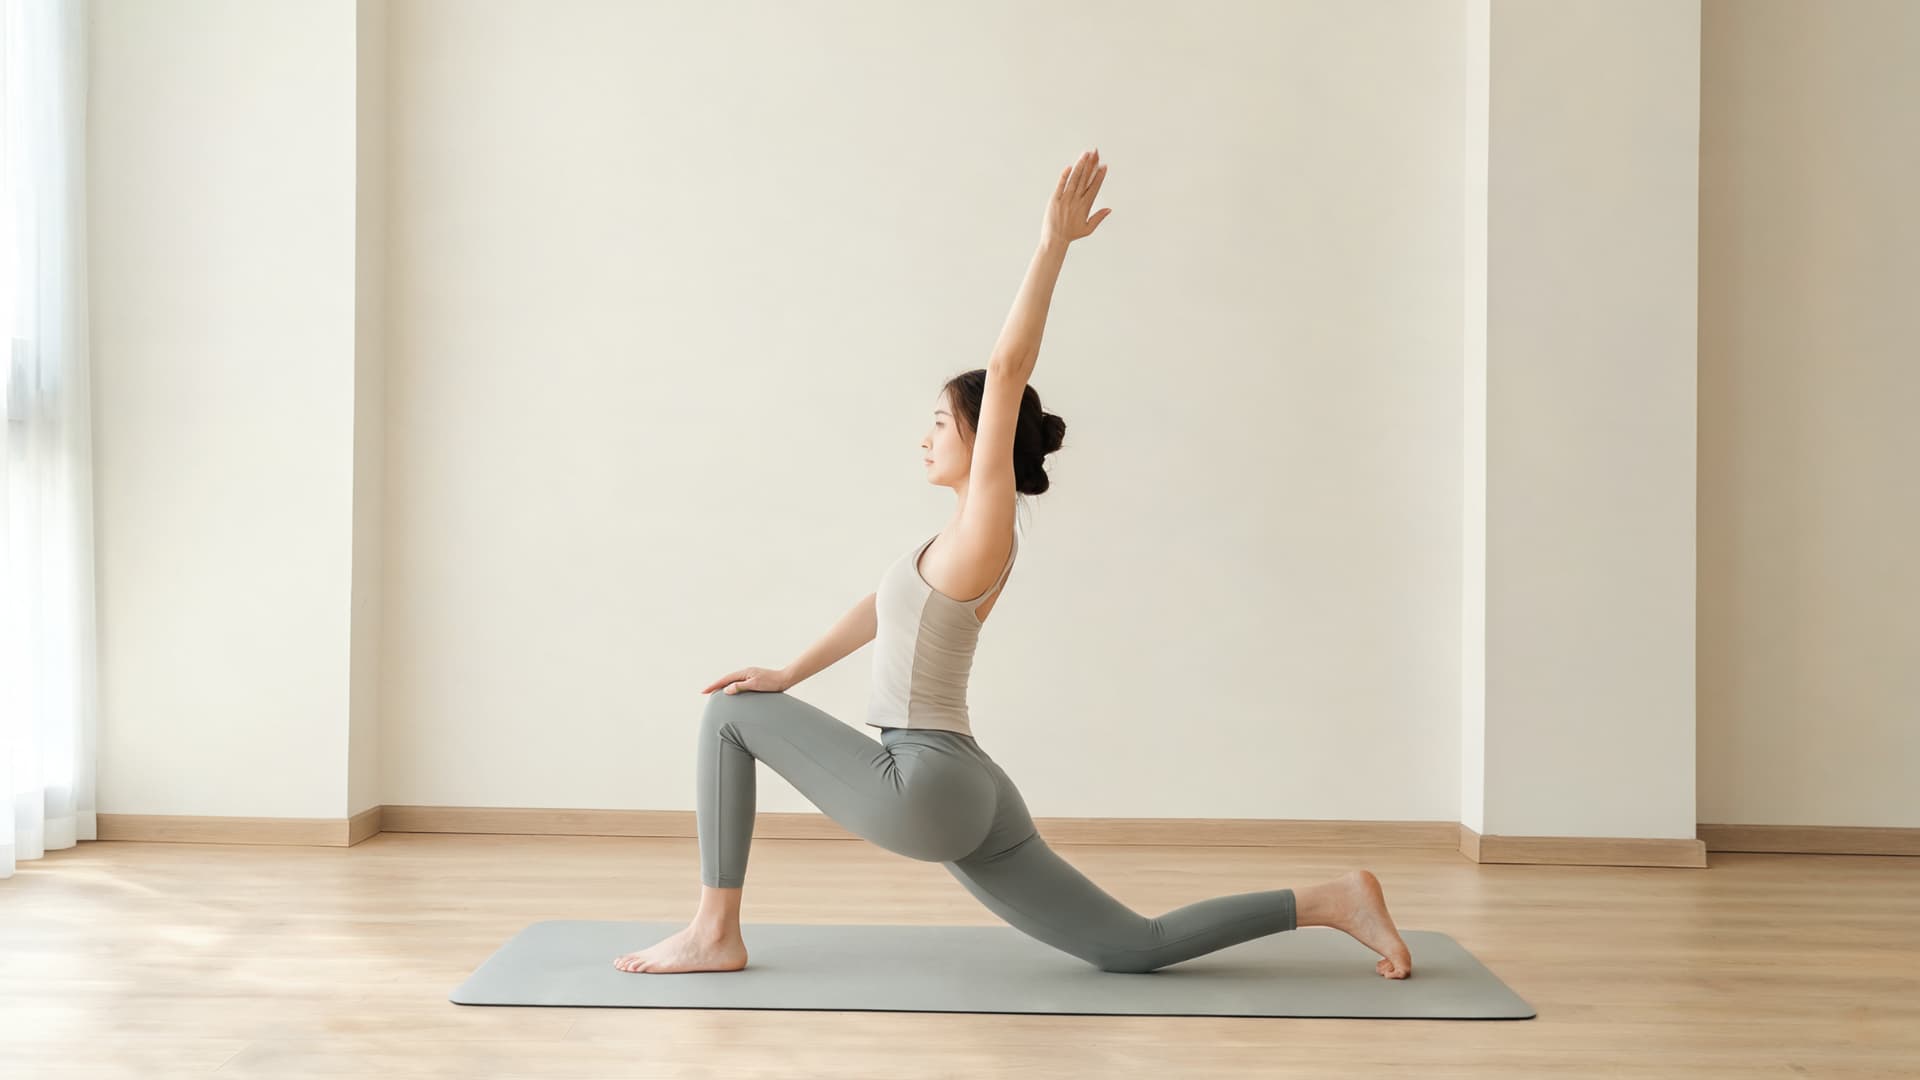
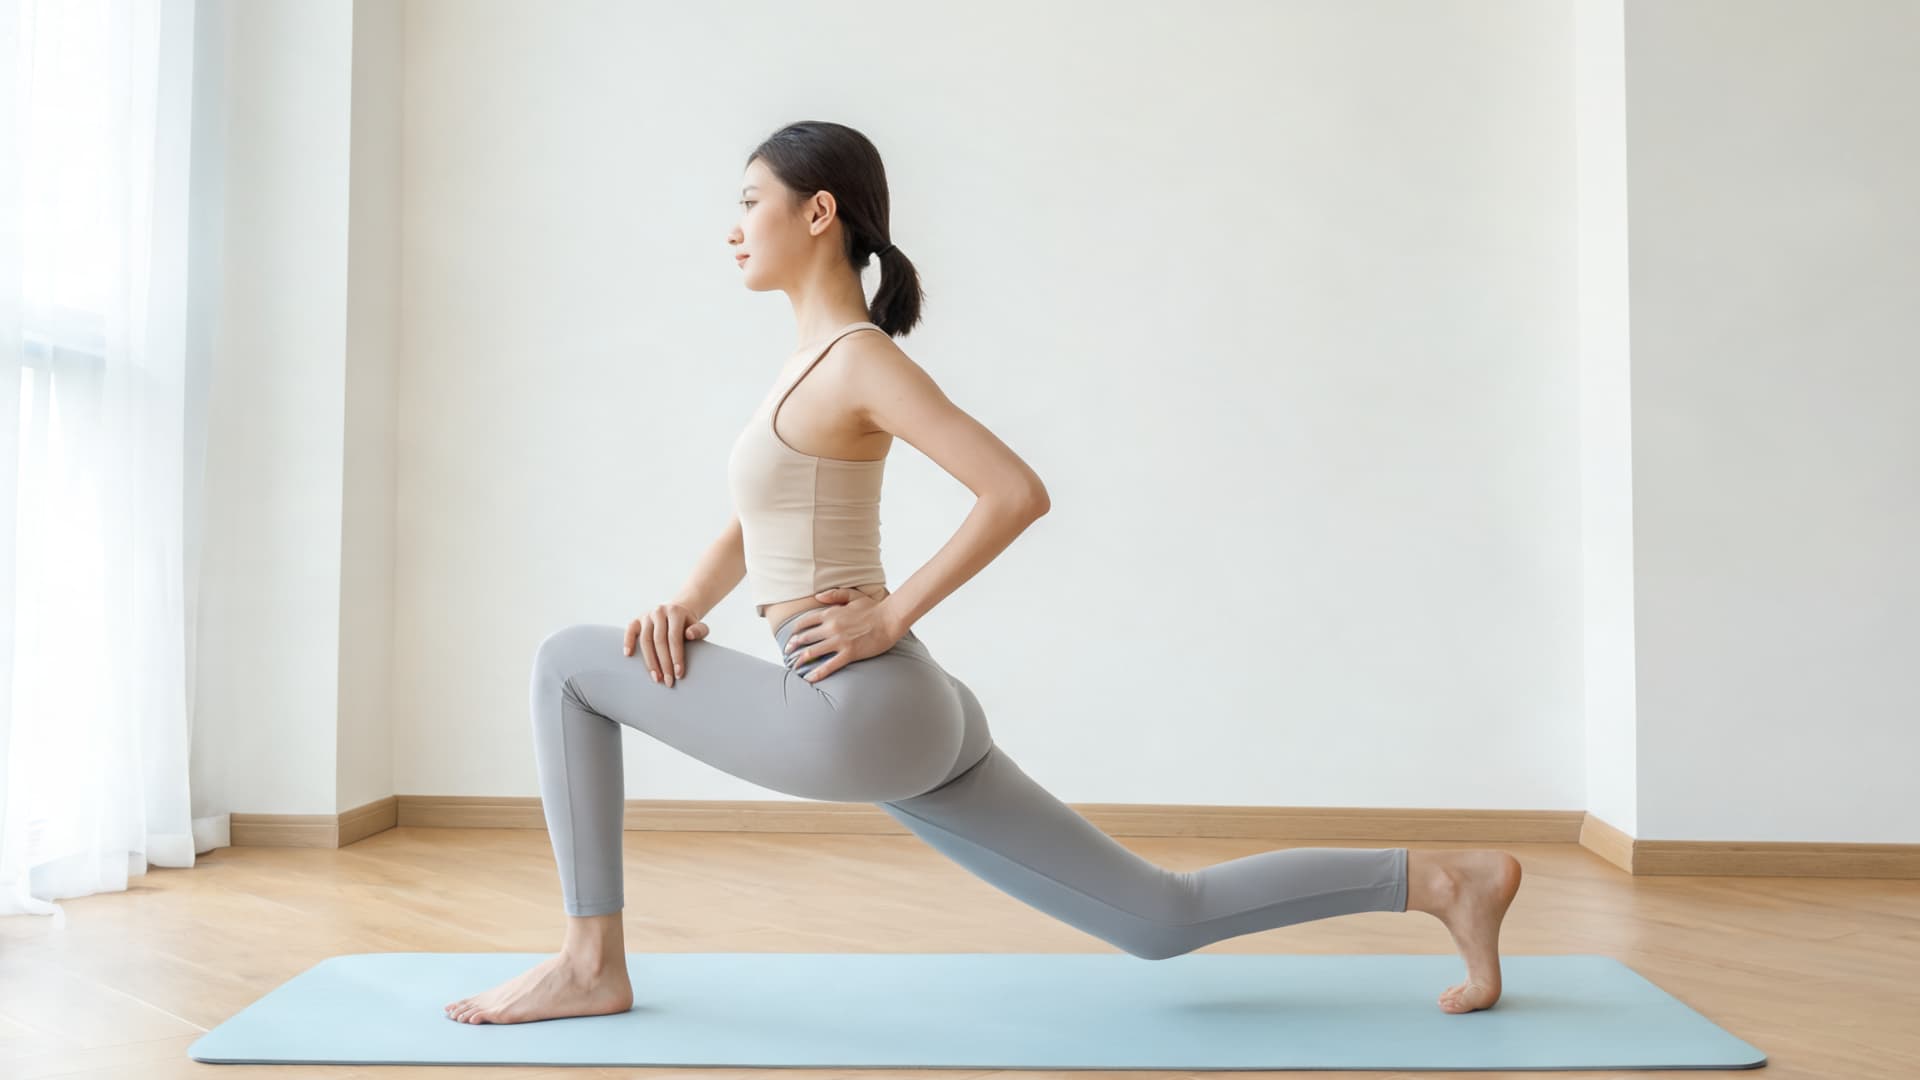
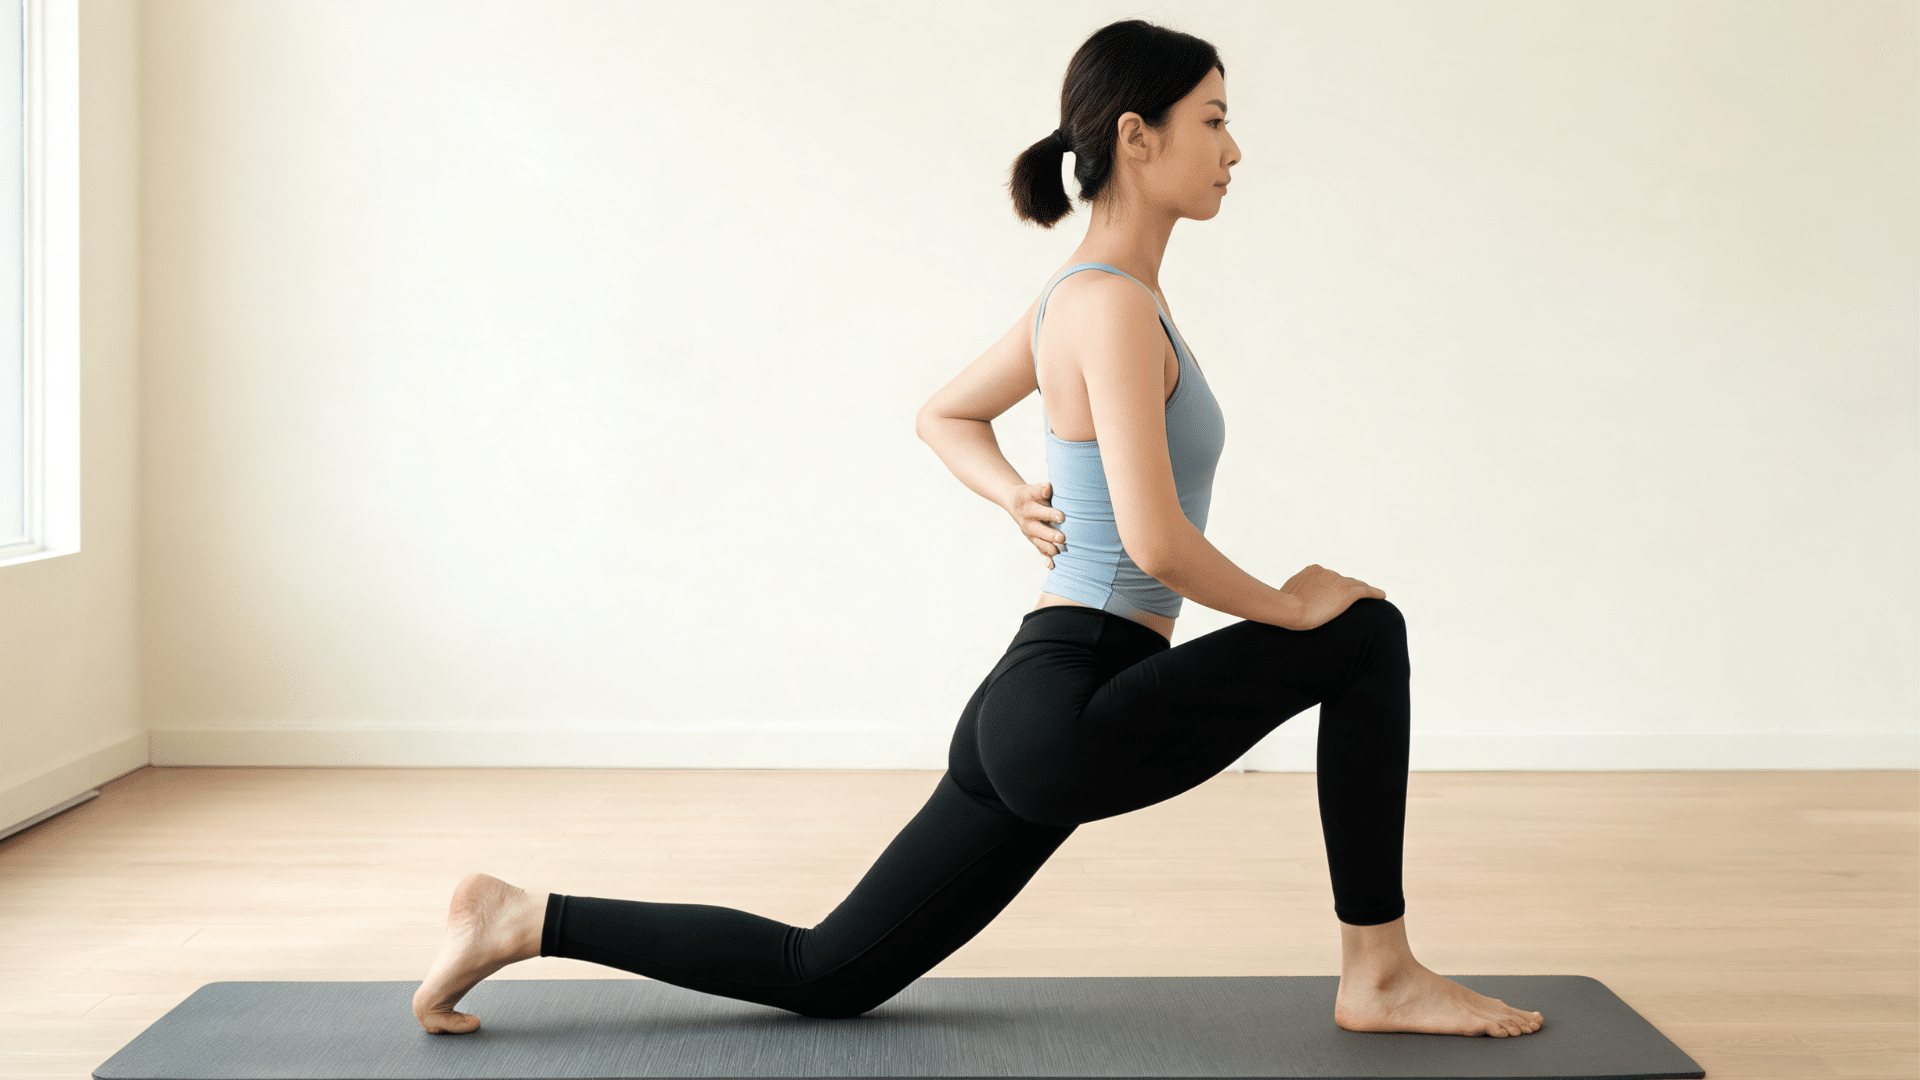
Step 1: Set Your Warrior II Base
Stand at the top of your mat with feet about three and a half to four feet apart. Turn your front foot toward the short edge of the mat. Angle your back foot slightly inward, around 80 degrees. Line up your front heel with the arch of the back foot.
Bend your front knee so it stacks directly over your front ankle, tracking toward the second and third toes. Press evenly through both feet and keep the back leg fully engaged. Reach both arms out wide at shoulder height as you would in Warrior II.
Step 2: Bring the Forearm to the Front Thigh
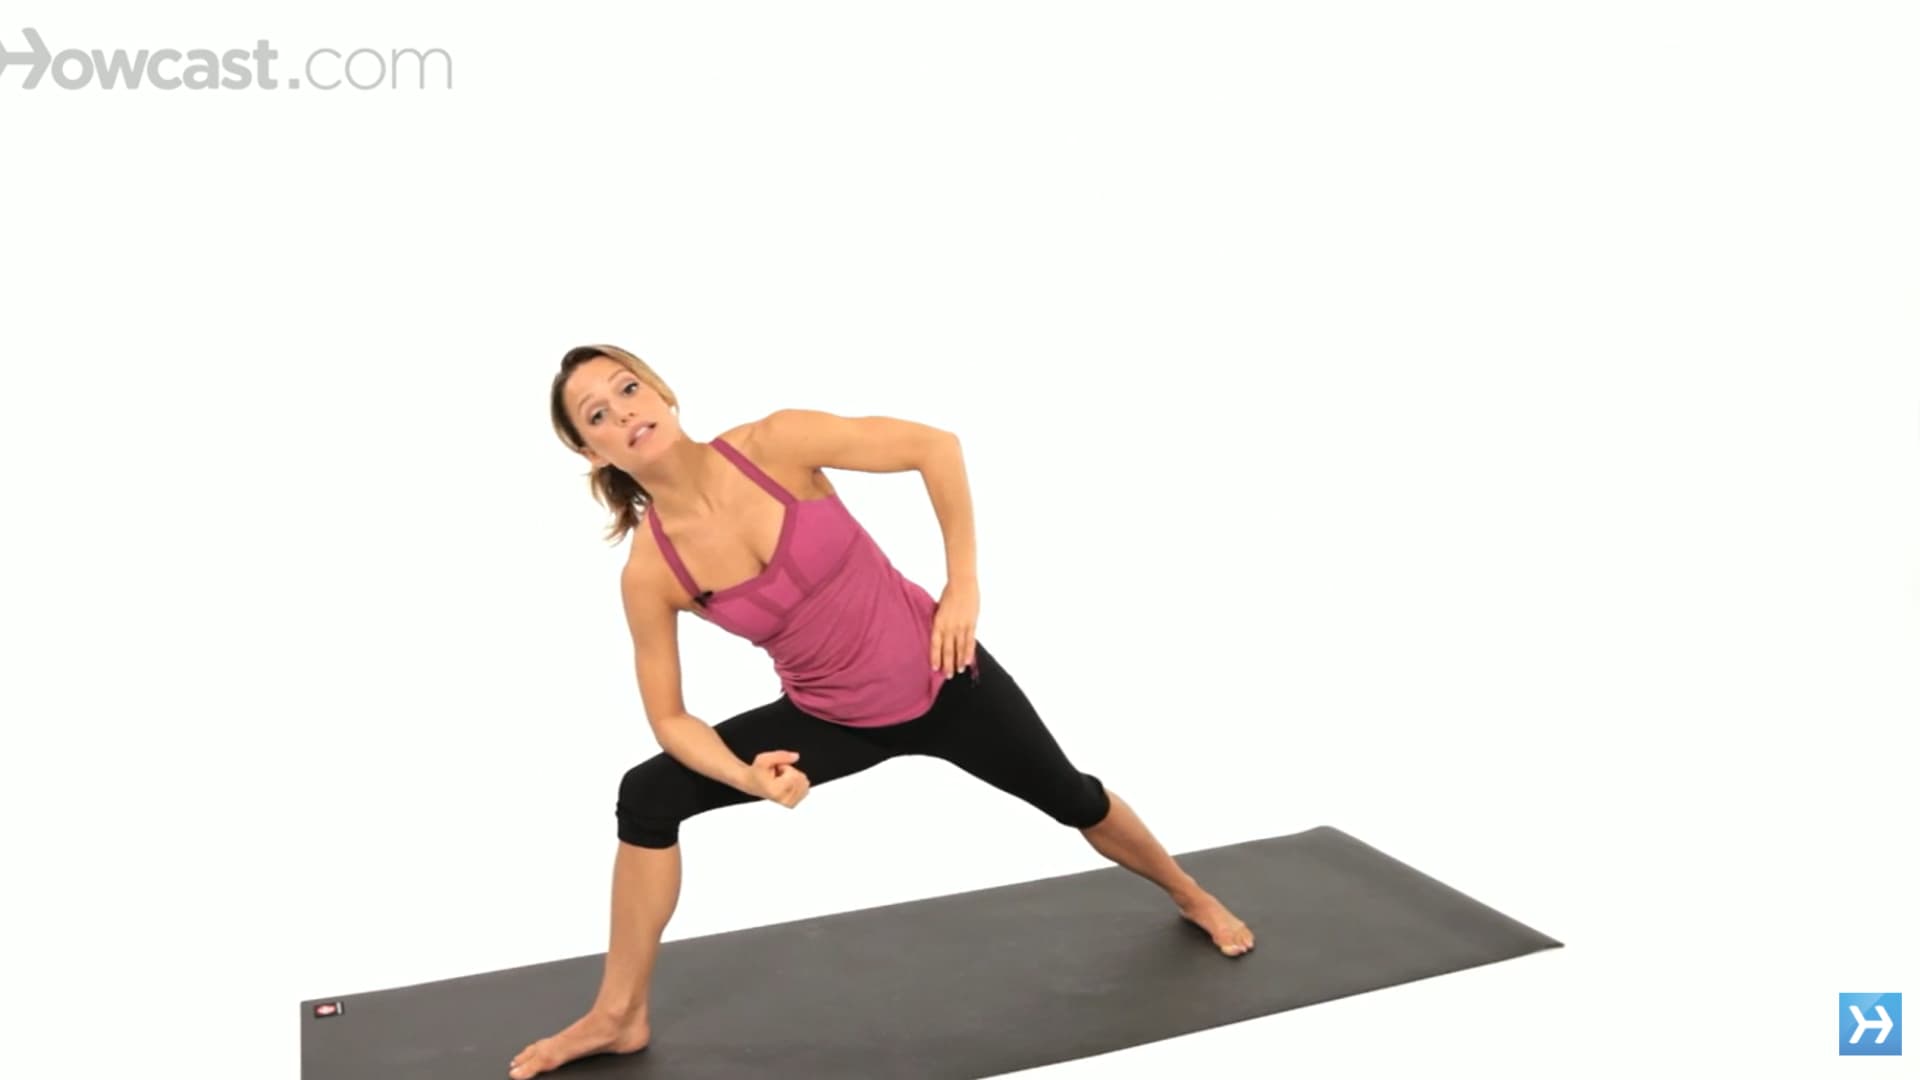
Rest your front forearm lightly on your front thigh. Do not lean heavily into it. This gives the torso a supported landing place without forcing the hand to the floor prematurely.
Keep your spine long as you tilt over the bent leg and resist the pull of gravity on the chest. Place your top hand on your hip. This single cue helps you feel exactly where the top shoulder is sitting and whether the chest is beginning to open or staying closed.
Step 3: Open the Chest and Reach the Top Arm Up
Once the chest feels open, reach the top arm up toward the ceiling. Keep the arm active from shoulder to fingertip. A useful cue: imagine a glass wall directly in front of your face and press the top fingertips into it.
This keeps the arm from drifting behind the body, which is one of the most common ways the shoulder loses its organized position. With the arm active and the chest rotating upward, the whole side body begins to engage.
Step 4: Choose Where to Place the Bottom Hand
You have three options. Forearm on the thigh is the most supported and often the smartest choice. Hand on a yoga block placed inside or outside the front foot gives more height than the floor, with more structure than the thigh.
Fingertips to the floor is the deepest version, but only choose it if the spine stays long and the chest stays open. If the floor pulls your chest down, move back to the block without hesitation.
Step 5: Lengthen Through the Full Line
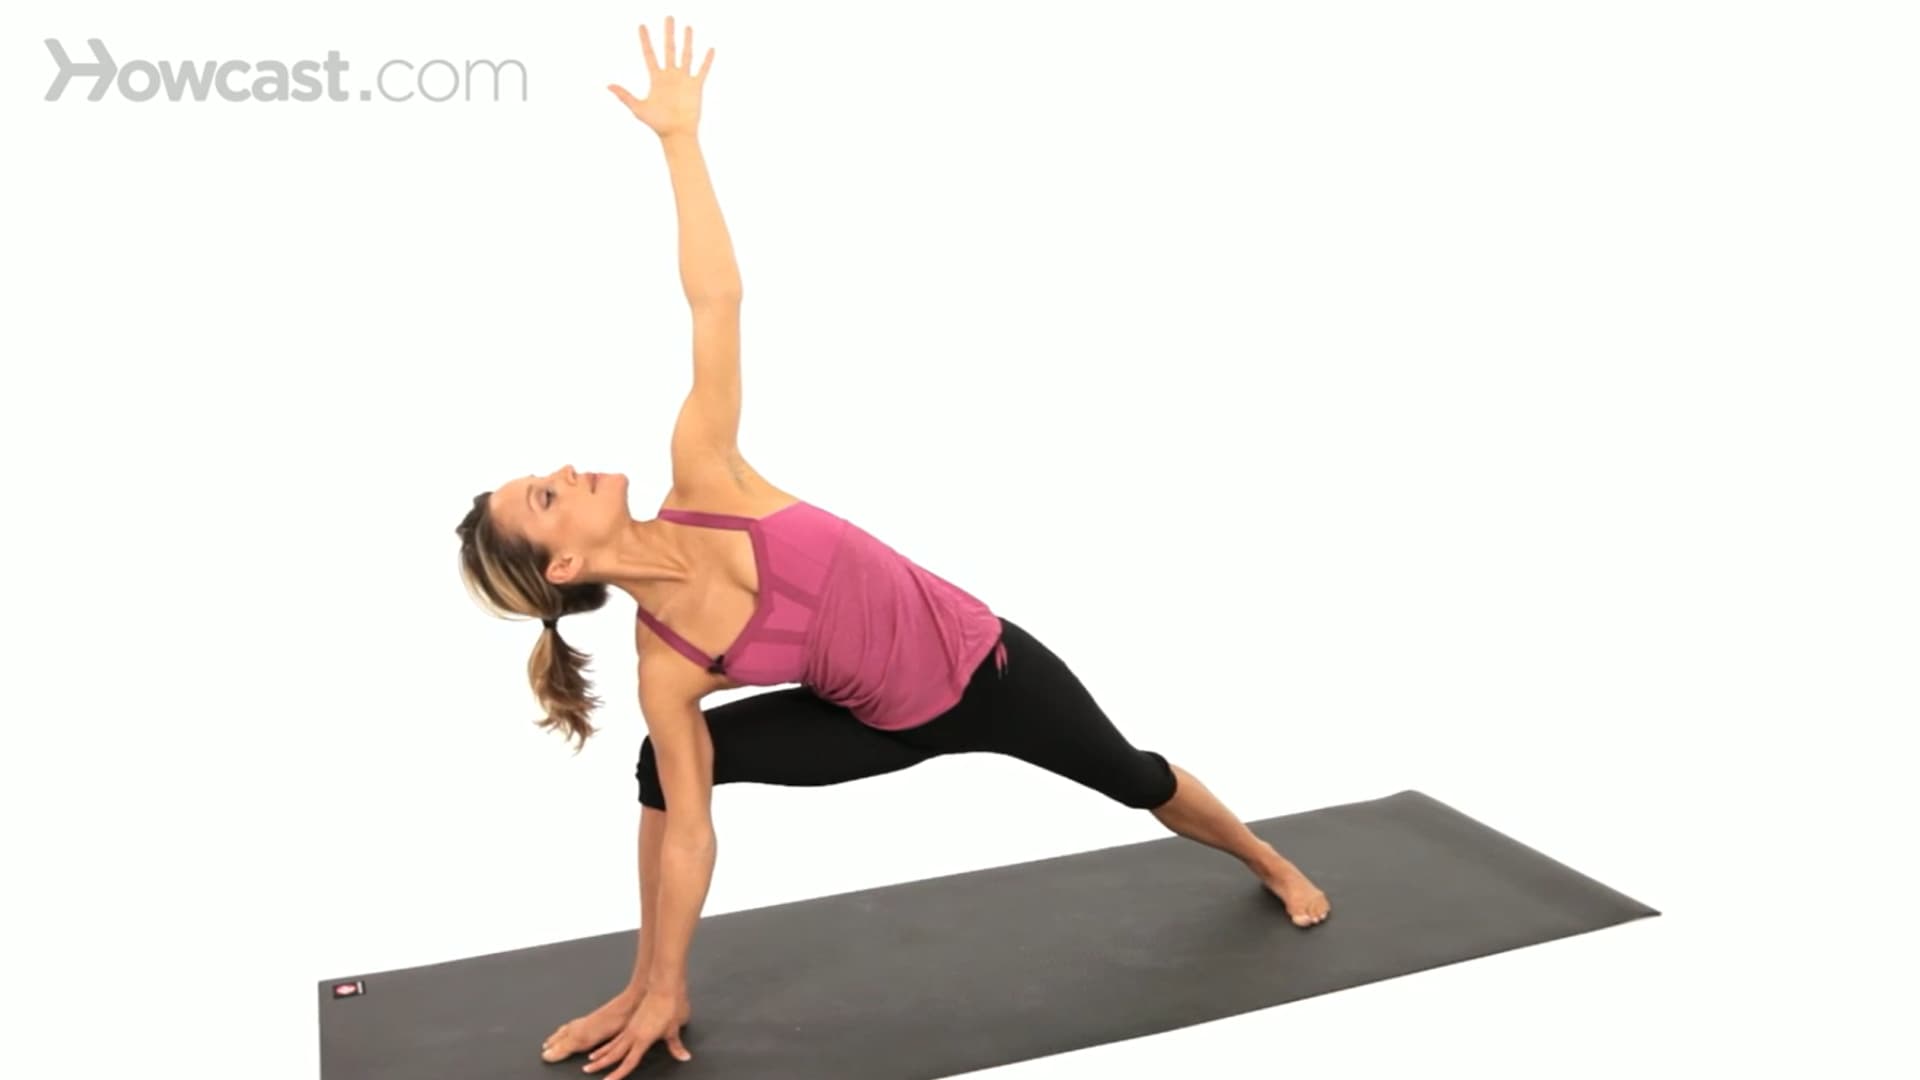
Once the base is steady, lengthen from the outer back heel through the side waist, ribs, shoulder, and up through the top fingertips. Your breath should feel smooth.
The pose should feel active and spacious, not clamped or forced. Hold for five to ten breaths. To come out, press firmly into both feet, rise back to Warrior II, straighten the front leg, and repeat on the other side.
Extended Side Angle Pose Variations
The best variation is the one that keeps your front knee steady, your spine long, your chest open, and your breath smooth. Here are six versions organized from most accessible to most demanding.
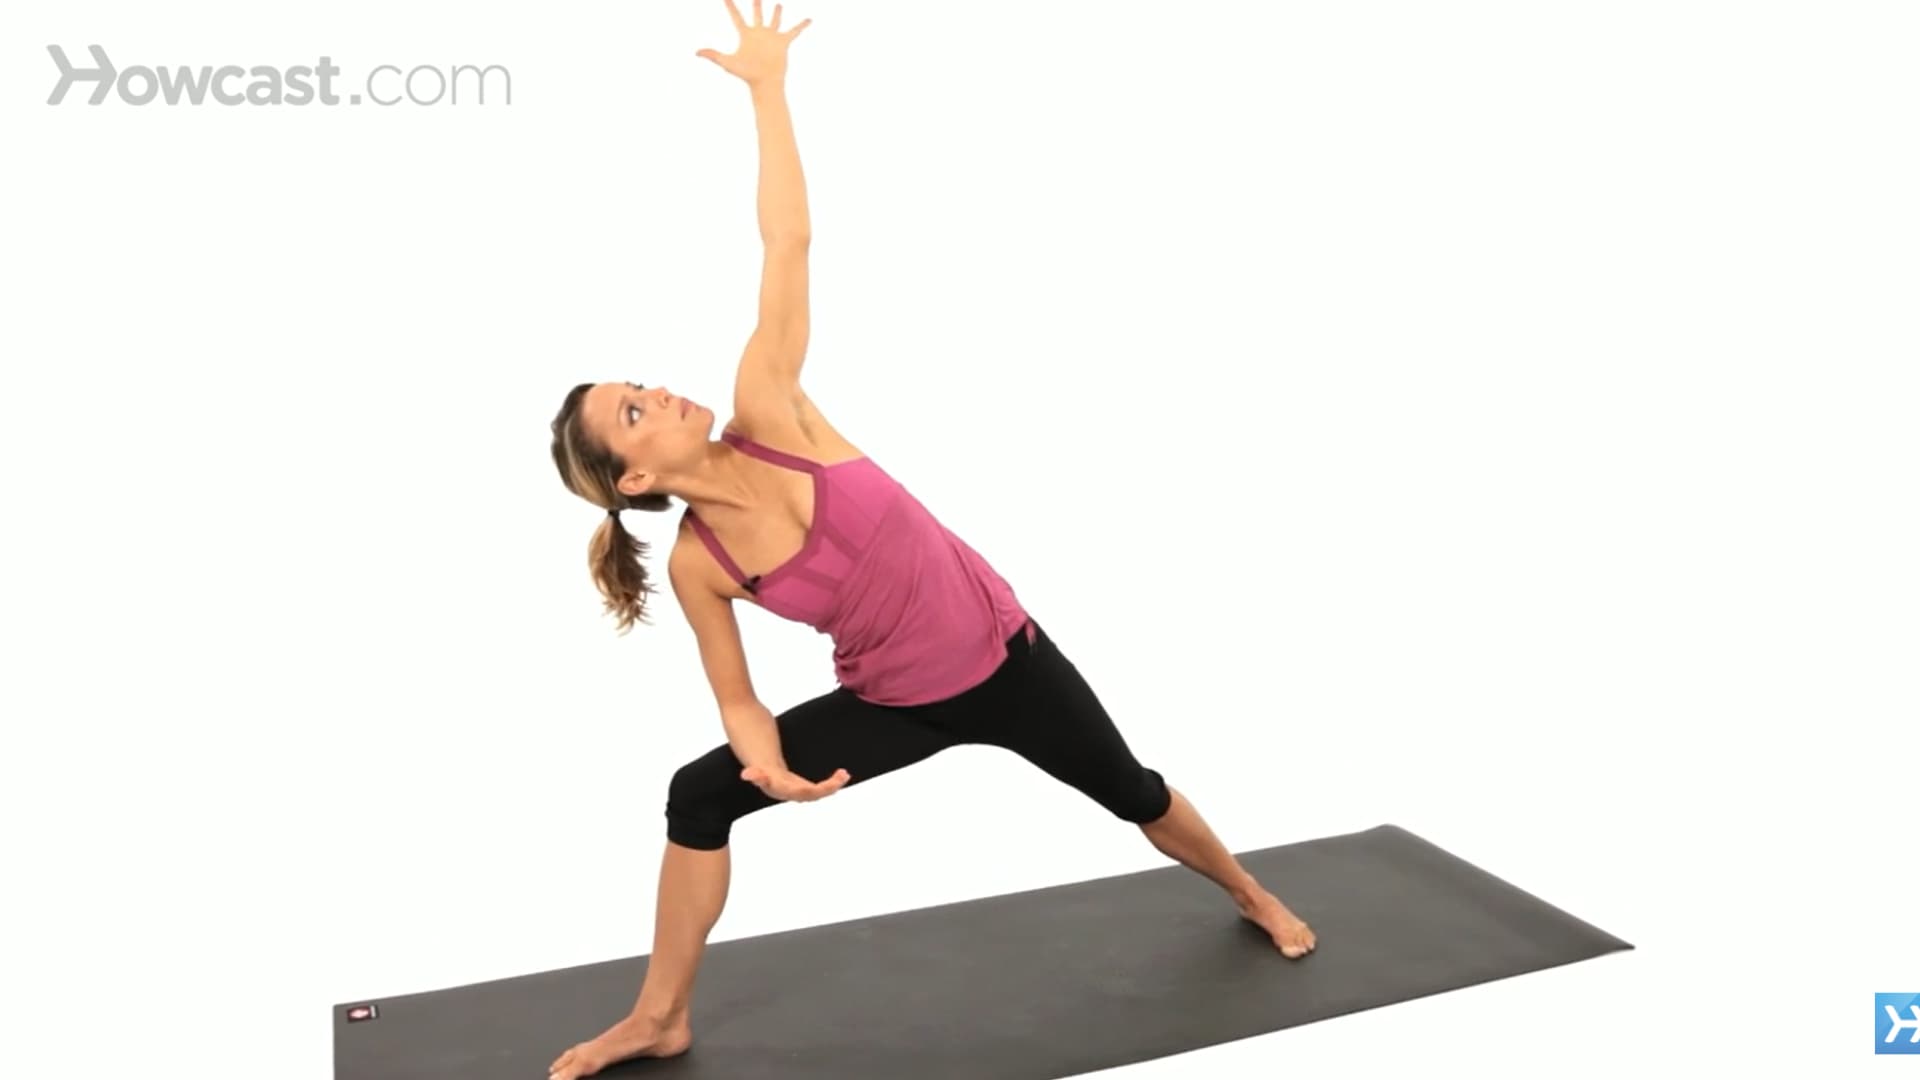
1. Forearm-to-Thigh Variation
Your front forearm rests lightly on the bent thigh while the top arm reaches overhead or stays on the hip. This is the most accessible version and a genuinely complete posture.
It is not a lesser version of the pose. Use it when you want to prioritize alignment over range, or when lower back fatigue is present.
2. Block-Supported Variation
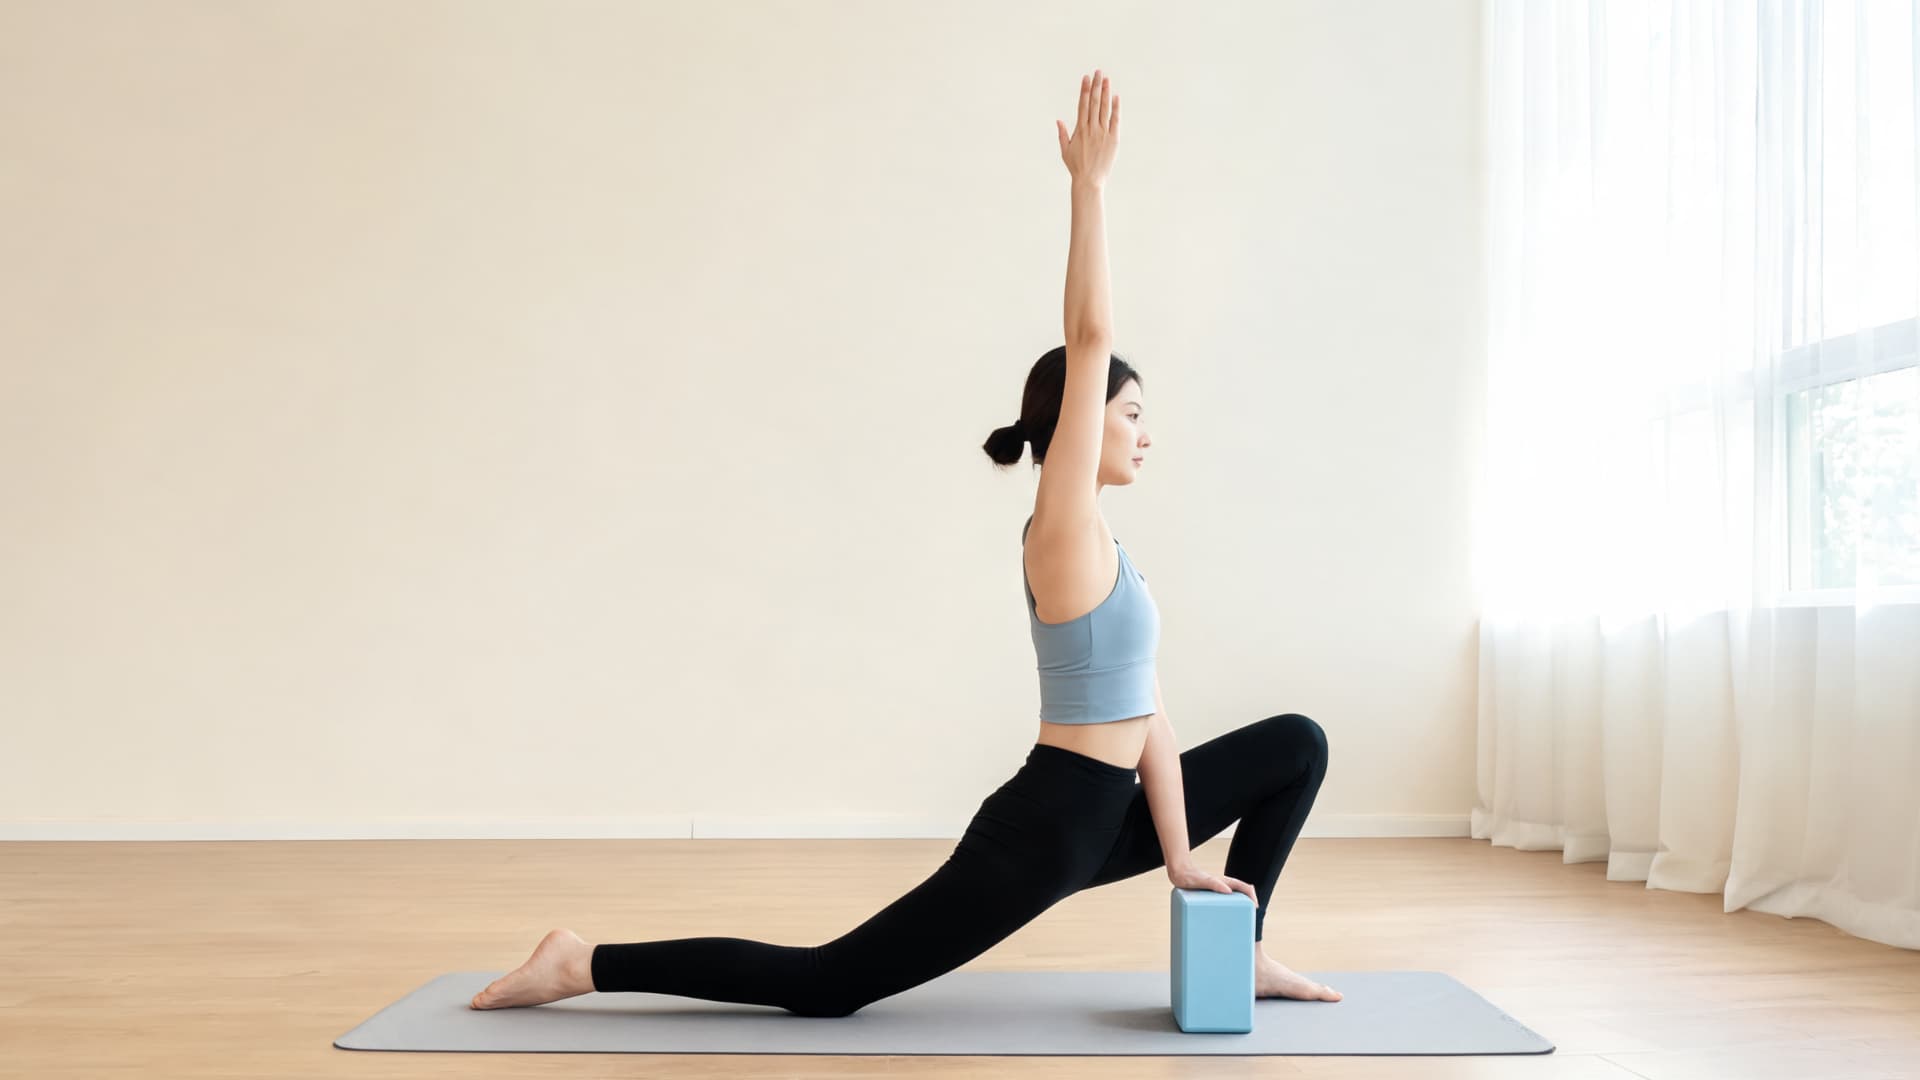
Place a block inside or outside the front foot and rest your bottom hand on it.
The extra height supports better spinal alignment and prevents the chest from dropping toward the mat. This is a strong intermediate choice when you want to build leg strength while still maintaining control of the upper body.
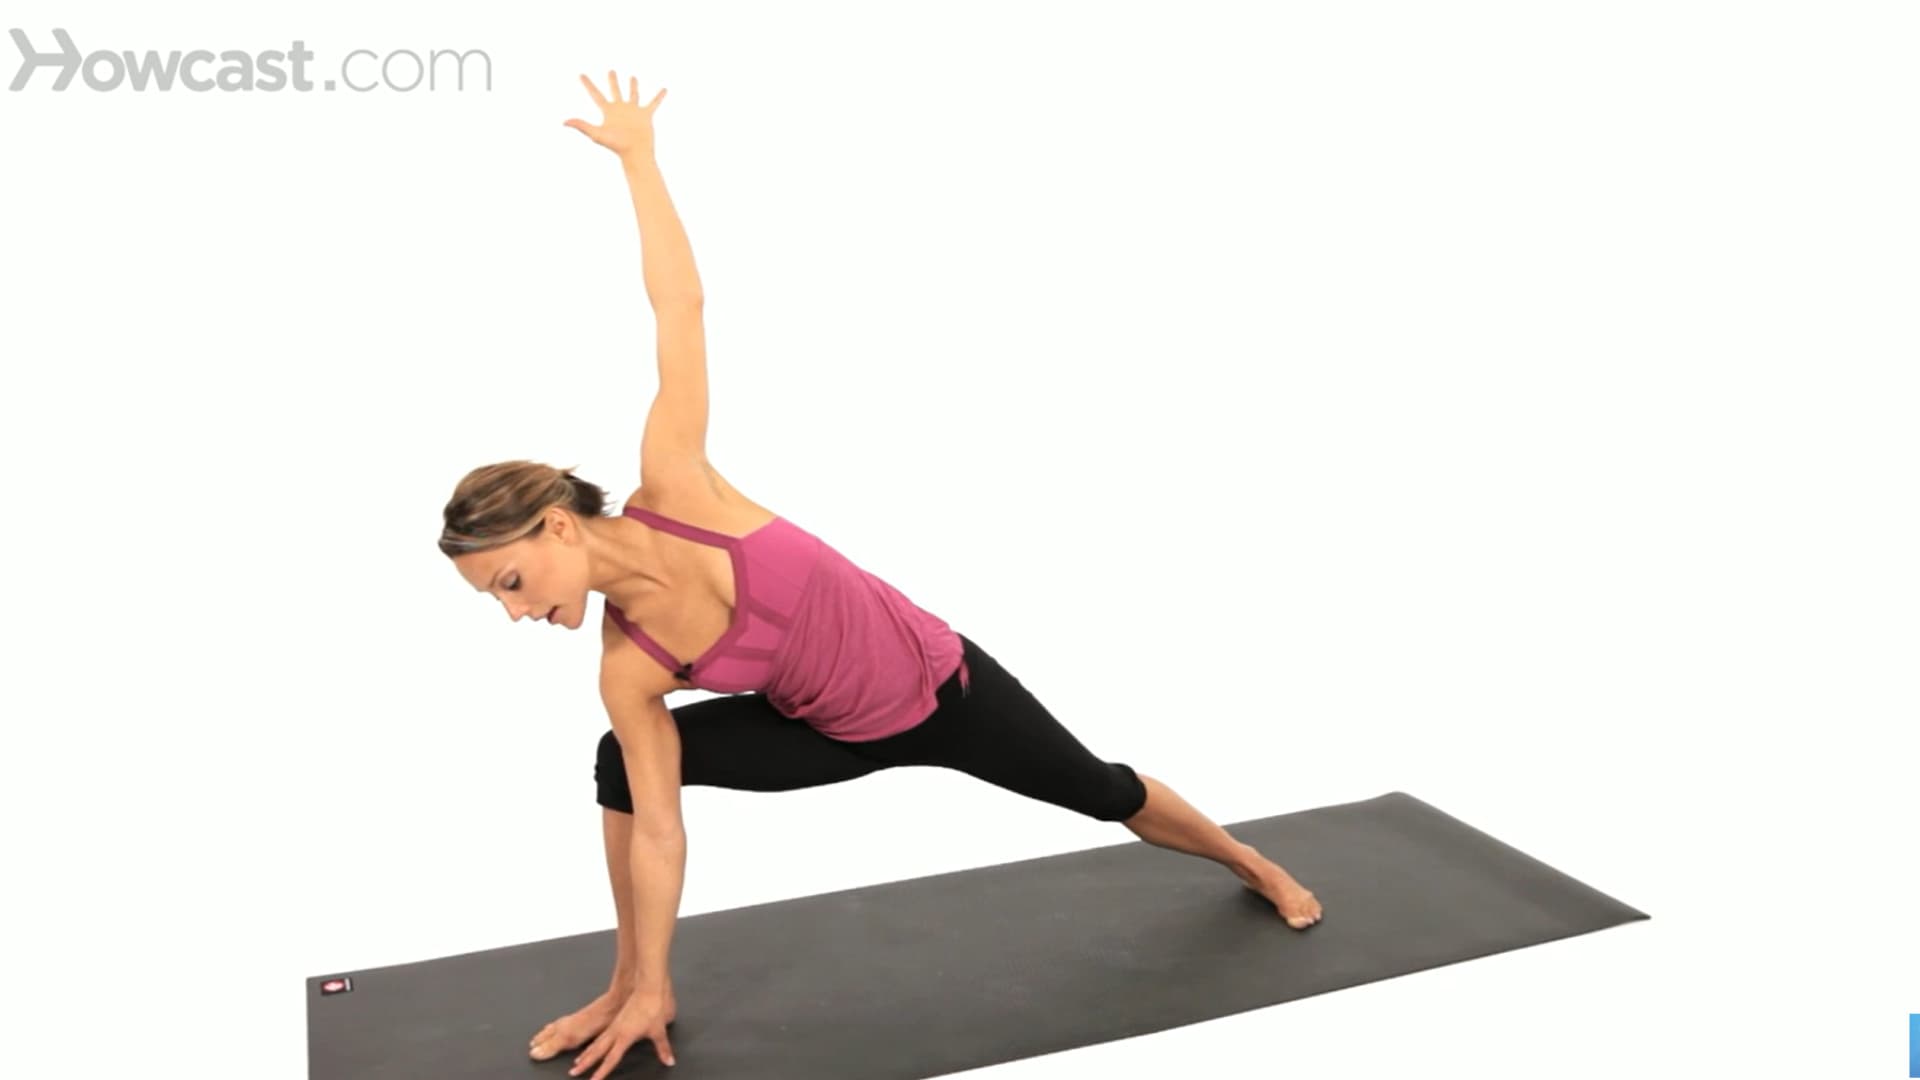
3. Hand-to-Floor Variation
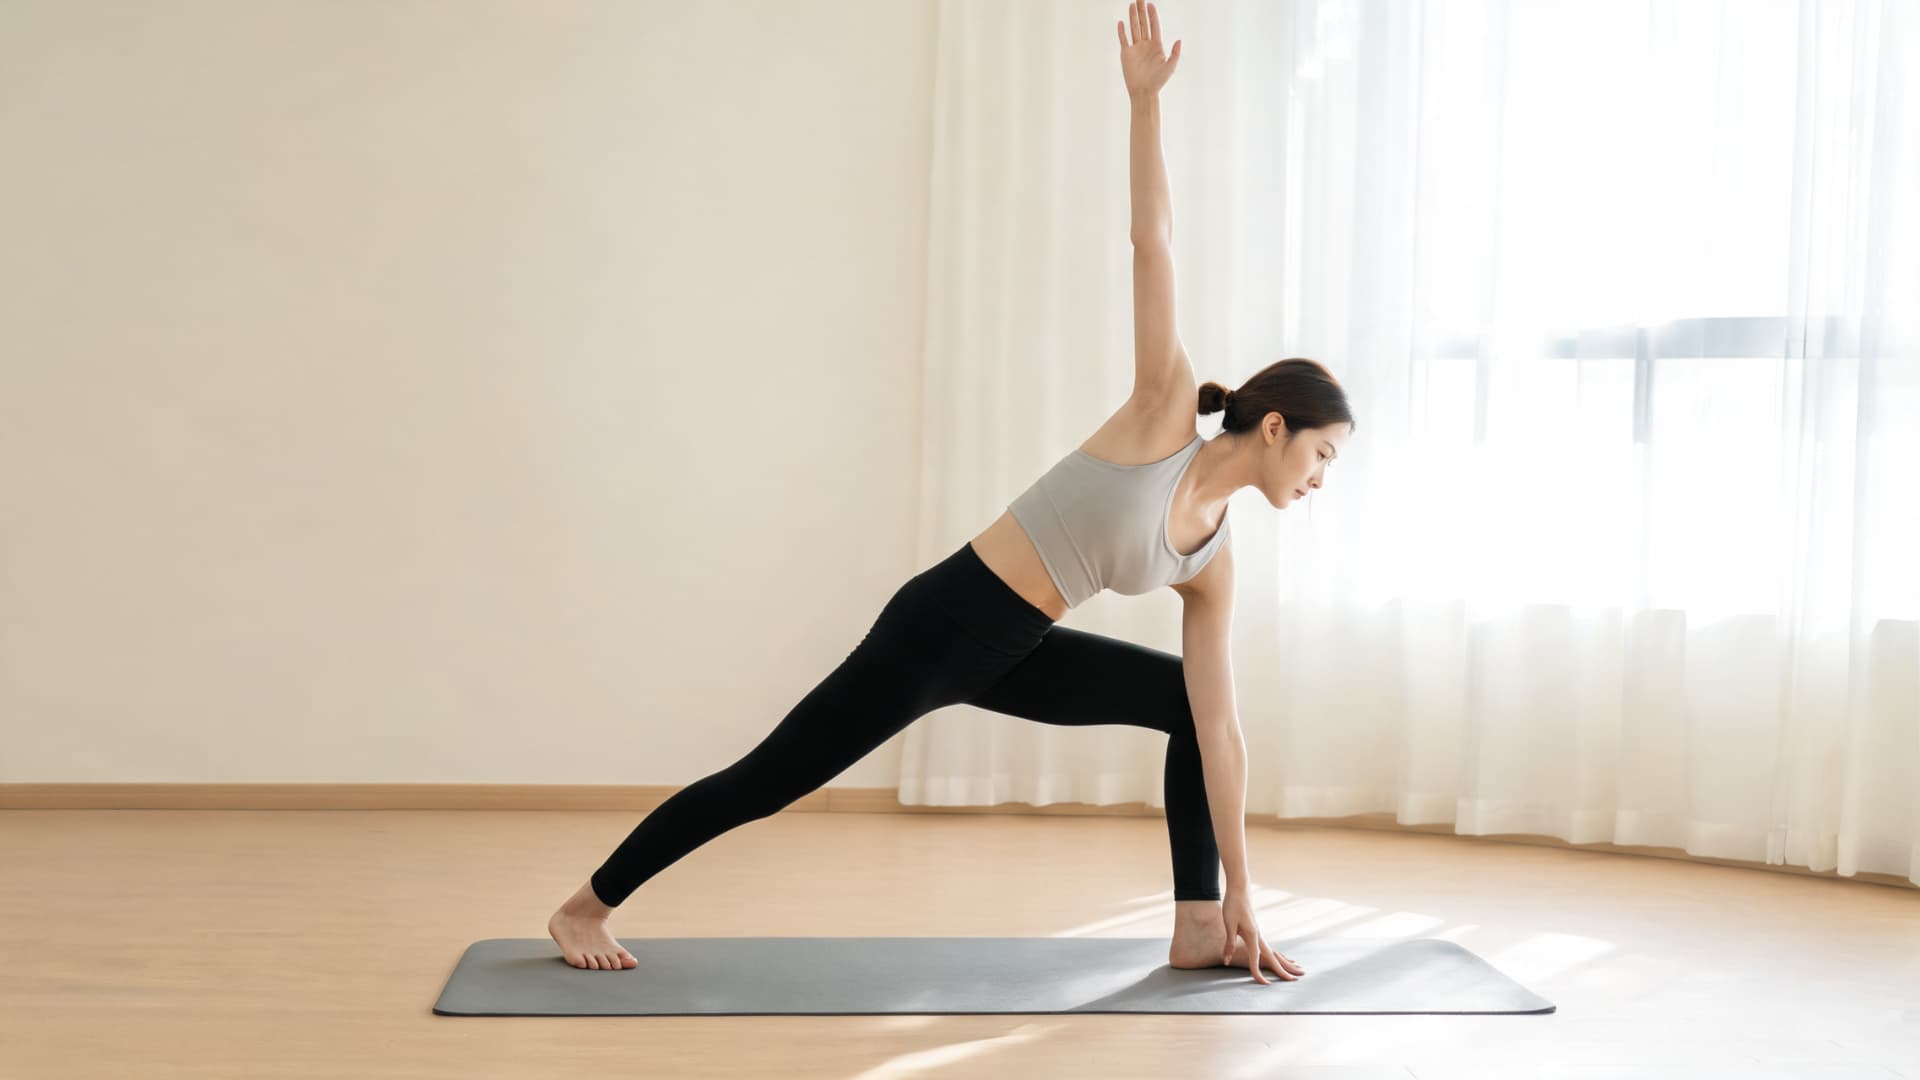
The fingertips or palm come to the floor inside or outside the front foot while the top arm reaches up or over the ear. This version requires more hip mobility and side-body length.
The alignment standard does not change: long spine, open chest, steady breath. If the hand touching the floor causes any collapse in the torso, return to a block.
4. Top Arm Over Ear Variation
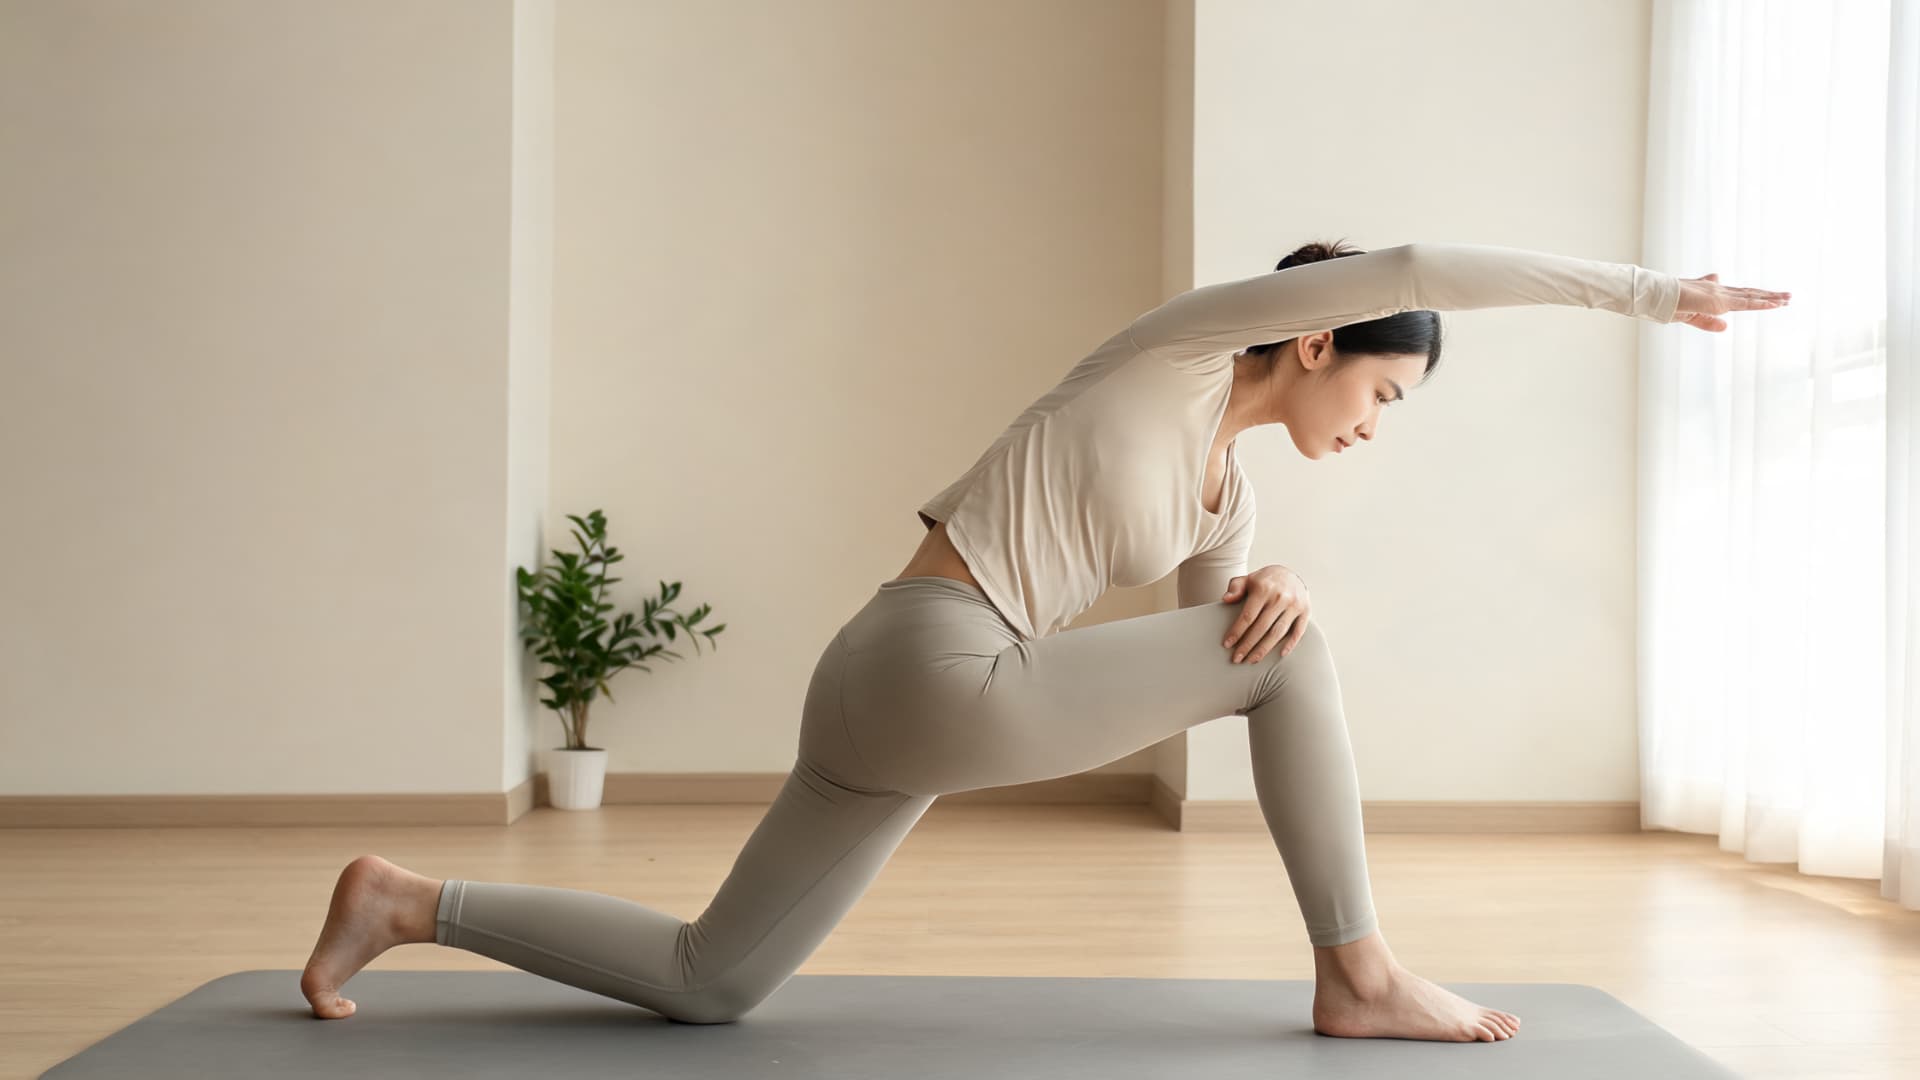
The upper arm extends forward over the ear rather than straight up, palm facing down or slightly inward. This creates a stronger diagonal line from the back heel through the fingertips and deepens the lateral stretch through the entire side body.
Use this once the chest and shoulder feel comfortable in the standard reach.
5. Top Hand on Hip Variation
The top hand stays on the hip instead of reaching overhead. This simplifies the upper body so attention can go fully to the lower body: the knee tracking, the back foot grounding, and the hip opening.
Useful when shoulder tension, neck tightness, or balance challenges make the arm reach a distraction.
6. Half Bound Variation
The top arm wraps behind the back while the lower arm stays supported on the thigh, block, or floor. This asks for considerably more shoulder and chest mobility.
Keep the front knee stable and the chest broad. If the wrap forces the spine to round or the knee to collapse, it is not ready yet.
Alignment Cues for Extended Side Angle Pose
Use these cues as a body-scanning checklist once you are settled in the pose. They help you self-correct without needing to rebuild the whole shape.
- Front Knee: Keep the knee stacked over the ankle. Guide it gently toward the little-toe side of the foot if it drifts inward.
- Back Foot: Press the outer edge firmly into the mat. If the heel keeps lifting, shorten your stance slightly.
- Hips: Let the front hip open naturally. Keep the back leg active so the lower body stays grounded rather than passive.
- Spine: Lengthen through both sides of the waist. Avoid dropping the torso heavily onto the bottom arm.
- Chest: Roll the ribs and chest upward. Keep the collarbones broad rather than letting the chest face the floor.
- Neck: Look down, forward, or up. Choose the gaze that keeps your neck relaxed and your balance steady. People who already deal with forward head posture from desk work may find the downward gaze most comfortable; the same habits that cause tension here respond well to tech neck exercises done alongside a yoga practice.
- Bottom Arm: Use it for light support only. Avoid putting your full body weight into the hand, block, or thigh.
- Top Arm: Reach from the back heel through the fingertips. Think of the stretch moving through the whole side body, not just from the shoulder down.
Good alignment in the extended side angle pose should feel strong, spacious, and sustainable, not strained or compressed.
Common Mistakes and How to Fix Them
Most misalignments in extended side angle pose come from reaching for more range than the body is ready to support. These fixes address what I see most often.
| Mistake | Why It Happens | How to Fix It |
|---|---|---|
| Front Knee Falls Inward | The hip and thigh are not engaged | Press the knee toward the little-toe side of the foot |
| Back Heel Lifts | The stance is too long, or the back leg is passive | Shorten the stance and press the outer heel actively into the mat |
| Chest Faces the Floor | Bottom hand is placed too low for current hip mobility | Use a block or rest the forearm on the thigh |
| Bottom Shoulder Collapses | Too much body weight is in the lower arm | Press through the feet and lift through the core to reduce arm load |
| Neck Feels Tight | Gaze is forced upward | Look forward or down until the neck settles |
| Low Back Pinches | Ribs and pelvis are uncontrolled | Gently lift the lower belly and lengthen the spine before going deeper |
The single most effective fix across all of these is slowing down at setup. Most alignment problems in extended side angle pose are locked in during the first ten seconds of entry.
How to Sequence Extended Side Angle Pose
This pose fits naturally after Warrior II and before Triangle Pose. That sequence progresses from a bent-knee lateral shape into a straight-leg lateral stretch, and the hip opening from the extended side angle directly prepares the inner thigh and groin for Triangle.
In a shorter practice, it can stand alone following a few rounds of Sun Salutation A as a hip and side-body opener.
Counterpose with a gentle forward fold, low lunge, or wide-legged standing forward fold after holding the pose for multiple breaths on each side.
If practicing as part of a full standing sequence, move from Warrior II into extended side angle and then directly into Triangle without returning to Mountain Pose in between, using the same foot position throughout.
Safety and Contraindications
The extended side angle pose is well suited to most practitioners when approached with the right modification. These guidelines help keep the practice safe.
- Knee Safety: Keep the front knee over the ankle throughout. If the knee feels strained, shorten the stance or reduce the bend angle.
- Low Back Safety: Use a block or forearm support if the low back pinches. A gentle engagement of the lower belly helps protect the lumbar spine. People managing nerve sensitivity along the lower back may also find targeted yoga poses for sciatica a helpful companion practice.
- Neck Safety: Look forward or down if looking upward creates tension. The gaze supports balance, not a specific aesthetic.
- Shoulder Safety: Place the top hand on the hip if the overhead arm feels uncomfortable. Keep the shoulder relaxed rather than forced into its range.
- Balance Support: Practice near a wall or use a shorter stance if the pose feels unstable. A steadier base produces a better pose than a wider one that wobbles.
- Pregnancy: Use a wider stance, choose a supportive variation, and seek guidance from a prenatal yoga teacher. Avoid any position that creates deep compression in the abdomen.
- Recent Injury: Avoid forcing the pose with recent knee, hip, back, shoulder, or neck pain. Choose a gentler variation or skip the pose until clearance from a healthcare provider.
- Blood Pressure: People with uncontrolled high or low blood pressure should seek guidance before practicing standing poses with arm raises.
- Breath Check: Come out of the pose if the breath becomes tight or held. Smooth breathing is non-negotiable in any extended hold.
Yoga poses work best when they are adapted to fit the body they are being practiced in, not forced into a fixed shape.
Frequently Asked Questions
Why Is Extended Side Angle Pose So Hard to Hold?
Several muscle groups work simultaneously in this pose: the front leg holds a deep lunge, the back leg stays grounded and active, the core supports the extended torso, and the shoulder maintains the arm reach. That multi-system demand is exactly what makes it difficult. Start with a shorter hold of three to five breaths and build from there as each system gets stronger.
Can I practice the Extended Side Angle Pose as a Beginner?
Yes. The forearm-to-thigh variation is specifically designed for beginner access and removes the requirement for hip or hamstring flexibility to reach the floor. Start there, practice the alignment cues, and the pose will develop organically.
Does Extended Side Angle Pose Help with Hip Flexibility?
It does. The front hip externally rotates as the knee tracks outward, which stretches the inner thigh and hip flexor simultaneously. Holding the pose consistently over weeks produces measurable improvements in hip range of motion, particularly for people who sit for long hours.
Should My Hips Face the Side or the Floor?
Your hips should be open enough to allow the chest to rotate upward. Avoid forcing the pelvis down toward the floor or twisting aggressively, especially if it causes the front knee to lose its alignment over the ankle.
Why Do Yoga Teachers Cue the Top Arm Over the Ear?
The arm-over-ear position creates a longer diagonal line from the back heel through the fingertips, which deepens the lateral stretch through the entire side body rather than just the shoulder. Use it when the shoulder feels comfortable and the chest is already open, not as the starting arm position.
How Do I Know If My Stance Is Too Wide?
Your stance is likely too wide if the back heel lifts off the mat, the front knee tracks inward rather than over the foot, or you cannot come out of the pose with controlled movement. Bring the feet closer together and re-check all three points before going deeper.
Is Extended Side Angle Pose a Stretch or a Strength Pose?
It is both. The front leg, back leg, and core work strongly to hold the shape. At the same time, the hips, inner thighs, side waist, and chest lengthen under load. That dual demand is what makes the pose more functional than poses that only stretch or only strengthen.
Can Extended Side Angle Pose Be Done Without a Yoga Mat?
Yes, but a mat provides grip and foot stability that most surfaces do not. On a slippery floor, the back foot can slide outward as the pose is held, which creates knee and hip strain over time. A non-slip surface is strongly recommended.
Final Thoughts
Extended Side Angle Pose brings together strength, balance, and side body opening in a way that supports both mobility and control.
When you practice it with patience, you start to notice how your legs, hips, and spine work together instead of feeling separate or unstable.
I focus on helping you keep the front knee steady, the chest open, and the breath smooth so the pose feels more natural over time. This matters because better alignment reduces strain and makes your yoga practice safer and more effective in everyday movement.
Try practicing it slowly on both sides and notice how your body responds, then share your experience or explore related yoga poses for deeper learning.