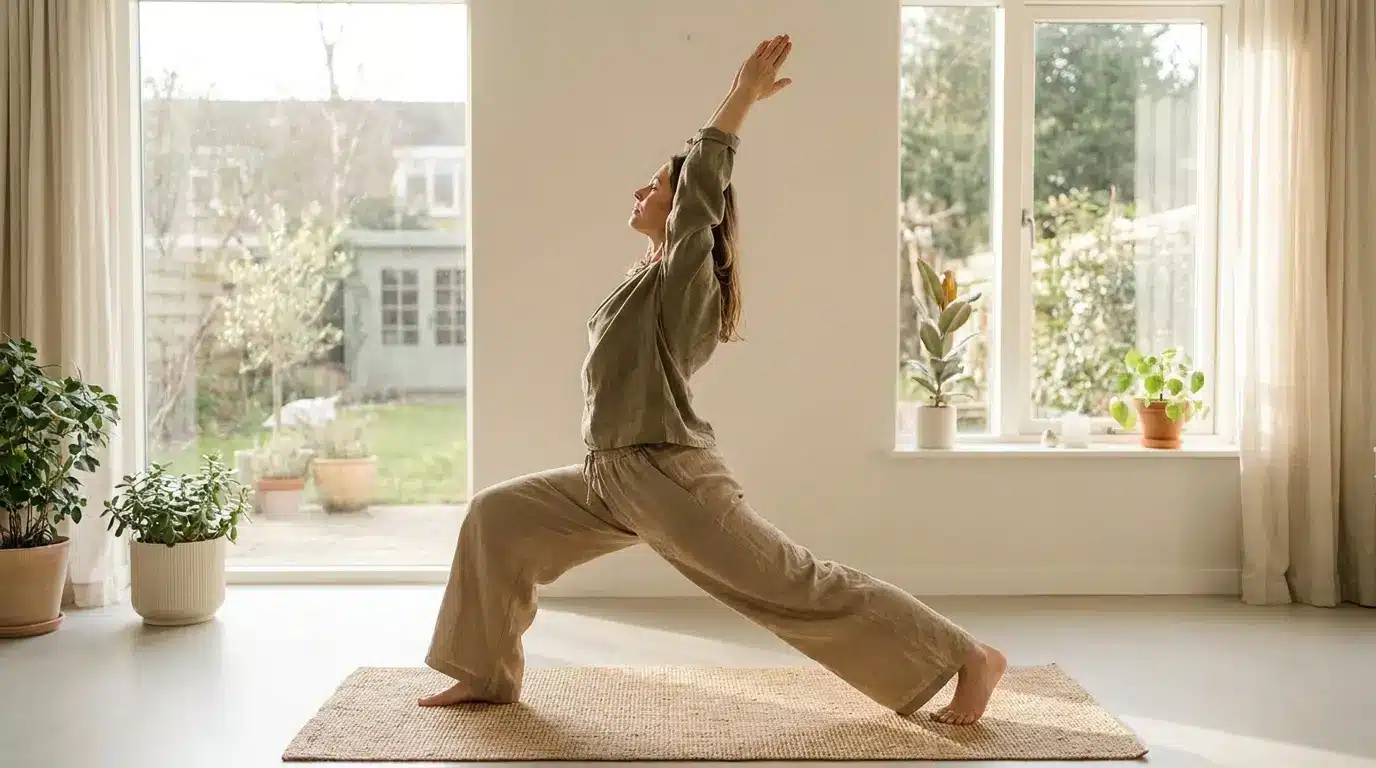


A simple floor stretch can feel confusing when your knees, feet, and back all need to land in the right place.
Happy Baby Pose looks easy, yet the best version isn’t the deepest. It is the one you can hold with a steady breath and no strain.
I use this pose when the hips feel tight, but I treat it as an alignment practice first. You will learn how to set up your back, stack your ankles over your knees, choose the right grip, and adjust the shape if your body feels stuck.
The goal is simple: make Happy Baby Pose feel safe, clear, and useful every time you practice.
| Disclaimer: This is for informational and educational purposes only. It does not constitute medical advice and should not replace consultation with a healthcare provider. Always see a doctor before changing your exercise routine, especially if you have hip, knee, or spinal issues. |
Things to Know Before Trying the Happy Baby Pose
Happy Baby Pose, known in Sanskrit as Ananda Balasana, is a reclined hip-opening posture done on your back. Use this quick table before you practice so you know how the pose is set up and what to focus on.
| Detail | What to Know |
|---|---|
| Sanskrit name | Ananda Balasana |
| Pose type | Reclined hip opener |
| Level | Beginner friendly |
| Body position | Lying on your back |
| Main action | Knees draw in and open out |
| Video grip | Hands hold the bottom arches of the feet from the inside |
| Hold time | 20 to 30 seconds for beginners |
| Best time to practice | Near the end of yoga or after long sitting |
| Main goal | Keep the back supported while the hips open gently |
The pose is not about pulling your knees as low as possible. It should feel controlled, steady, and easy to breathe through.
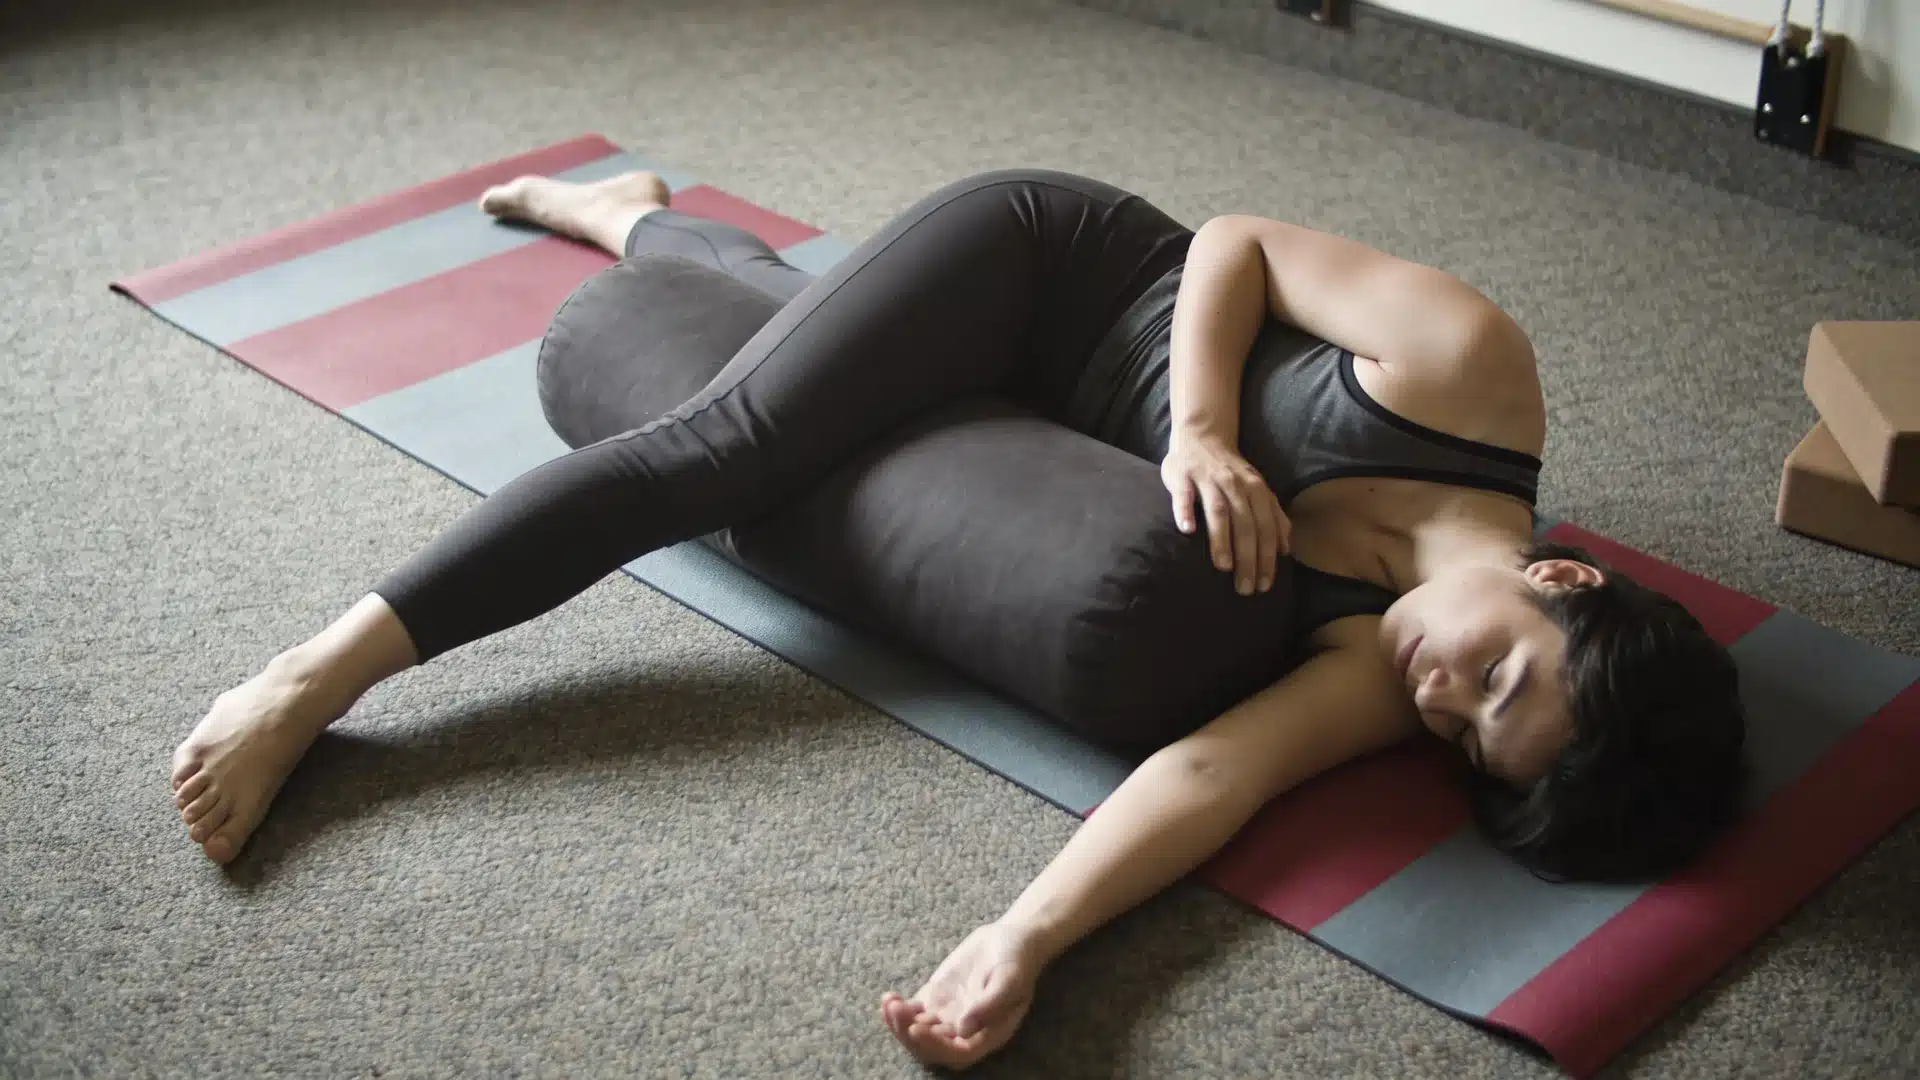
The Happy Baby Pose Step by Step
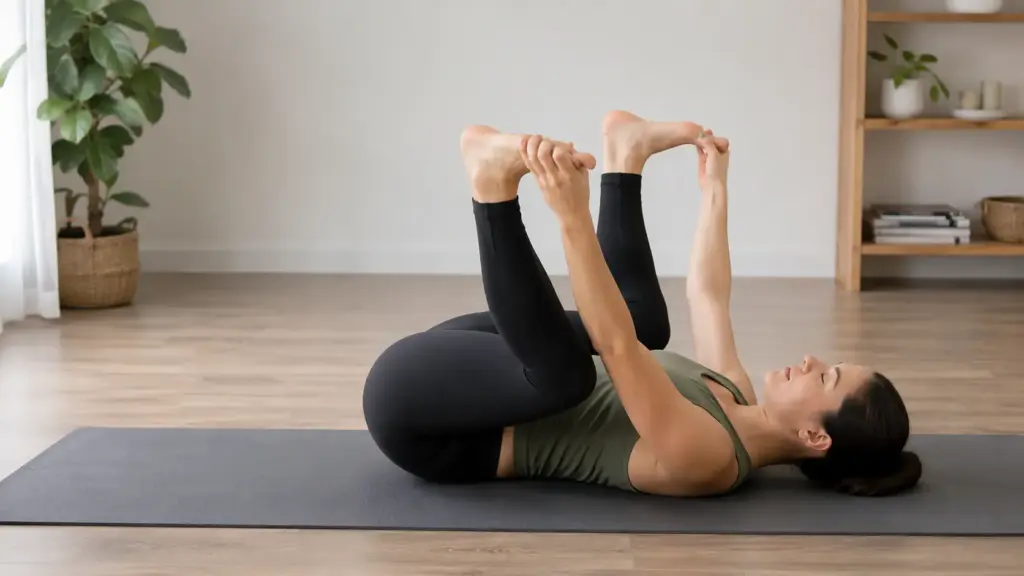
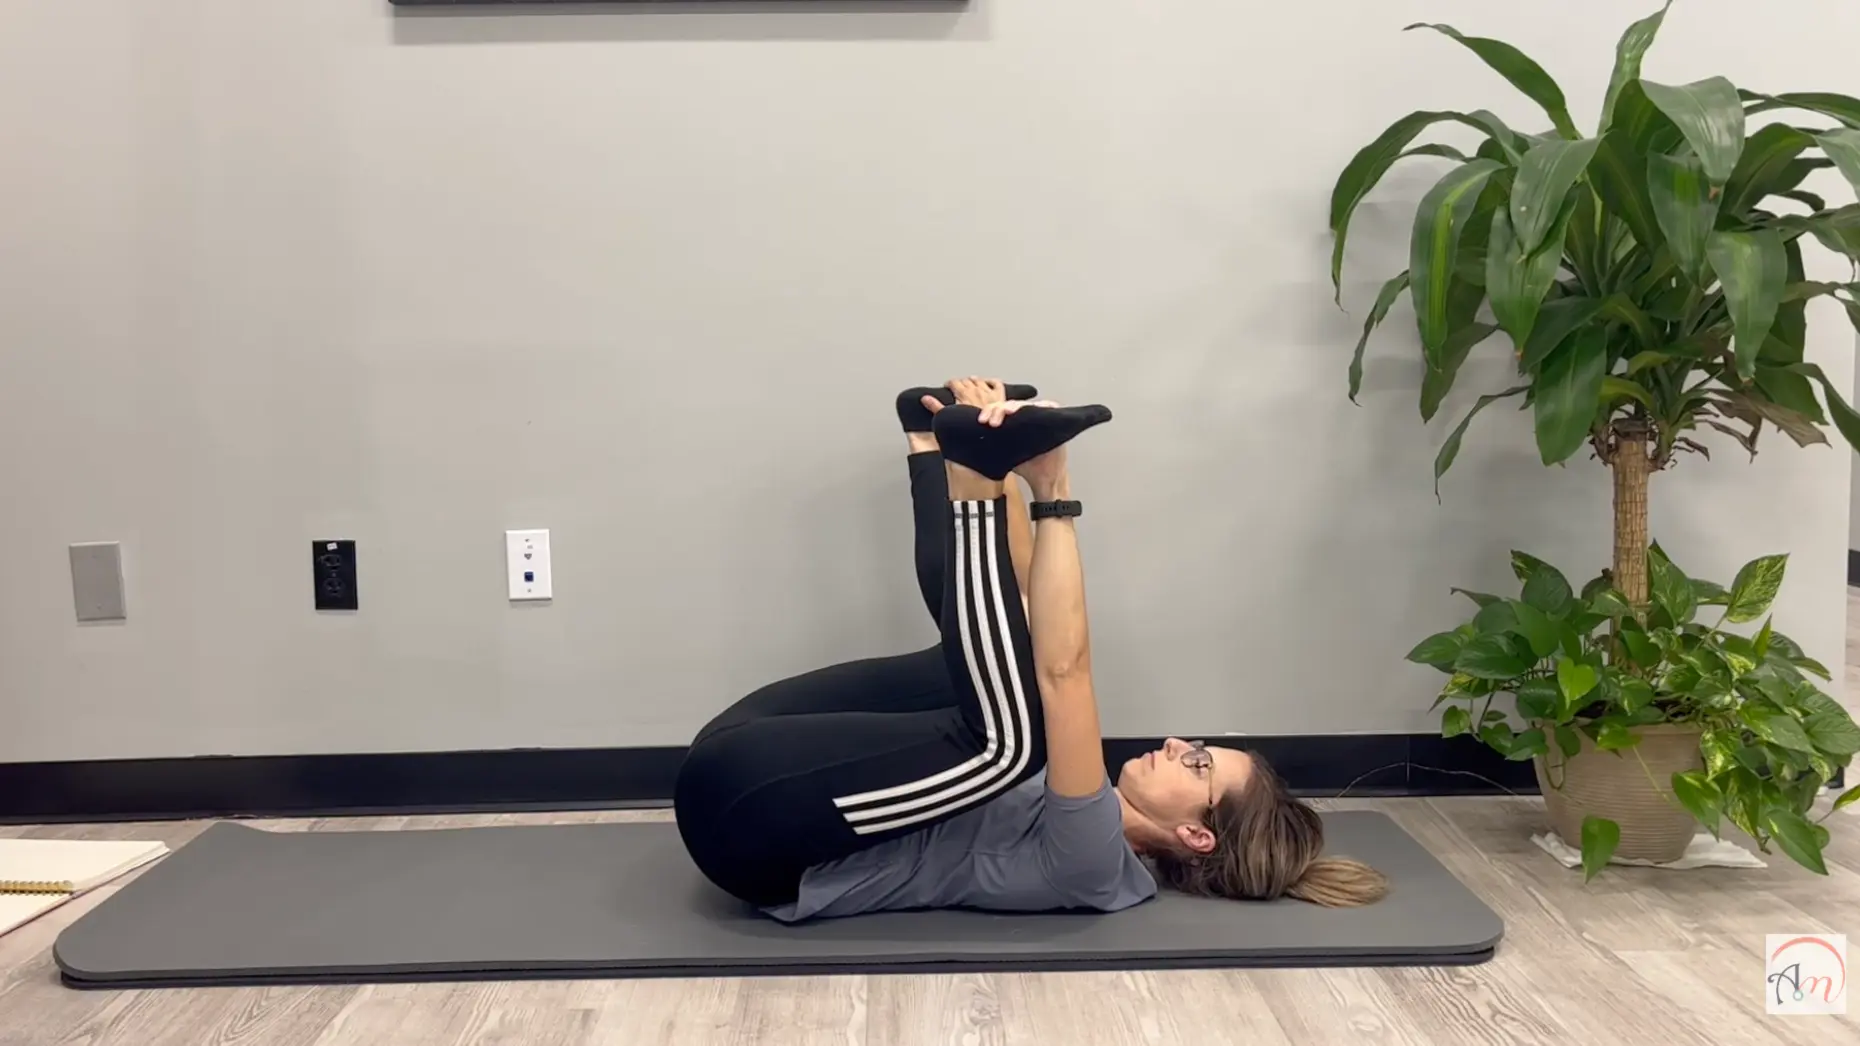
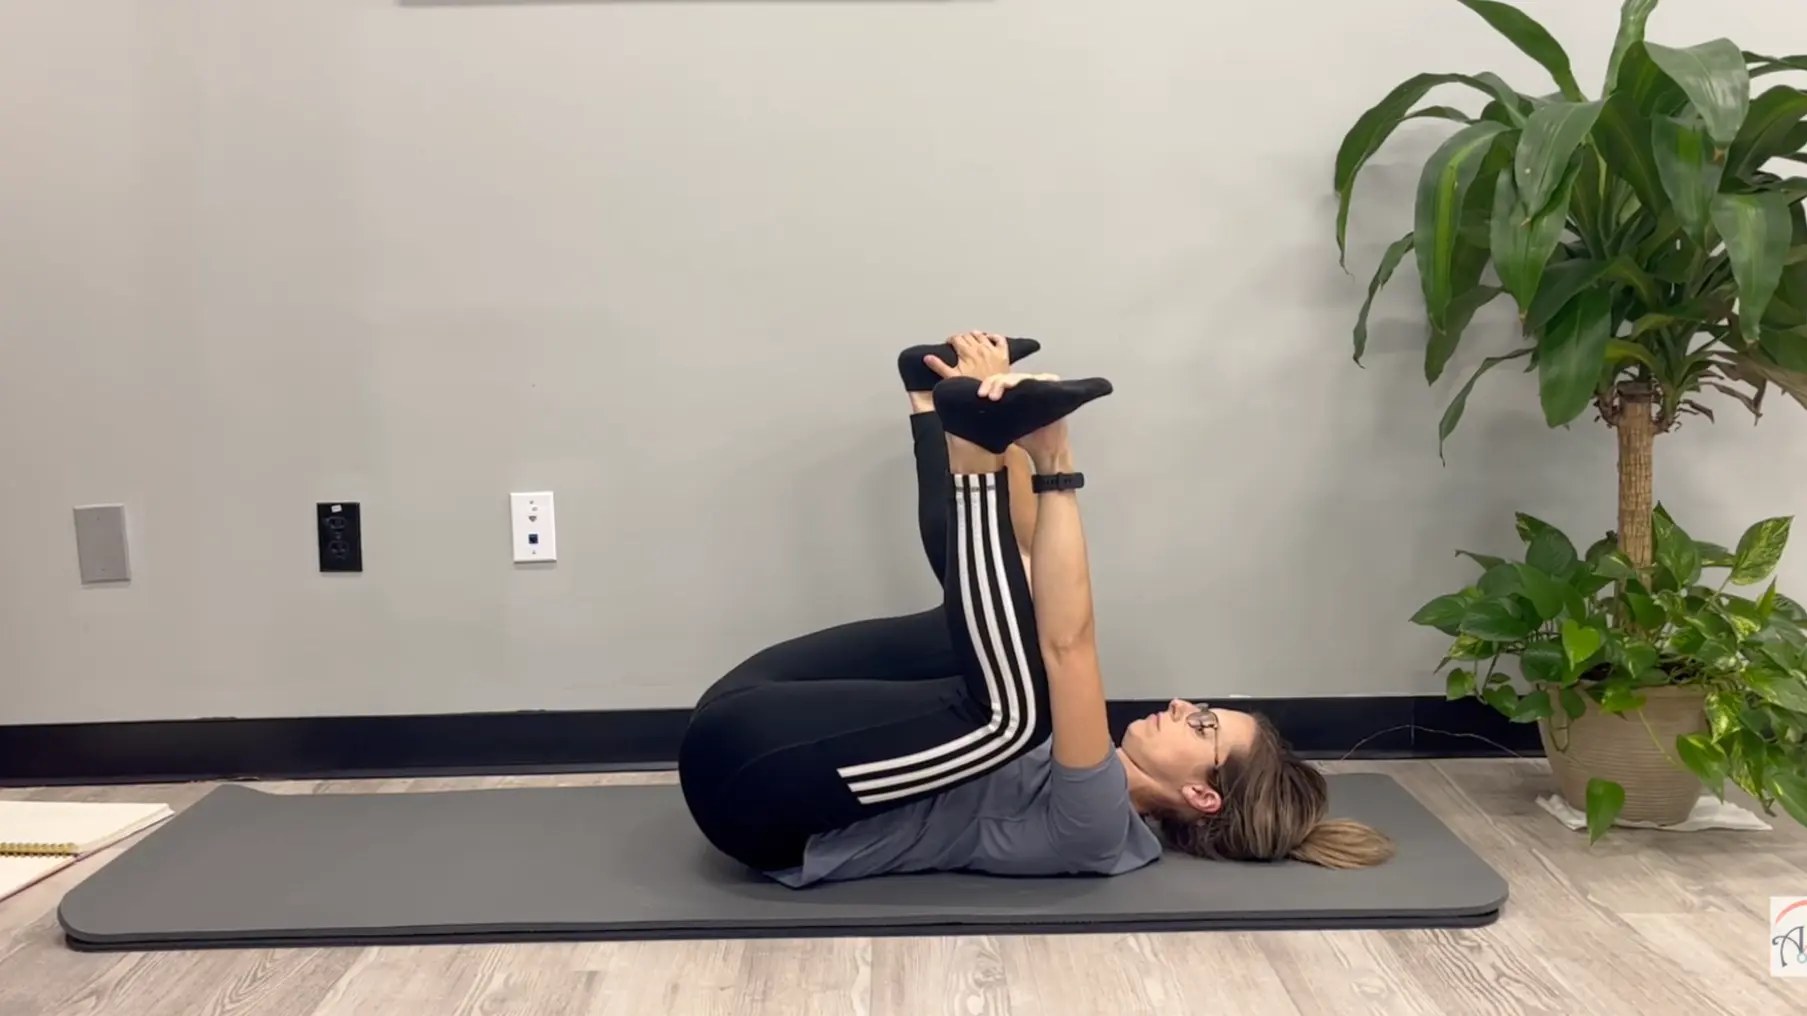
Move into this pose slowly. The video shows a simple setup: lie on your back, bring your knees in, hold your feet from the inside, then open the knees out while keeping the stretch light and comfortable.
Step 1: Move Onto Your Back
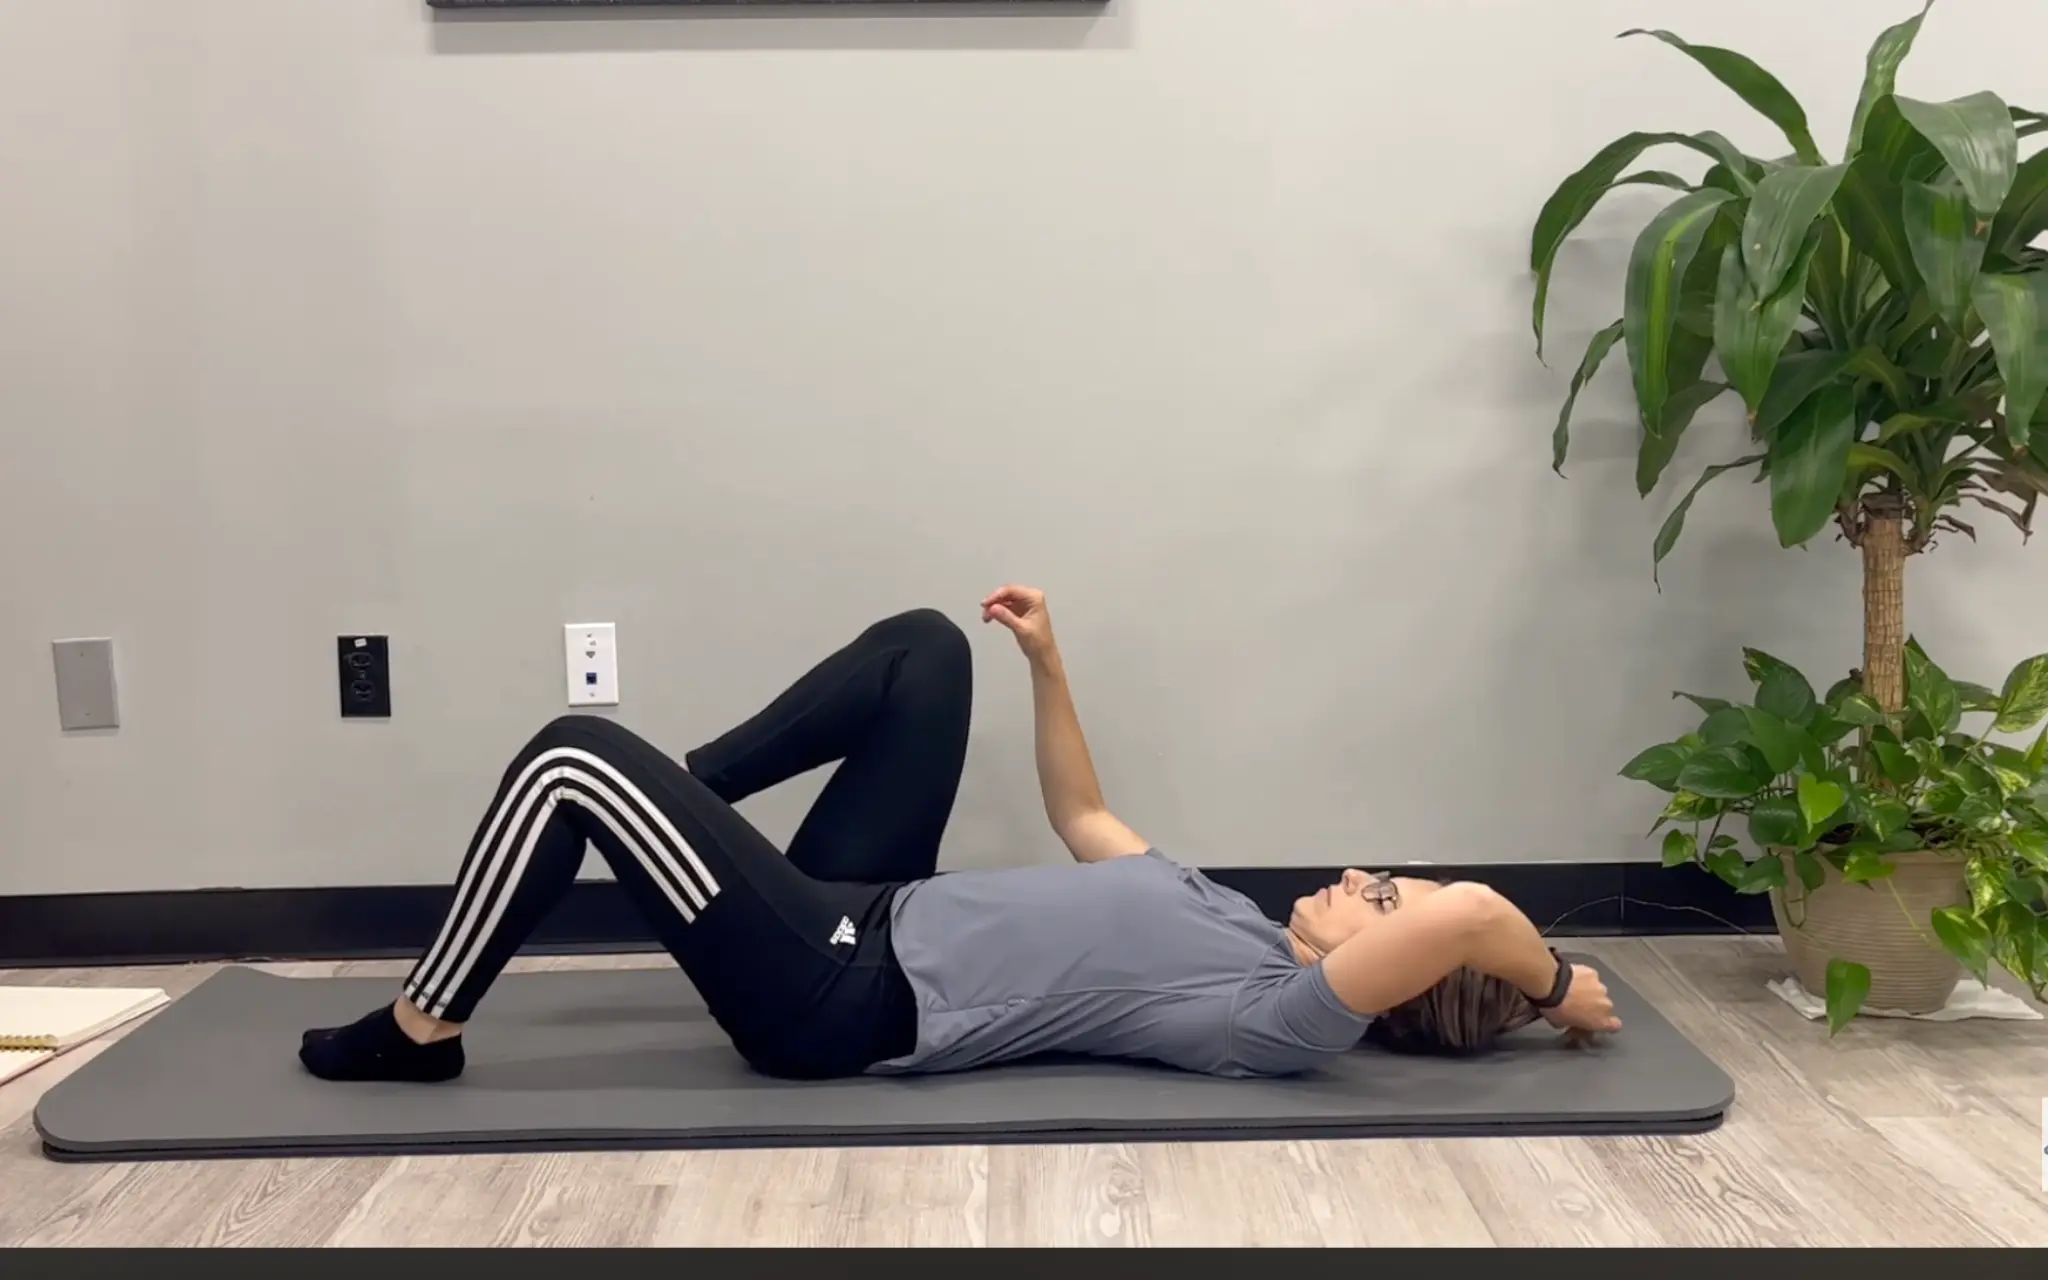
- Your Action: Lie on your back. Let the spine settle into the mat. Bend knees slowly toward the chest.
- Align: Keep shoulders soft and heavy. Avoid lifting the lower back or forcing depth.
- Breathe / Feel: Inhale as knees come closer. Exhale and let tension soften. This supports lower back release and stability.
Step 2: Bring Your Knees Toward Your Chest
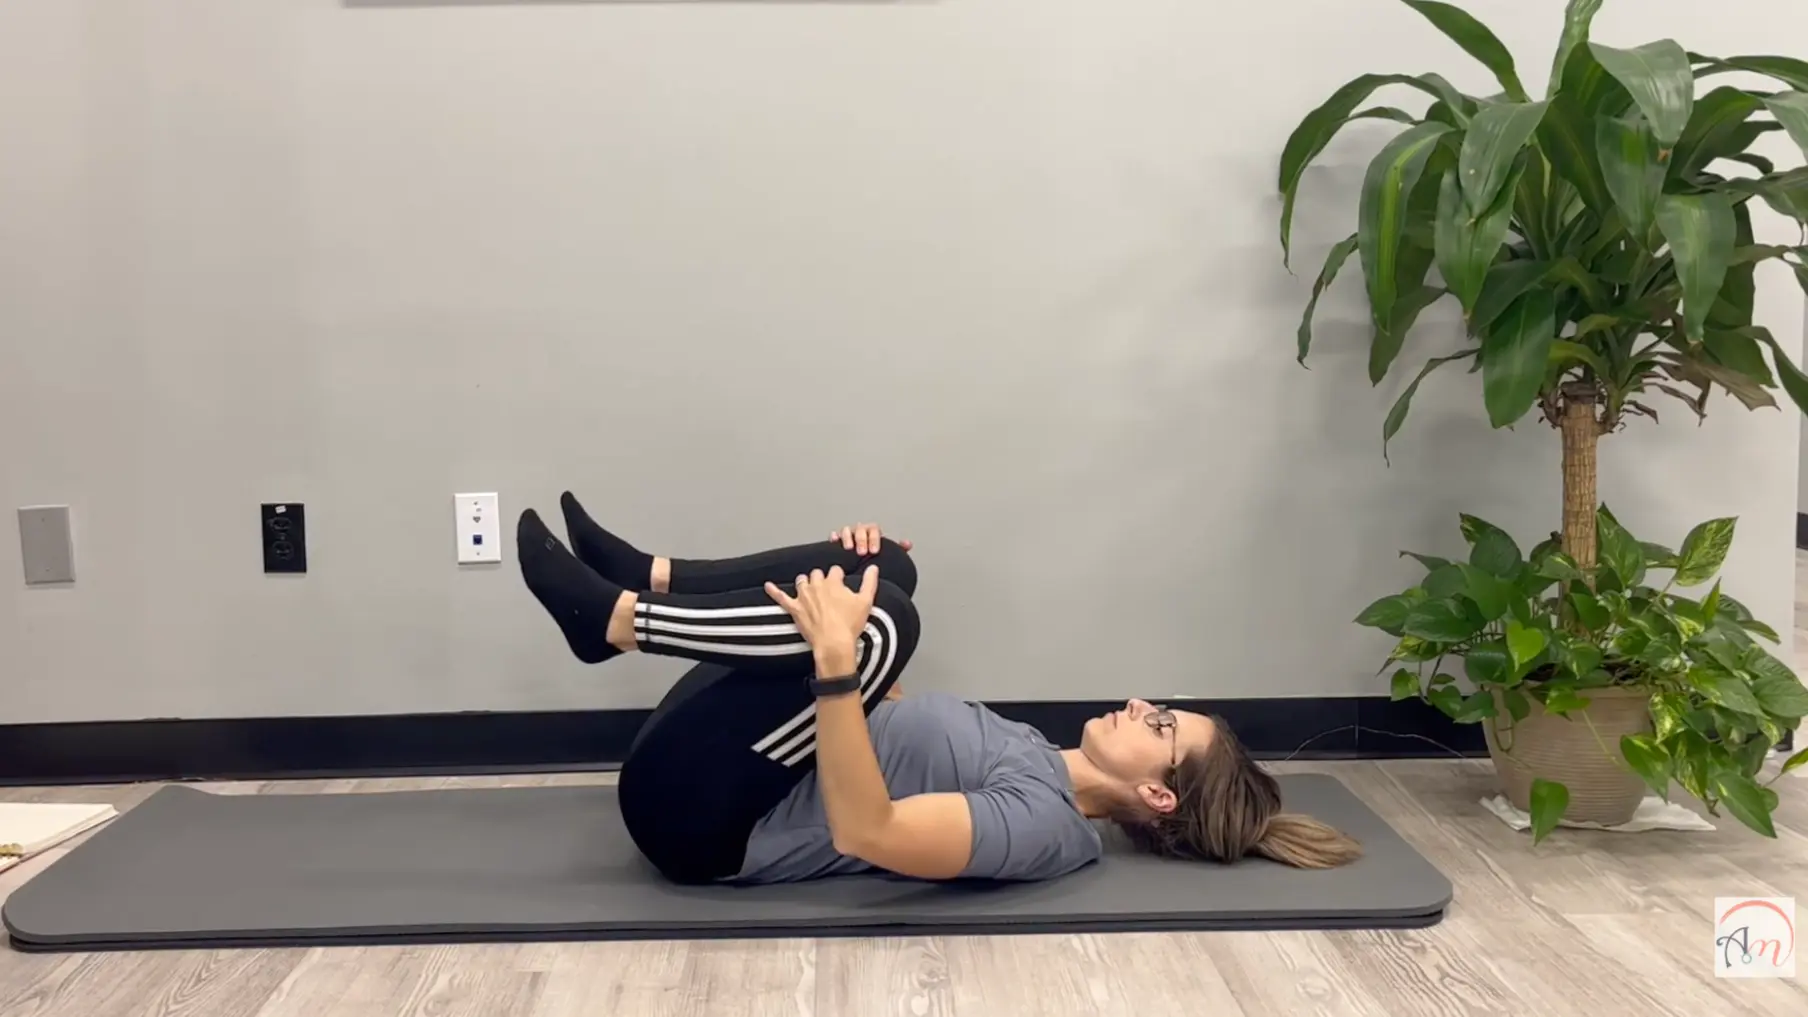
- Your Action: Draw both knees closer to your chest and let your hips soften.
- Align: Keep your neck relaxed and your shoulders heavy on the mat. If your lower back feels pulled, keep the knees slightly farther away.
- Breathe / Feel: Take one slow breath here before reaching for your feet. You should feel supported, not compressed.
Step 3: Hold the Arches of Your Feet
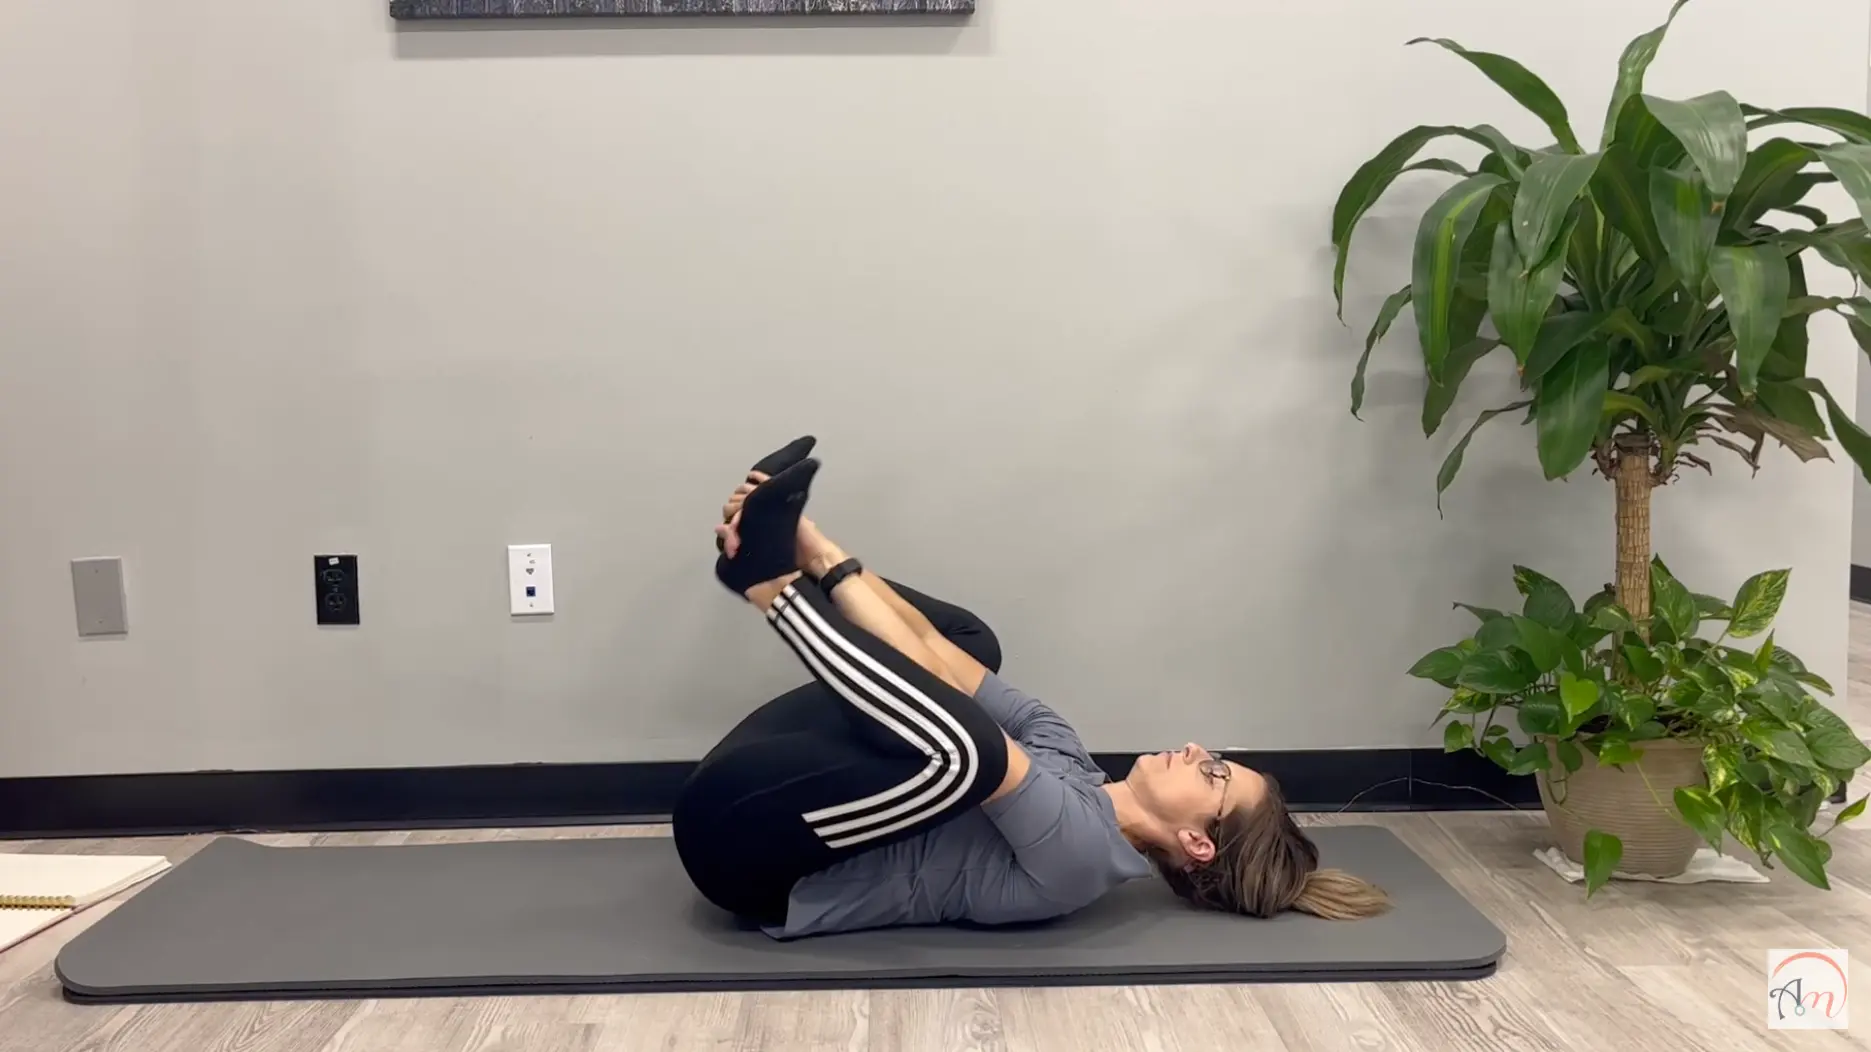
- Your Action: Reach your hands inside your legs and hold the bottom arches of your feet, as shown in the video.
- Align: Keep your grip gentle. If your shoulders lift or your neck tenses, hold your ankles, calves, or thighs instead. A yoga strap works well here for keeping that reach comfortable
- Breathe / Feel: Let your breath stay smooth as you choose your grip. The right grip should make the pose feel easier, not tighter.
Step 4: Pull the Knees In and Out
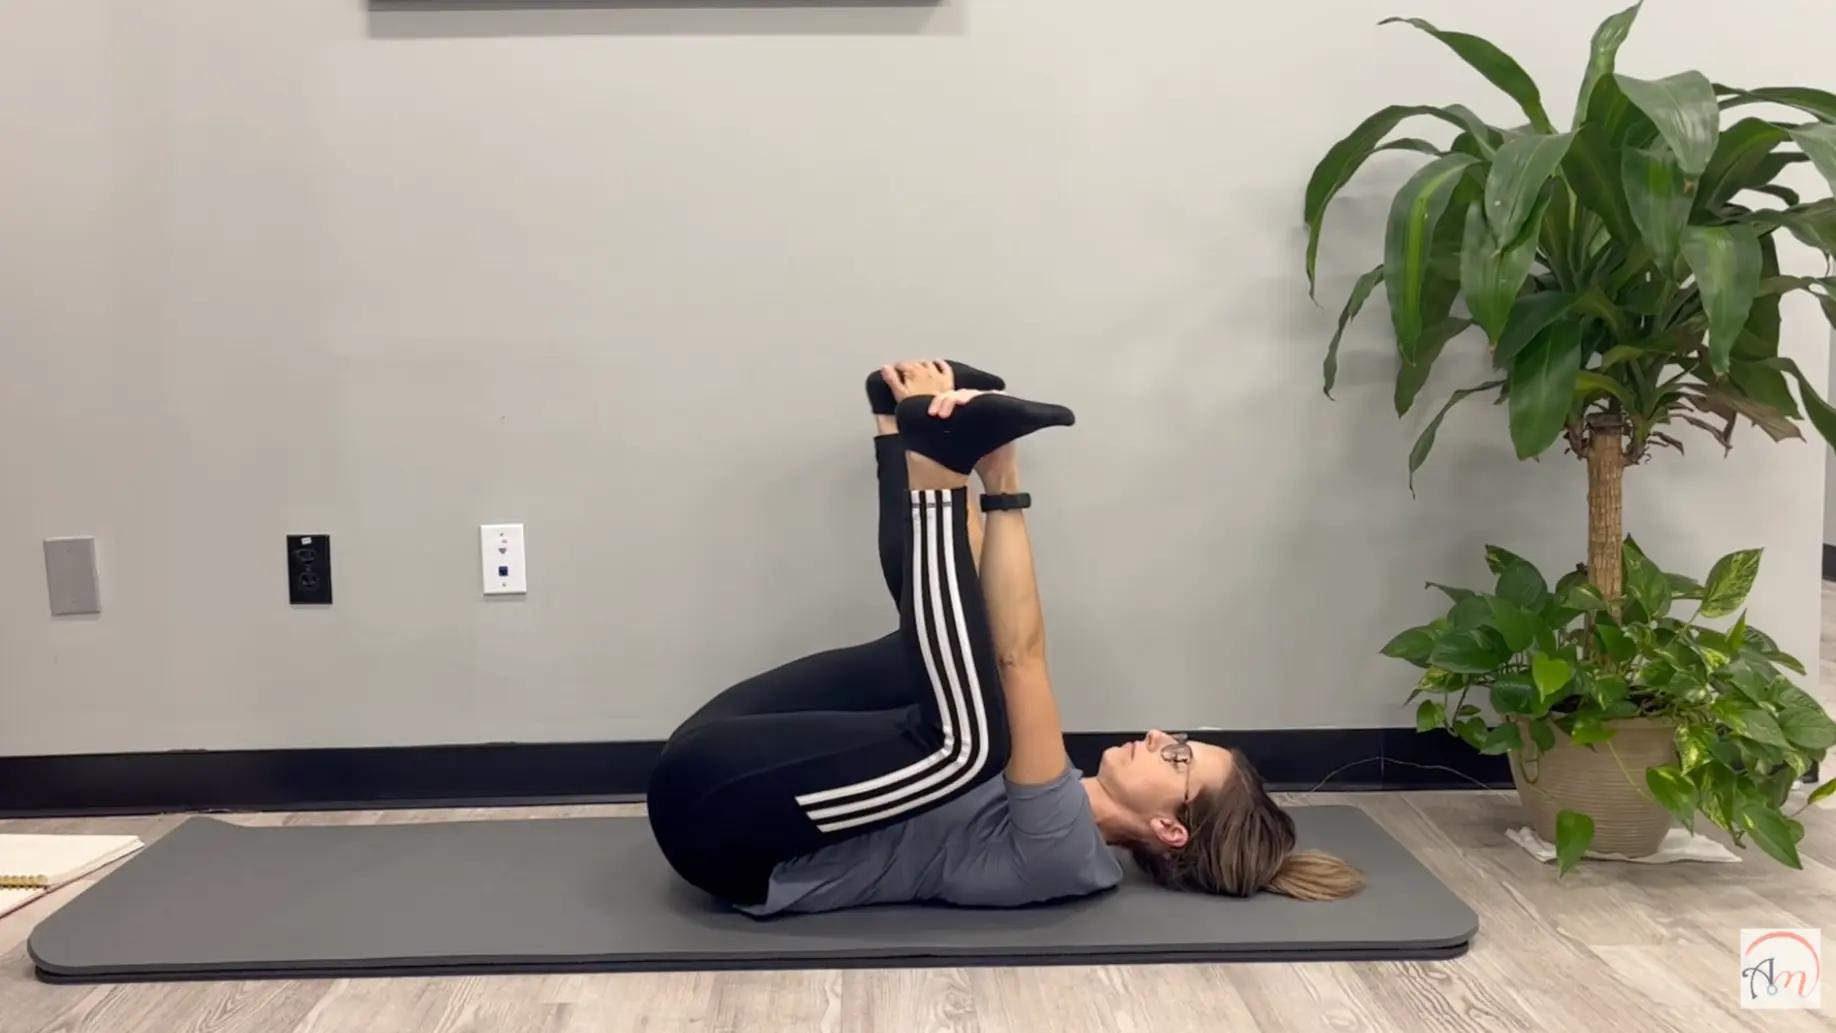
- Your Action: Gently pull your legs toward your chest while letting your knees open out to the sides.
- Align: Think of your knees moving in two directions at once: toward you and away from each other. Do not press them straight down.
- Breathe / Feel: Exhale as the knees open wider. You may feel the stretch move into the hips and inner thighs.
Step 5: Notice the Stretch Areas
- Your Action: Stay in the pose and notice where the stretch shows up.
- Align: Keep your lower back supported, your shoulders relaxed, and your feet gently flexed.
- Breathe / Feel: You may feel your inner thighs, backs of the legs, or lower back releasing into the mat. Ease off if you feel sharp pain, hip pinching, knee pressure, or a hard pull in your back.
Step 6: Keep It Light and Comfortable
- Your Action: Hold the pose for a few slow breaths, then release slowly when you are ready.
- Align: Keep your grip soft and your body relaxed. Hold lower on your legs if the pose starts to feel intense.
- Breathe / Feel: Keep it light, comfortable, and easy to breathe through. The pose should feel calming, not forced.
Watch the short video below before you try the pose on your mat. It will help you see the hand placement, knee direction, and gentle pull more clearly.
Key Alignment Cues for Happy Baby Pose
Good alignment helps the Happy Baby Pose feel steady, gentle, and safer by keeping the stretch in your hips and inner thighs instead of your knees, neck, or lower back.
| Alignment Cue | What to Do | Why It Matters |
|---|---|---|
| Keep Your Back Supported | Let your lower back and tailbone feel heavy on the mat. | This helps your spine stay relaxed instead of pulling your hips too far off the floor. |
| Stack Ankles Over Knees | Keep your ankles above your knees as much as your body allows. | This supports the knees and keeps the stretch focused in the hips and inner thighs. |
| Open Knees Without Force | Let your knees move wider than your ribs, but do not press them down. | This prevents hip pinching and keeps the pose controlled. |
| Use a Light Grip | Hold your feet, ankles, calves, or thighs without pulling hard. | This keeps the stretch mild and helps your shoulders stay relaxed. |
| Relax the Neck and Shoulders | Let your head rest down and soften your shoulders into the mat. | This prevents upper-body tension while your hips open. |
| Keep the Feet Active | Flex your feet gently as if the soles face the ceiling. | This gives the legs more support and can help protect the knees. |
| Breathe Slowly | Stay only where your breath feels smooth and easy. | This helps you notice when the pose is too deep and when to ease back. |
Use a smaller version if anything feels sharp, pinched, or tense. A controlled Happy Baby Pose is always better than a deeper one.
Muscles Worked in Happy Baby Pose
Happy Baby Pose is a supported stretch, not a strength pose. Here is where you will actually feel it.
- Inner thighs (adductors): The wide-knee position creates a direct stretch across the adductor muscle group running along the inner thigh.
- Groin and hip flexors: Opening the knees outward stretches the inner hip and, depending on your range of motion, the front of the hips.
- Hamstrings: With the feet lifted and knees bent at roughly 90 degrees, the backs of the legs get a passive lengthening.
- Glutes: The outer hip muscles receive a mild release as the knees draw inward and then open wide.
- Lower back and sacrum: The grounded spine position, combined with the leg pull, creates gentle traction through the lumbar region and across the sacroiliac joint.
You do not need to feel all of these at once. A clear, steady stretch in one or two of these areas is the right signal. If you feel nothing, you may need to bring your knees slightly closer to your armpits. If you feel sharp or pinching pain anywhere, ease back immediately.
Beginner Changes for a Safer Setup
You do not need to hold your feet to practice the Happy Baby Pose well. The best version is the one that keeps your back supported, your shoulders relaxed, and your breath steady.
1. Hold Your Ankles or Calves
Hold your ankles or calves if reaching your feet makes your neck tense. This gives you more reach without forcing your arms.
Keep your elbows soft and use a light grip. The pose should still feel calm, not like you are pulling yourself into shape.
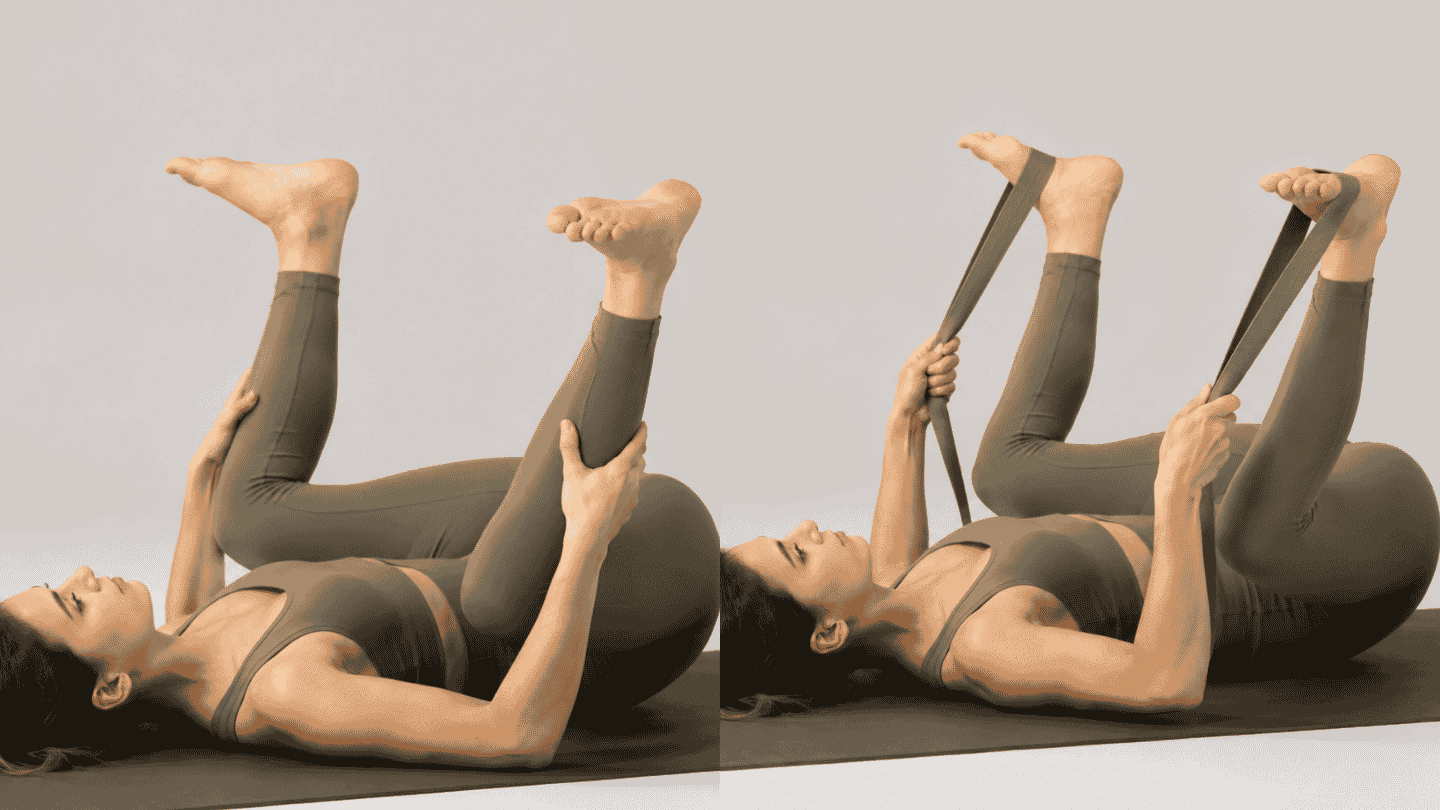
2. Use a Strap or Towel
Loop a yoga strap or towel around the arches of your feet and hold the ends with both hands.
This helps you guide your legs without lifting your head or shoulders. Keep the pull gentle so your lower back stays settled.
3. Try One Leg at a Time
Keep one foot on the floor and bring the other knee toward your chest. Hold that foot, ankle, or calf, then open the knee out to the side.
This works well if one hip feels tighter than the other or the full pose pulls your back off the mat.
Who Should Avoid or Modify the Happy Baby Pose?
Happy Baby Pose is gentle for many people, but some bodies need more support or a different stretch. This section is not about small form mistakes. It is about situations where the pose may not be the best choice.
| Concern | Why Be Careful | Safer Option |
|---|---|---|
| Recent hip injury | The wide-knee position may feel too strong | Skip it or try knees-to-chest |
| Recent knee injury | Bent knees and foot holding may add pressure | Hold behind the thighs only |
| Lower back pain | Pulling the legs in may irritate symptoms | Keep feet on the floor or skip |
| Neck problems | Lying flat may still feel tense for some people | Support the head with a folded towel |
| Pregnancy or recent birth | Wide hip opening or lying on your back for long holds may not suit every stage | Practice only with qualified guidance |
| Recent surgery | Stretching may be too much during recovery | Wait for professional clearance |
| Pelvic pressure | The wide-leg shape may feel uncomfortable | Choose a gentler reclined pose |
If any condition above applies to you, choose the smallest version or skip the pose that day. A stretch should feel steady and easy to leave, not risky.
Common Mistakes to Avoid
A few small mistakes can make Happy Baby Pose feel uncomfortable. Keep the pose gentle and adjust early if your body starts to tense.
- Pulling too hard on the feet: This can strain your hips or knees. Use light pressure and let the stretch build slowly.
- Forcing the knees down: Your knees should open out to the sides, but they do not need to touch the floor. Let them move only as far as your hips allow.
- Lifting the shoulders: If your shoulders rise off the mat, your grip may be too high. Hold your ankles, calves, or thighs instead.
- Letting the ankles drop inward: Try to keep your ankles above your knees. This helps your knees feel more supported.
- Rounding the neck: Keep your head relaxed on the mat. Use a folded towel under your head if your neck feels tight. If neck tension is a recurring issue during floor work, how you sleep at night can play a bigger role than most people expect
- Holding your breath: If your breath gets short, the pose is too deep. Ease back until breathing feels smooth again.
- Ignoring sharp pain: A stretch can feel clear, but it should not feel sharp, pinched, numb, or tingly. Come out of the pose if that happens.
If the pose feels uncomfortable, use a smaller grip before you stay longer.
Frequently Asked Questions
Can I do this stretch every day?
Yes, if it feels comfortable and pain-free. Keep the hold short at first and avoid forcing your knees wider. Skip it on days when your hips, knees, or lower back feel irritated.
Is it okay if one hip feels tighter?
Yes, that is common. Move slowly and avoid forcing both sides to match. If one side feels much tighter, use the one-leg version and give that side a little more setup time.
Can I practice it on a bed?
A firm mat or floor works better because it supports your back evenly. A soft bed may let your hips sink too much, which can make alignment harder to control.
Should I warm up first?
You do not need a long warm-up, but the pose often feels better after light movement. Try it after gentle stretching, walking, or near the end of yoga practice.
What should I do after releasing it?
Bring your knees back toward your chest, then place both feet on the mat. Rest for one breath and notice how your hips and lower back feel before moving on.
Conclusion
Happy Baby Pose works best when you stop chasing depth and start reading your body. I like it because the floor gives you support, so you can focus on small details: relaxed shoulders, heavy hips, flexed feet, and slow breath.
Use Happy Baby Pose after sitting, after a light workout, or near the end of yoga practice when your hips need a gentle reset. Pairing it with other floor-based hip openers can make the reset feel more complete. Keep your ankles above your knees, avoid pulling hard, and pick the grip that lets your neck rest.
Try it for five slow breaths today, then save this page and use the cues the next time you roll out your mat again at home or after class.