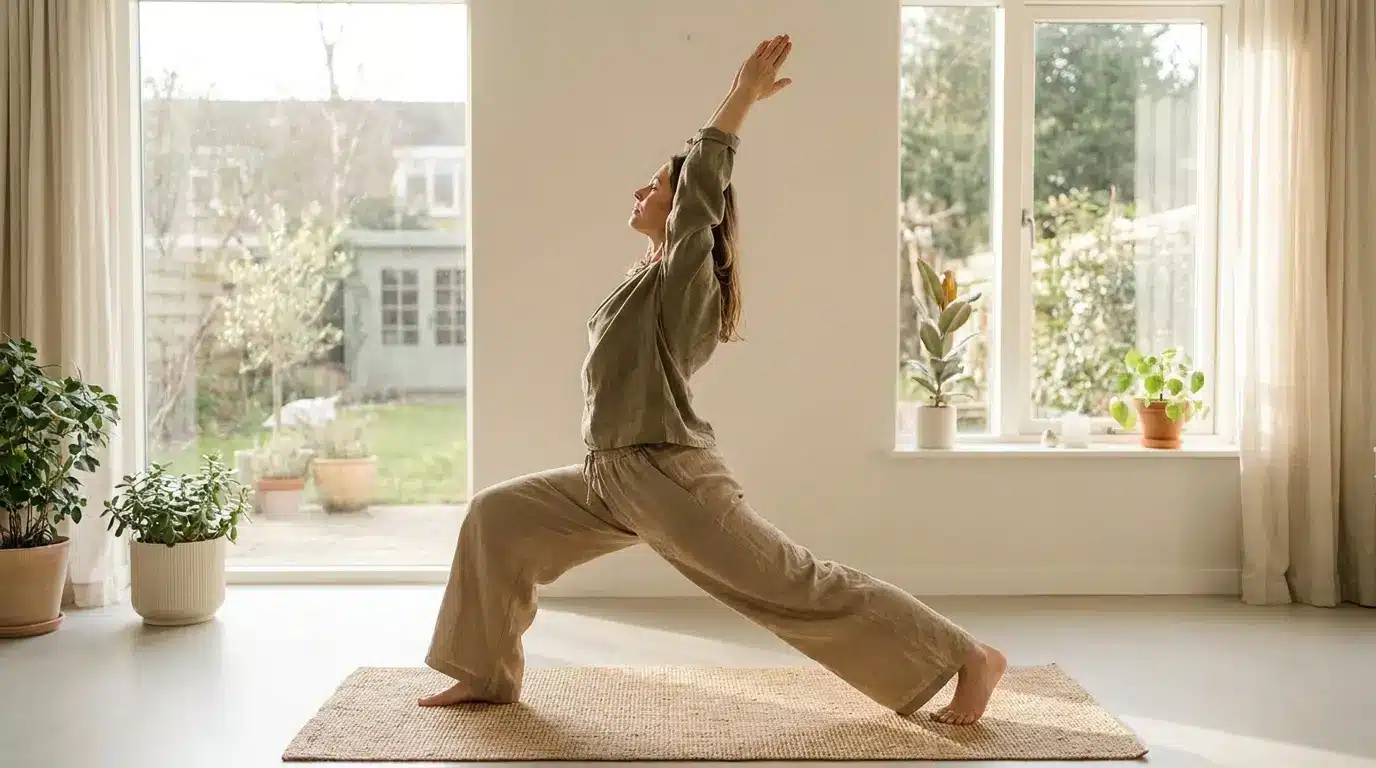


Puppy pose stretches the thoracic spine, shoulders, and chest in a single kneeling shape that most people can hold comfortably within their first yoga session.
If your upper back feels compressed from desk work or your shoulders stay tight no matter how many chest stretches you try, this is one of the more direct fixes available on a yoga mat.
| Disclaimer: This article is for informational and educational purposes only. It does not constitute medical advice and should not replace consultation with a qualified healthcare provider. Always consult a doctor before making changes to your exercise routine, especially if you have existing shoulder, neck, or spinal conditions. |
| Difficulty | Beginner |
| Duration | 3 to 5 breaths (beginner) / 30 to 60 seconds (experienced) |
| Props Needed | Yoga mat; optional: blocks, folded blanket, bolster |
| Best Time | Warm-up, cool-down, restorative sequence, or before sleep |
| Avoid If | Acute knee injury, severe shoulder impingement, late-stage pregnancy (without modification), sharp neck pain |
Puppy Pose Overview in Yoga Practice
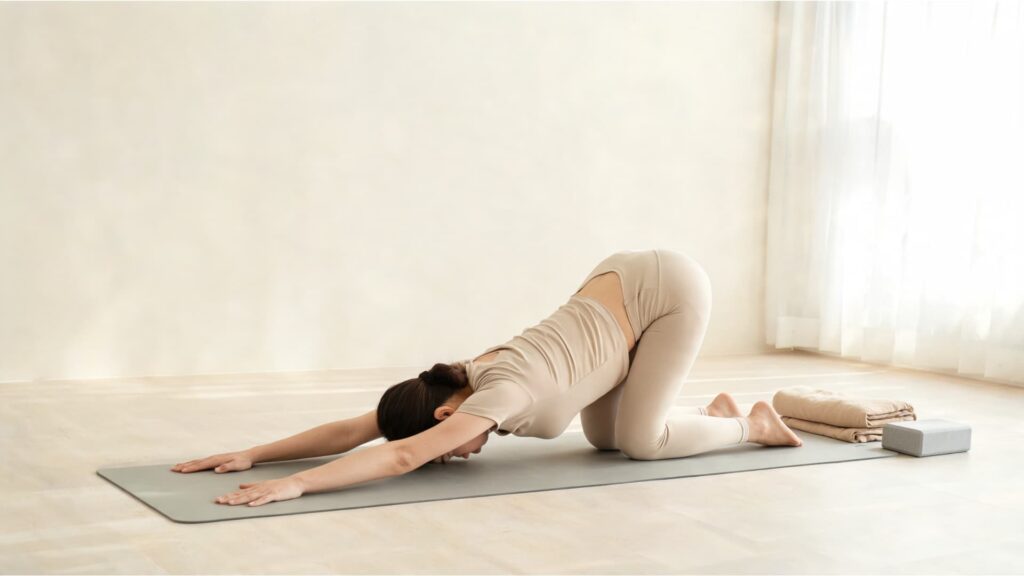
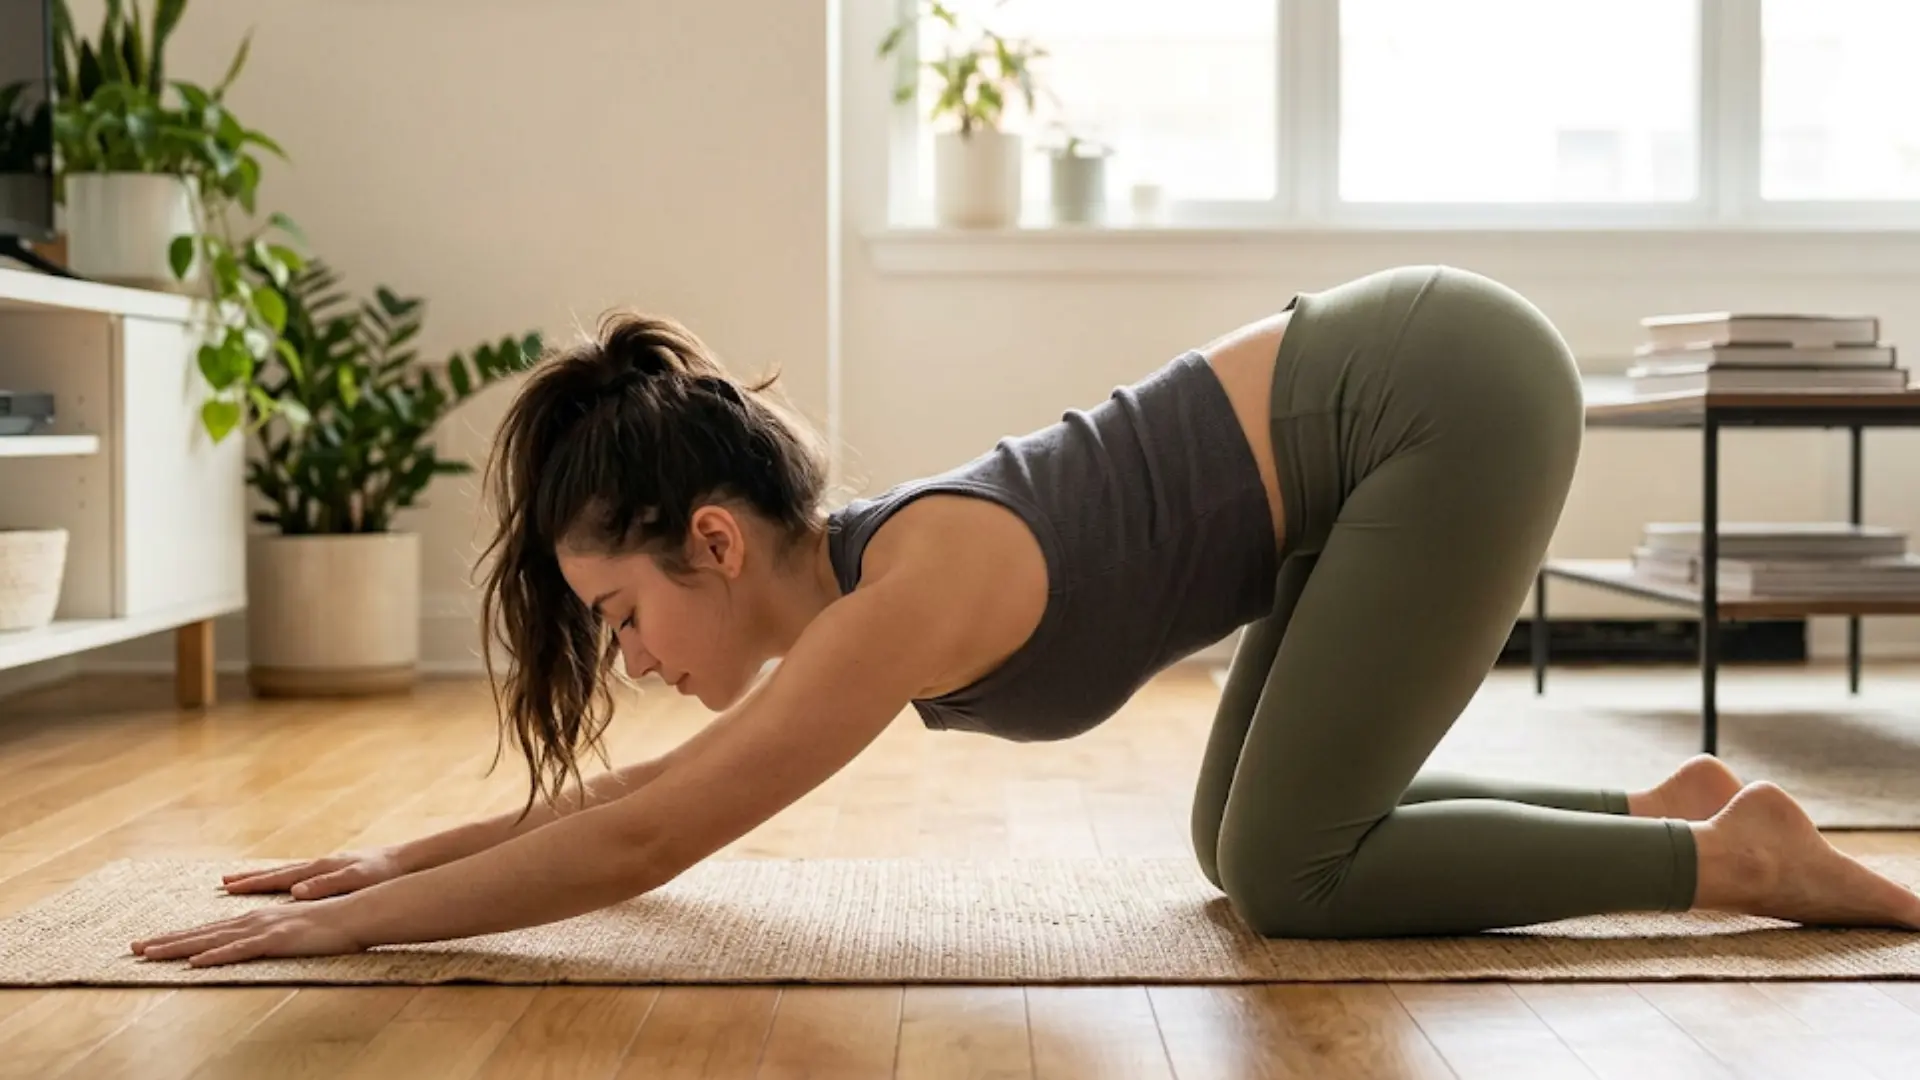
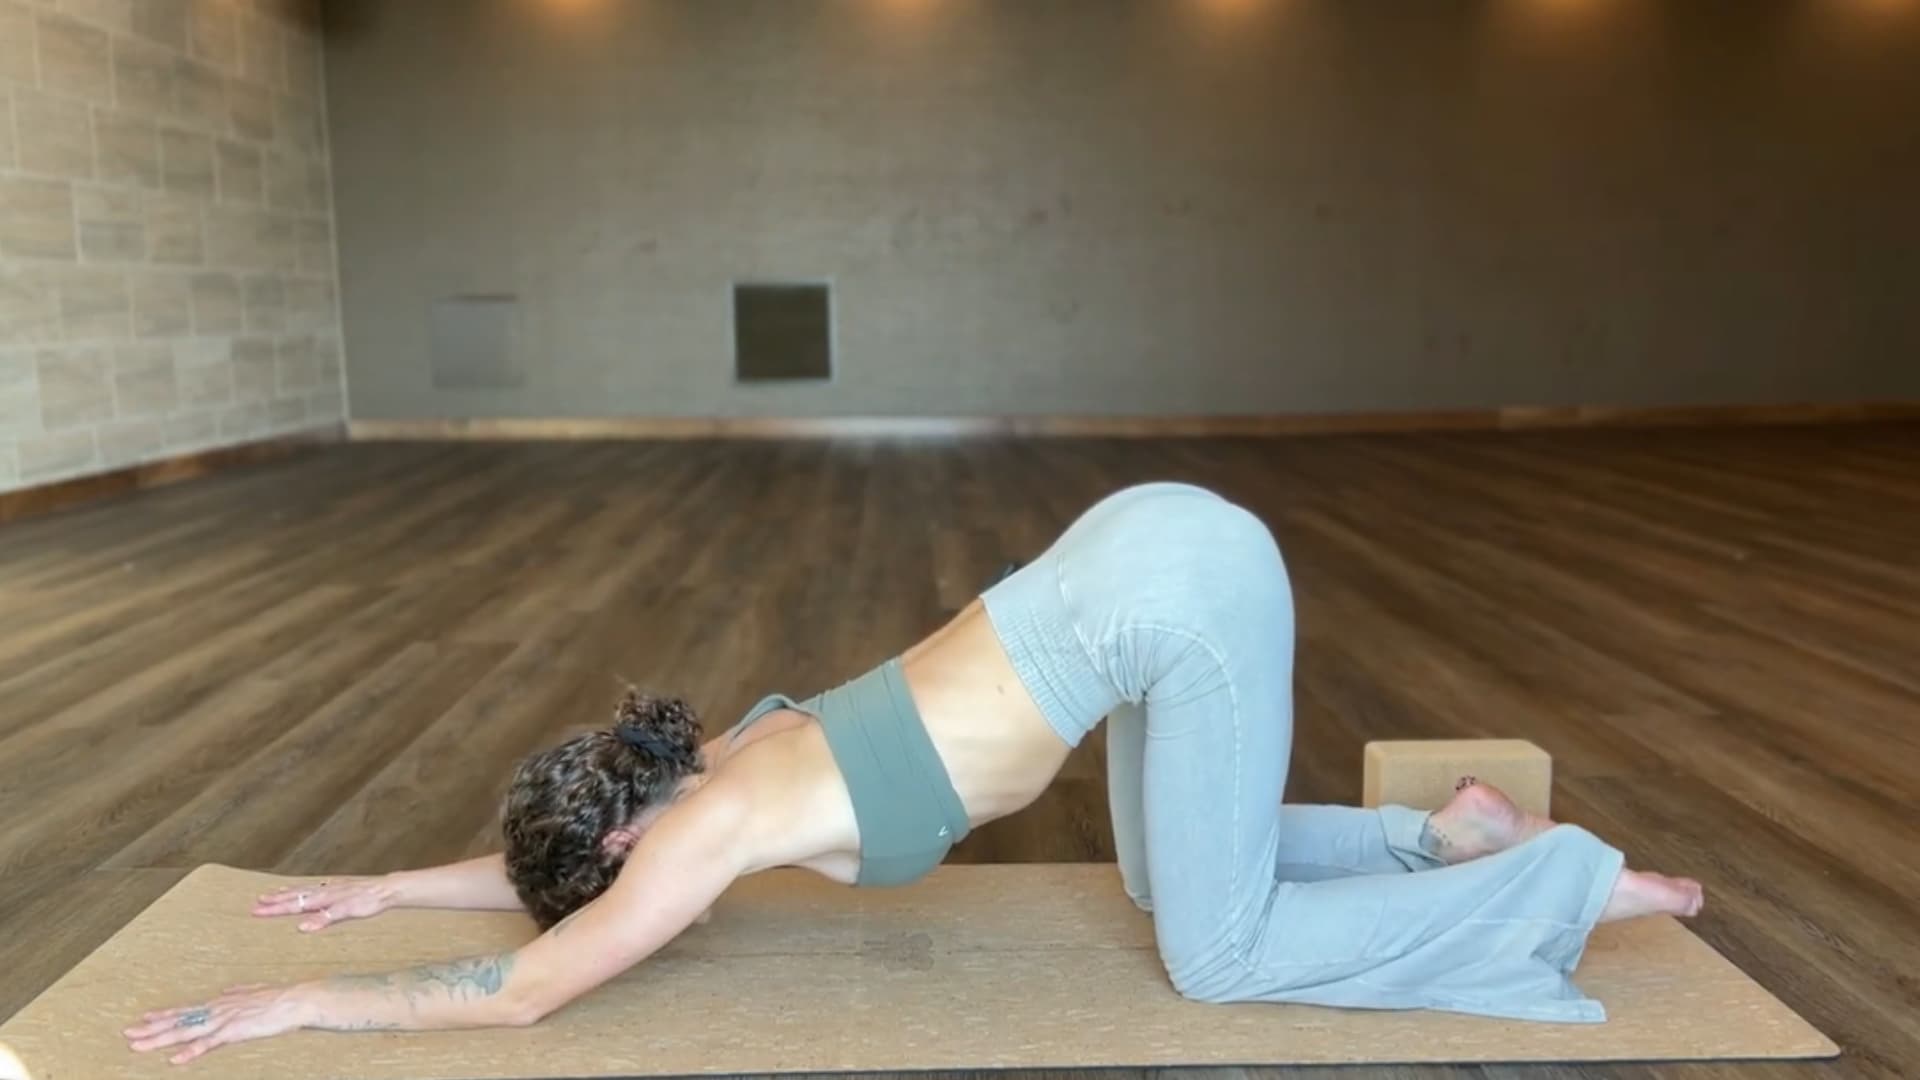
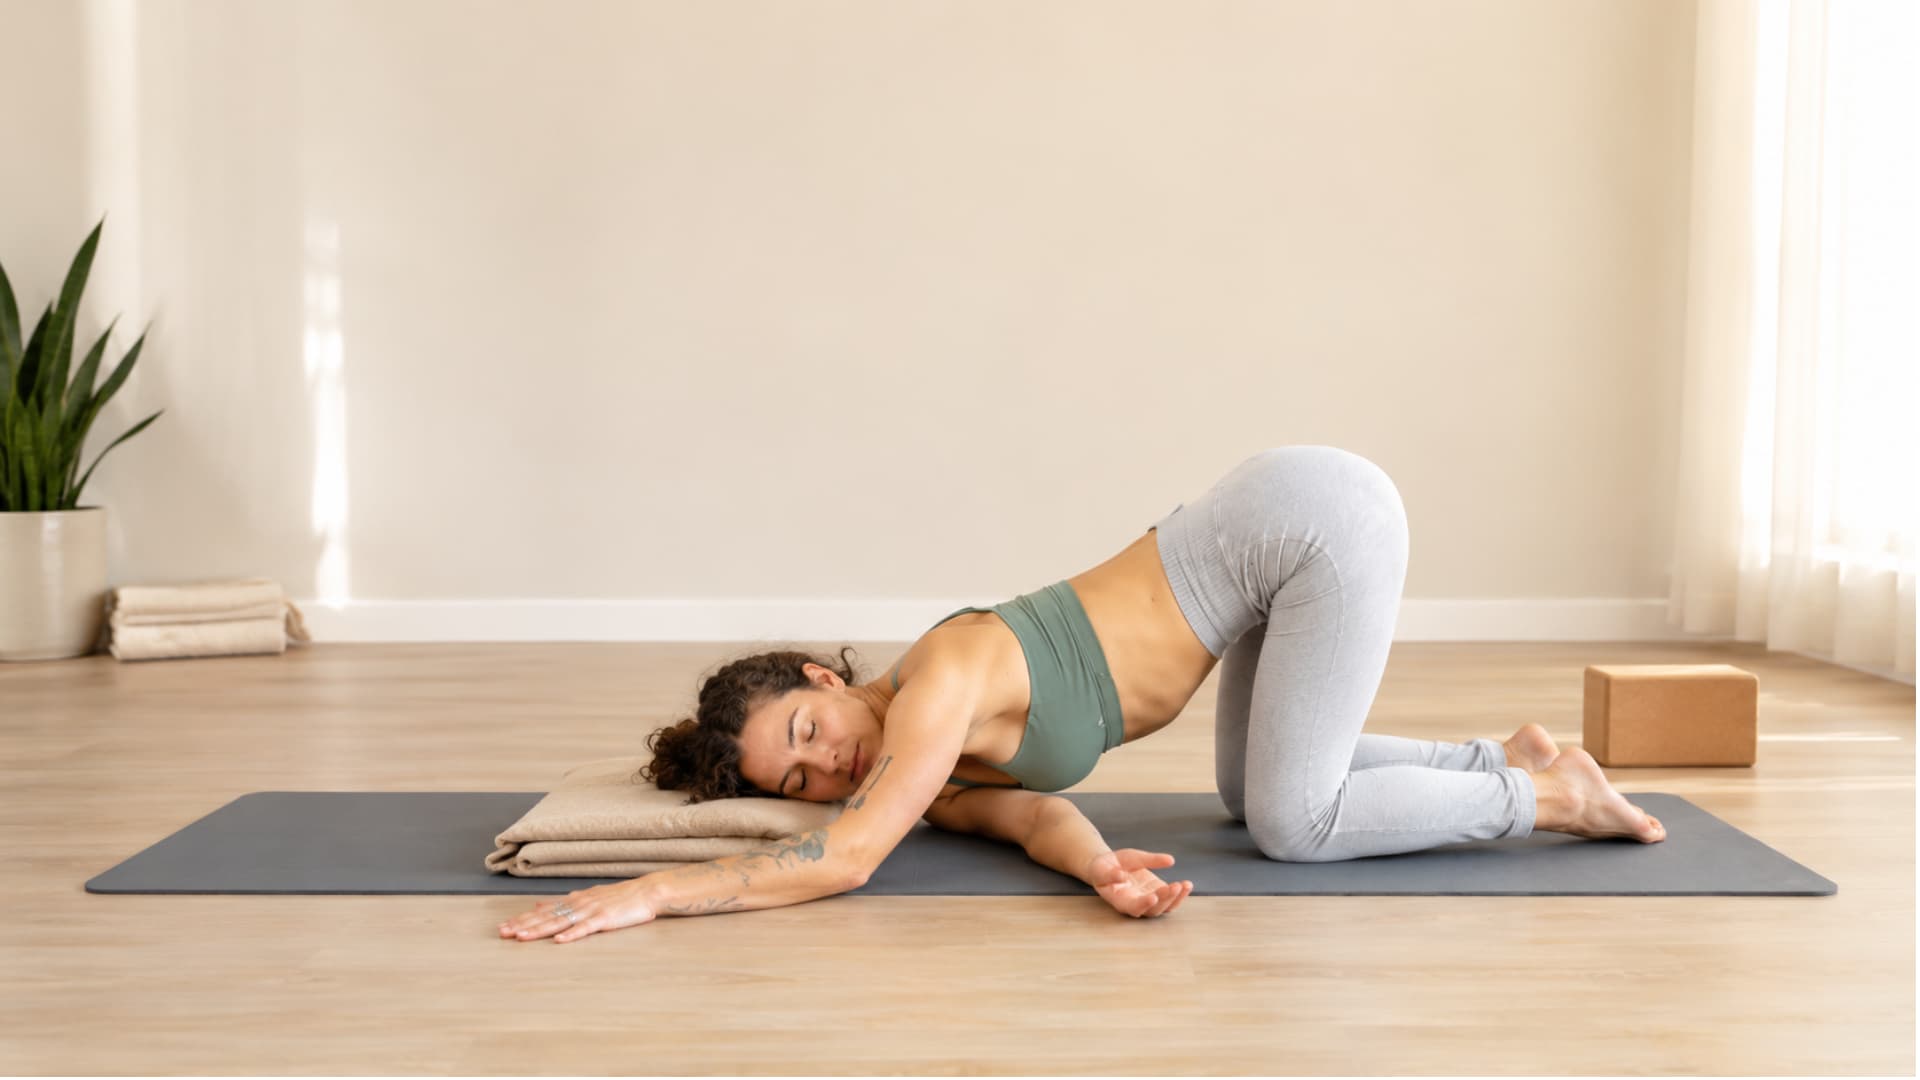
Puppy pose is a kneeling yoga posture where your knees stay grounded, your hips remain lifted above them, and your arms reach forward until your forehead rests on the mat. It is also called extended puppy pose, Uttana Shishosana in Sanskrit, and sometimes the melting heart pose because of how the chest softens toward the floor when you breathe out.
The shape sits between child’s pose and downward-facing dog. In child’s pose, your hips drop all the way back to your heels and the forward fold compresses the torso.
In downward dog, your legs and arms both bear weight. Puppy pose takes the long spine and arm reach of downward dog but keeps the knees on the mat and the hips at mid-height, which removes a lot of wrist and leg load while keeping the upper-body stretch fully active.
Yoga teachers use it in warm-up sequences to prepare the shoulders before deeper backbends, in cool-downs to release a tired upper back, and in yin and restorative flows where longer holds and gravity do the work.
Why Puppy Pose Works: The Physiology Behind the Stretch
Understanding what the pose actually does to your body helps you hold it more intentionally.
When your arms reach forward and your hips draw back, the thoracic spine, the mid-back section spanning roughly the shoulder blades, receives traction in both directions simultaneously.
The upper end extends toward the mat while the lower end moves toward the ceiling. This dual pull decompresses the vertebral joints in an area that tends to round and compress during seated work.
At the shoulders, the raised arm position combined with gravity creates a passive external rotation stretch across the glenohumeral joint. The pectoralis minor, which often shortens from forward posture, gets a sustained lengthening pull when the chest lowers toward the mat.
Research on restorative yoga postures published in the International Journal of Yoga (2016) found that passive shoulder-opening positions held for 30 to 60 seconds produced measurable reductions in upper trapezius resting tension. Puppy pose fits directly into that category of hold.
The breathing component adds another layer. The folded shape naturally slows the breath, activating the parasympathetic nervous system and reducing cortisol-driven muscle guarding in the neck and shoulders. That is why the pose feels like it gets easier the longer you stay in it, not harder.
Puppy Pose Benefits
Puppy pose may look gentle, but it can release tension in several areas at once. When you reach your arms forward, keep your hips lifted, and breathe slowly, the pose can support flexibility, posture, and relaxation.
- Stretches the Shoulders and Chest: Reaching your arms forward helps open the shoulders and chest, which can ease tightness from sitting, typing, driving, or looking down at a screen.
- Lengthens the Spine: Keeping your hips lifted while your chest lowers creates space through the spine, helping your back feel longer without forcing a deep stretch.
- Releases Upper Back Tension: The forward reach stretches around the shoulder blades, which can feel helpful when your upper back feels stiff, rounded, or tight.
- Supports Better Posture: Puppy pose opens the chest and shoulders, two areas that often tighten during desk work or long periods of sitting.
- Encourages Calm Breathing: The folded shape keeps you close to the mat, giving your body a steady place to soften and your breath a slower rhythm.
- Stretches the Arms and Side Waist: Reaching through your fingertips while drawing your hips back gently stretches the arms and both sides of the waist.
Use these benefits as a guide, but keep the stretch comfortable. Your shoulders, neck, and back should feel supported, not strained.
How to Do Puppy Pose: Step-by-Step Instructions
Take the setup slowly. Dropping your chest straight to the mat without working through each step tends to compress the neck and collapse the shoulder position. These cues are sequenced to give each area time to adjust.
Step 1: Start in Tabletop
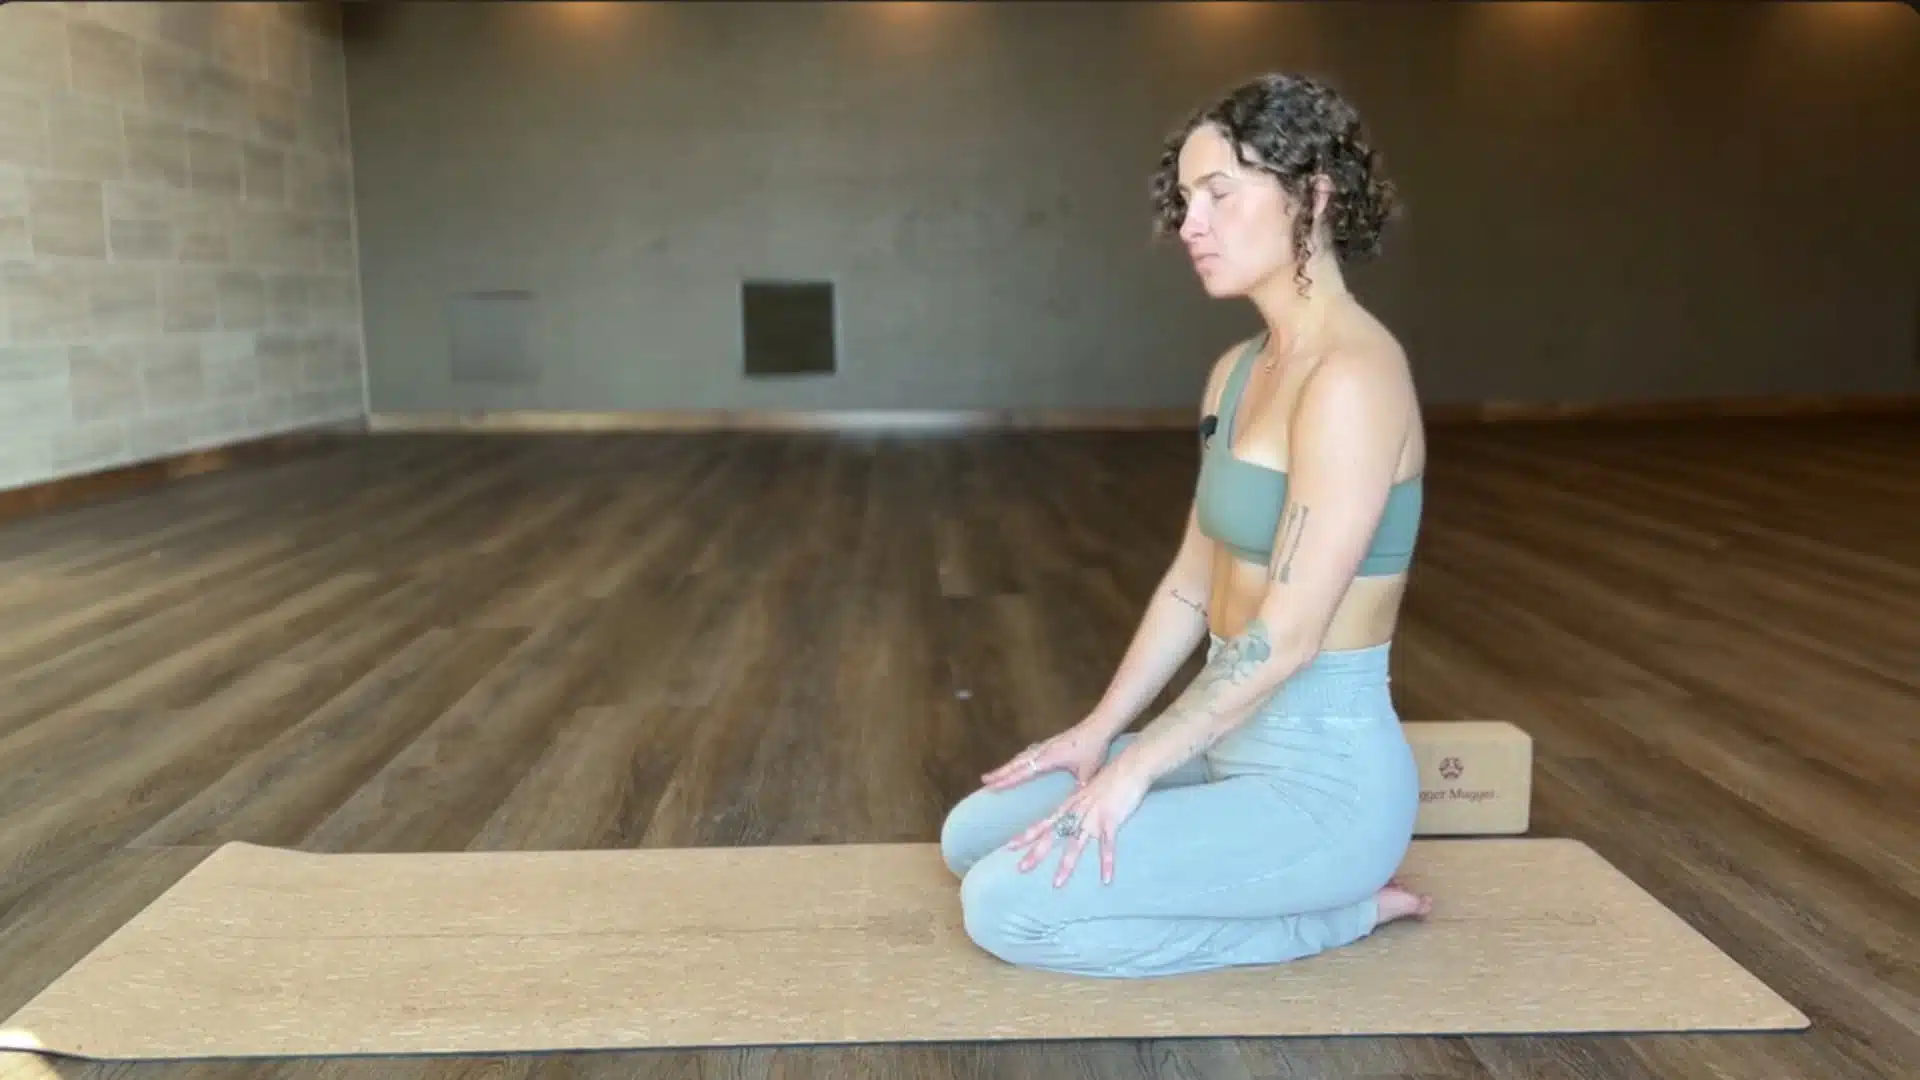
Come onto your hands and knees. Place your knees directly under your hips, hip-width apart. Stack your wrists under your shoulders.
Spread your fingers wide and press lightly through your palms. Rest the tops of your feet on the mat, or tuck your toes if that feels more stable. Take two slow breaths here before moving.
Step 2: Walk Your Hands Forward
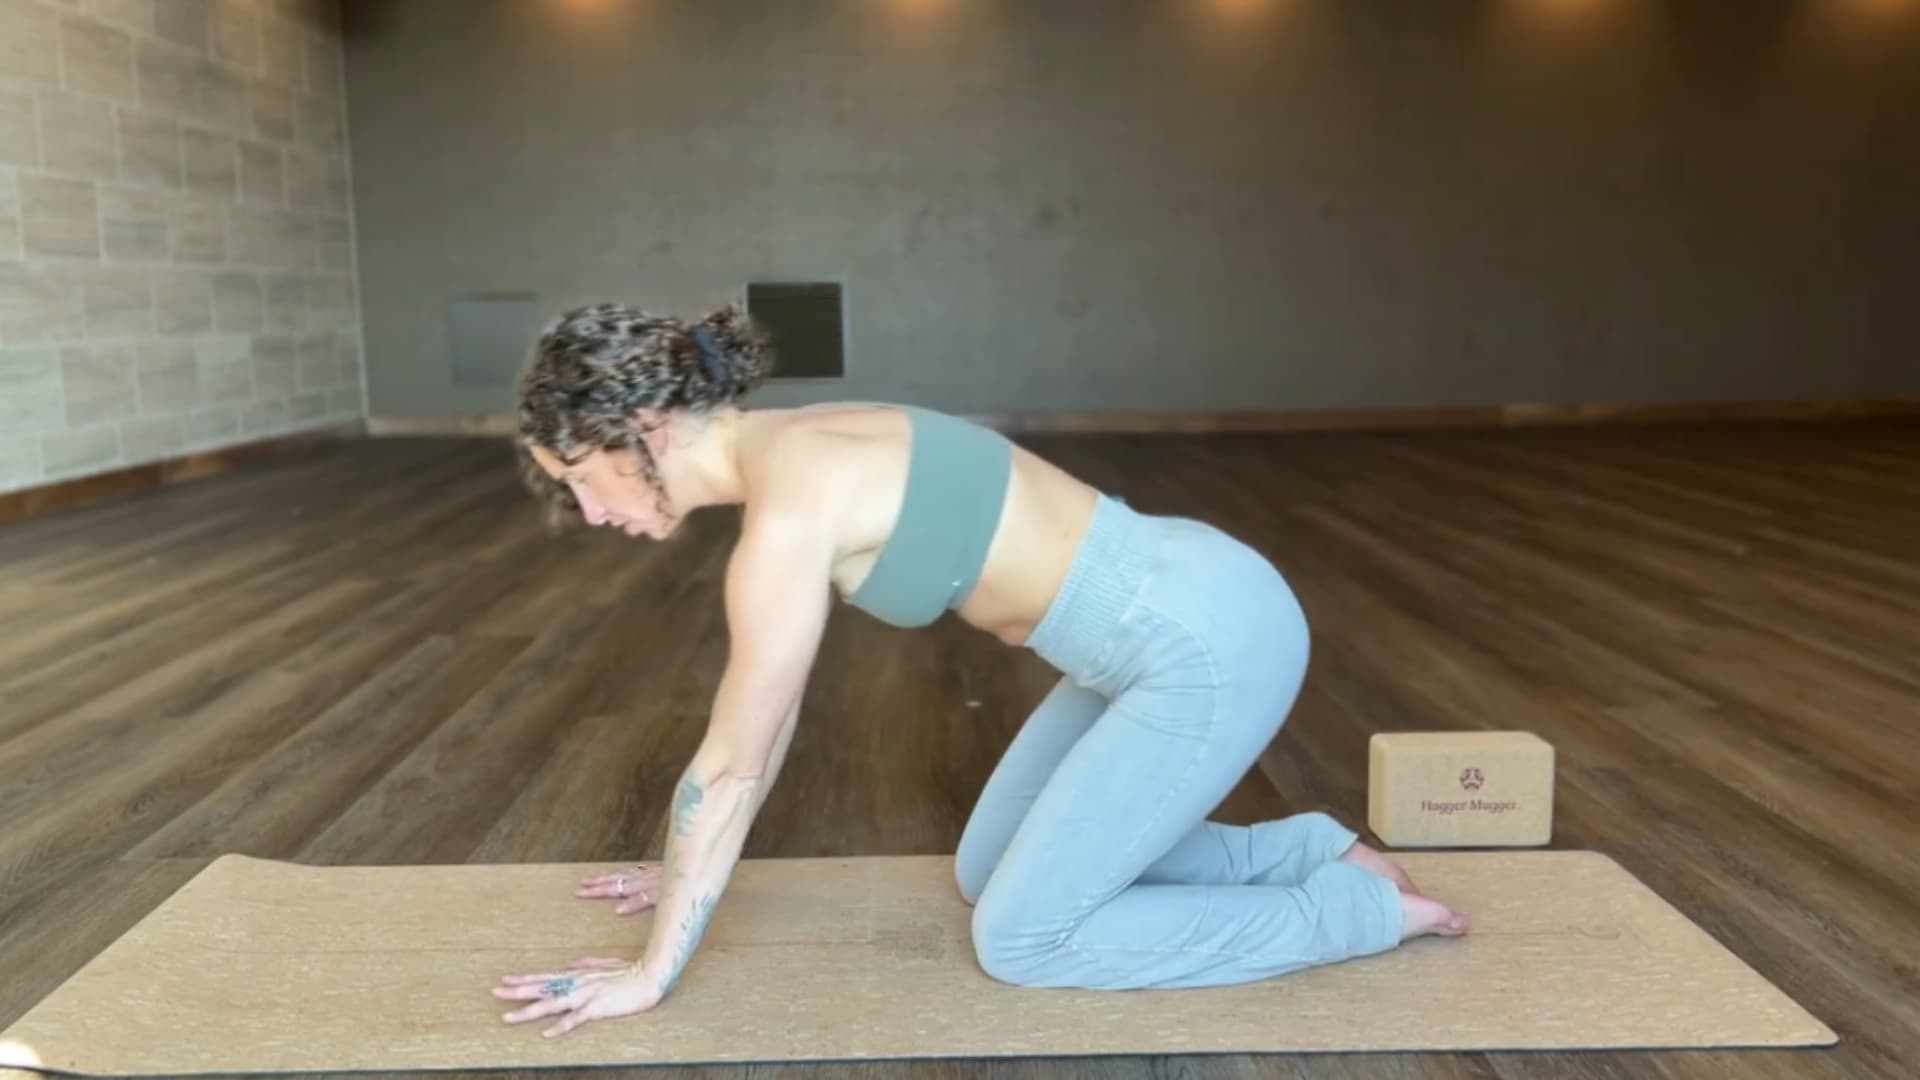
Begin walking your hands forward, one at a time. Keep your elbows lifted off the mat and maintain active arms throughout this step. Move slowly so your shoulders have time to adjust.
You are not trying to reach a specific distance yet; you are creating length through both sides of your waist.
Step 3: Shift Your Hips Halfway Back
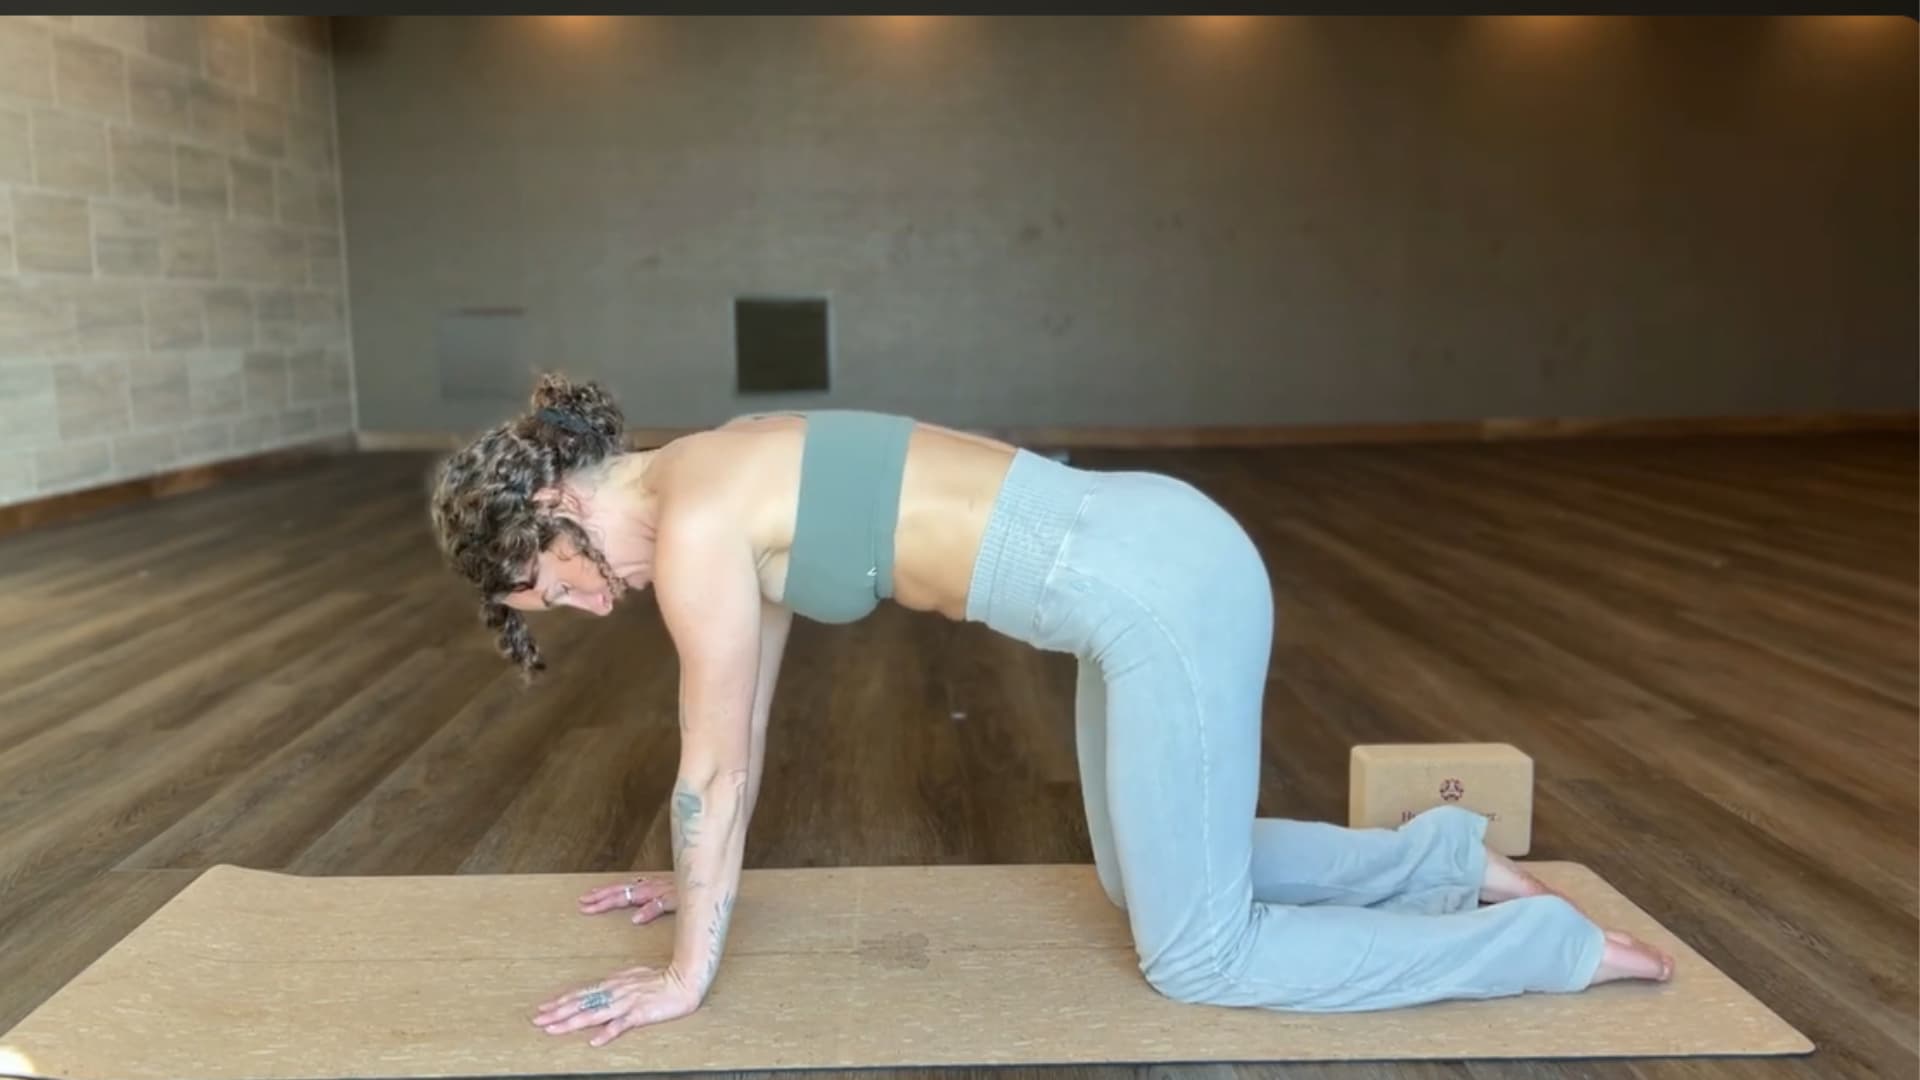
Push your hips halfway back toward your heels. Stop before you reach child’s pose. Your hips should stay lifted enough that your spine forms a long diagonal line rather than folding over your thighs.
Think of your tailbone lifting gently while your chest begins to move forward and down. If your knees feel sensitive, slide a folded blanket underneath them.
Step 4: Slide Your Palms Farther Forward
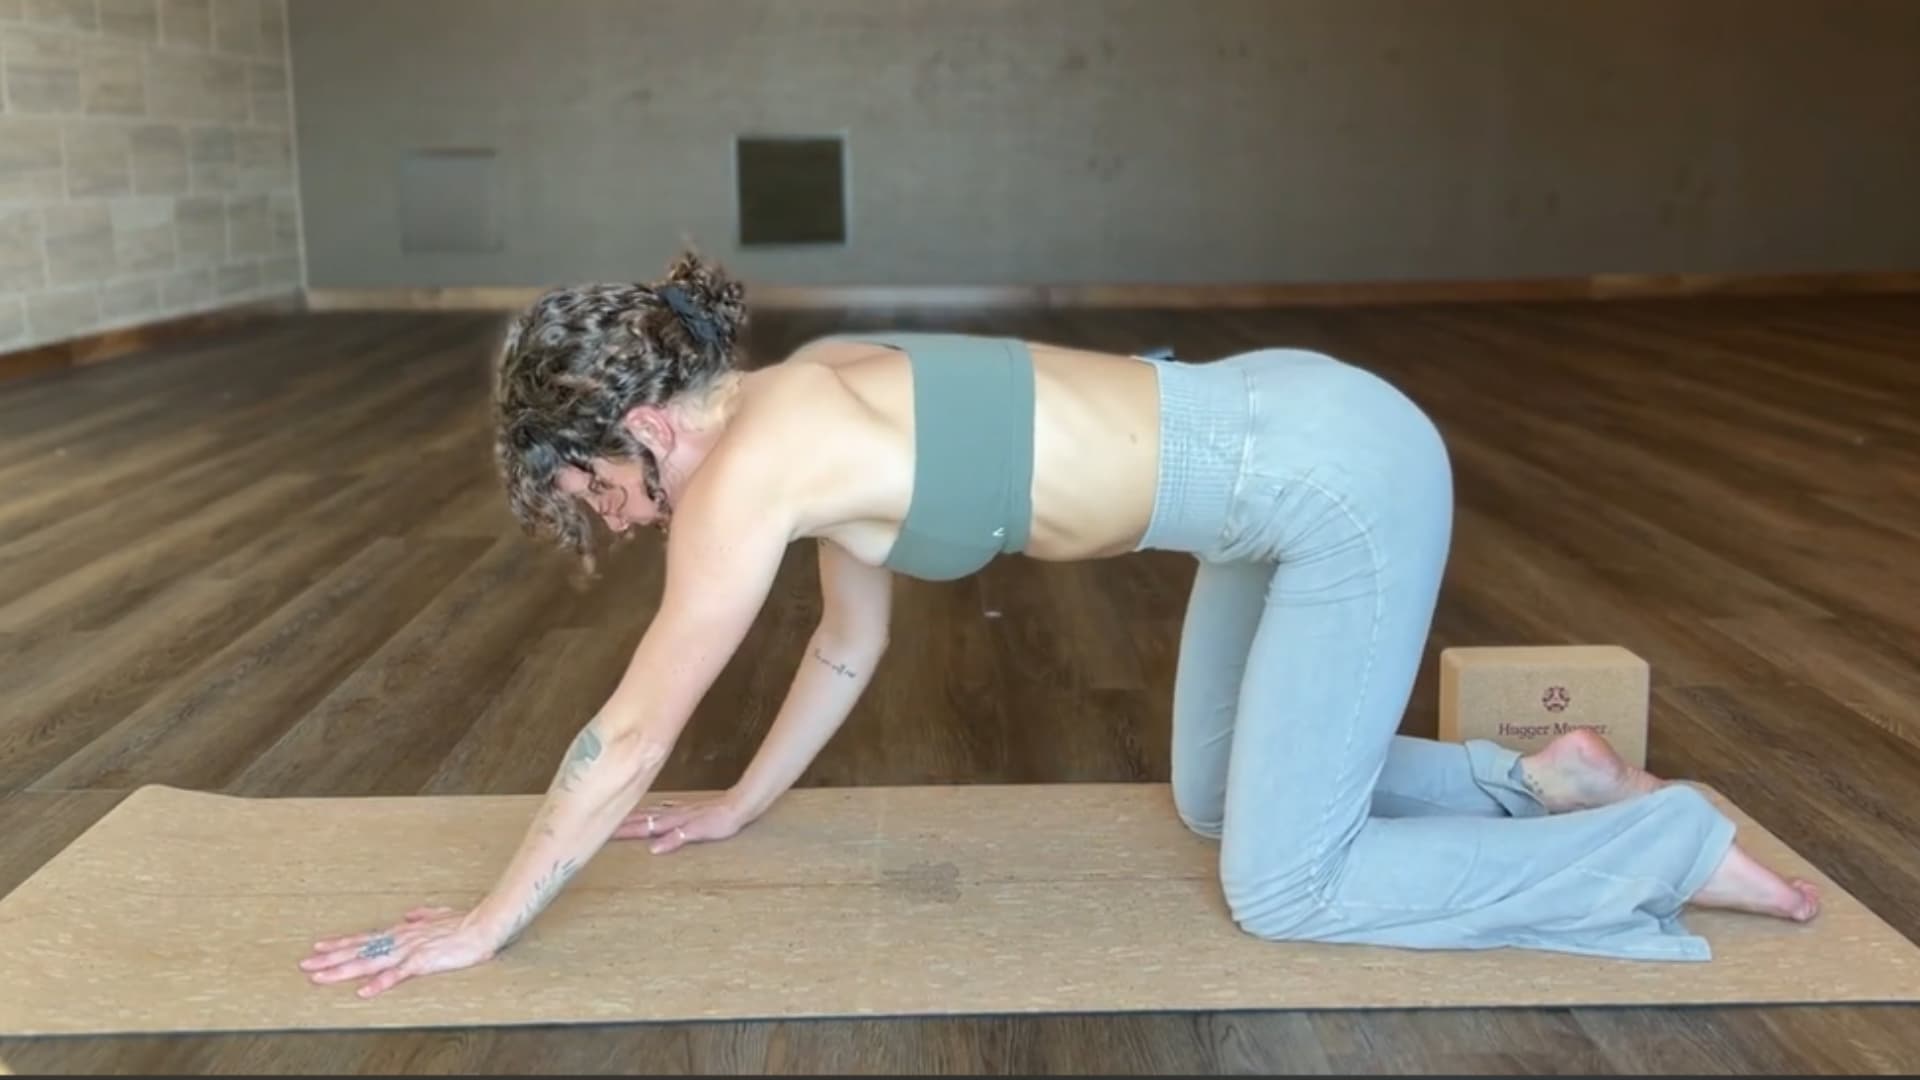
Continue reaching your palms forward as your hips draw back. Stretch through your fingertips as if lengthening the front edge of your mat away from you.
Check that both arms are even. If one shoulder drops lower than the other, widen your hand placement to shoulder-width or slightly beyond.
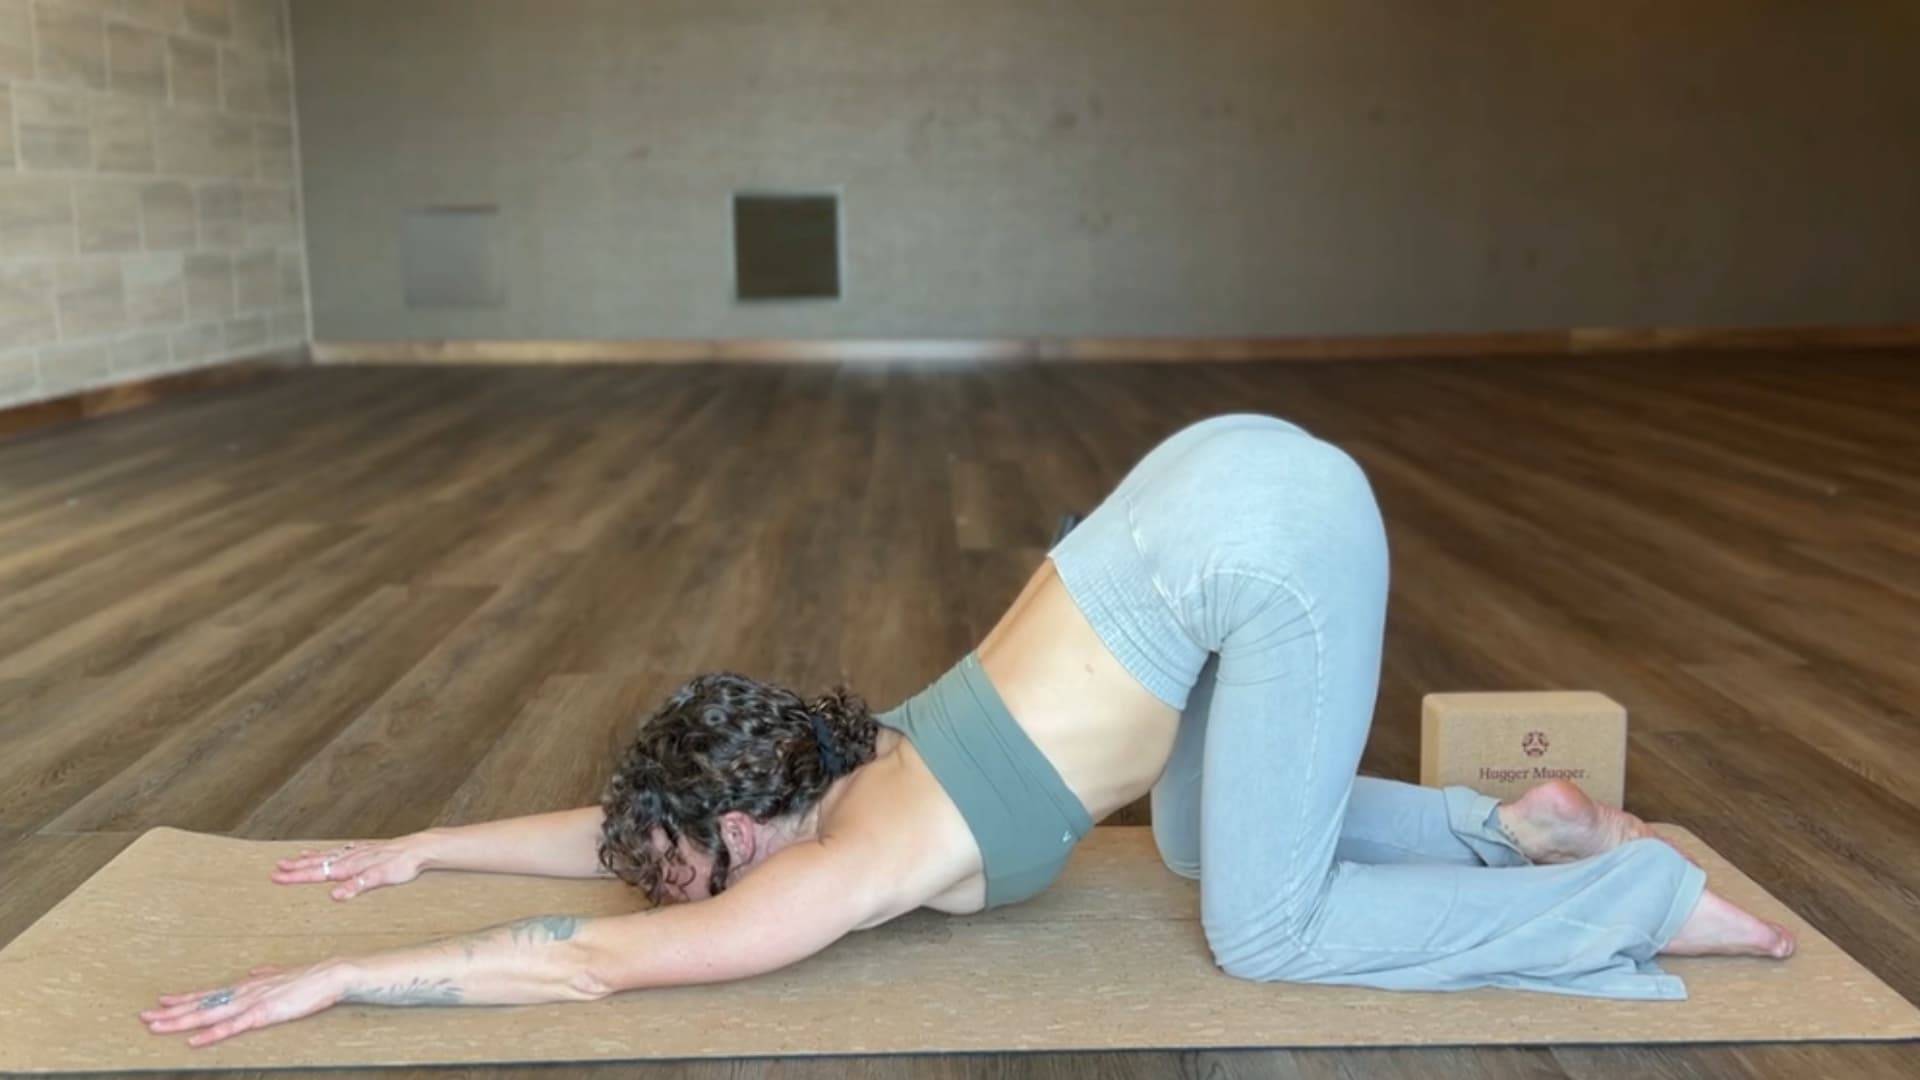
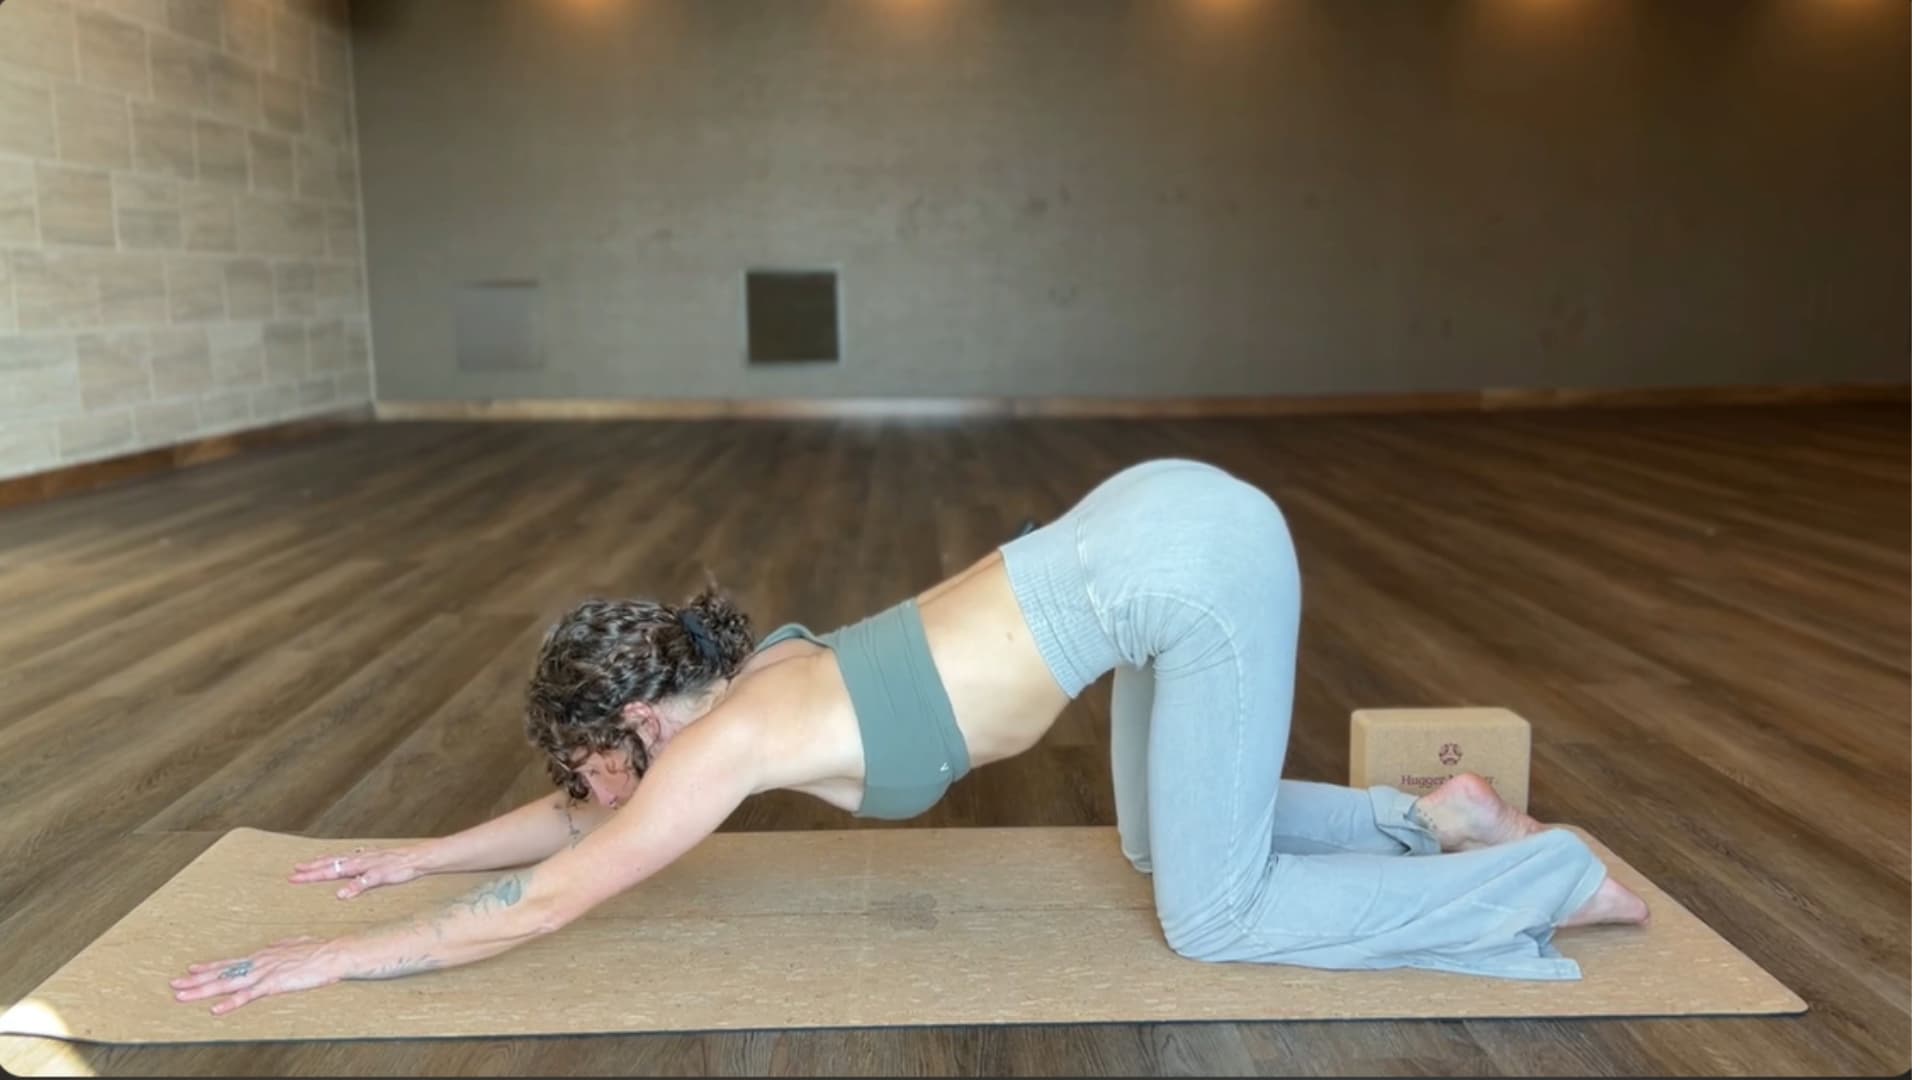
Step 5: Lower Your Forehead to the Mat
Let your forehead lower toward the mat. Do not push your chin down. The cue is forehead, not chin. If the floor is too far away, place a yoga block or folded blanket under your forehead so your neck can fully release. Your head should feel supported rather than hanging.
Step 6: Reach Through Your Fingertips
With your forehead resting, press lightly through your palms and actively reach through your fingertips. This keeps the pose from becoming passive and continues to open the arms, shoulders, and upper back.
Keep your elbows lifted if that feels comfortable. If your shoulders feel strained with straight arms, soften slightly at the elbows.
Step 7: Hold and Breathe

Stay in puppy pose and breathe through your nose. On each exhale, let the chest, shoulders, and upper back soften a little further. Do not force your body lower with your breath.
Let gravity do the work. Beginners can aim for 3 to 5 slow breaths. More experienced practitioners can hold 30 to 60 seconds. If your breath becomes short or your neck feels compressed, ease back a few inches.
Step 8: Release Carefully
To come out, press into your palms and slowly walk your hands back toward your knees. Return to the tabletop. Pause for one breath before continuing. Child’s pose makes a natural follow-up if your lower back wants a softer reset after the spinal length work.
Use this puppy pose video as a visual reference before you practice. Pay attention to how the hands reach forward, the hips stay lifted, and the forehead lowers without forcing the neck.
Puppy Pose Alignment: What to Keep in Mind
Small adjustments at the start make the difference between a stretch that feels good and one that strains the shoulders or compresses the neck. These are the alignment points I come back to most often when teaching this pose.
- Hips over knees, not past them. If your hips drift too far back, you slide into child’s pose and the spinal traction is lost. Keep them stacked directly above, or only slightly behind, your knees.
- Active arms, not passive ones. Pressing through the palms and reaching through the fingertips keeps the shoulders engaged and prevents the joint from sagging under the weight of the posture.
- Forehead on the mat or on a prop. The neck should be completely relaxed. If you are straining to reach the floor, place something under your forehead. This is not a modification for beginners only; it is correct alignment for anyone whose floor is too far away.
- Lower back stays spacious. The pose stretches the thoracic spine, not the lumbar. If your lower back is dipping or compressing, raise your hips slightly or widen the distance between your hands.
- Steady breath throughout. If your breath shortens, the pose has gone too deep. Back off until breathing is easy and slow again.
Common Puppy Pose Mistakes and How to Fix Them
These are the errors that show up most often, and each one has a straightforward fix.
| Mistake | Why It Matters | How to Fix It |
| Hips sliding too far back | Collapses the pose into child’s pose and removes the spinal traction | Keep hips directly above or slightly behind the knees; check from the side |
| Forcing the chest toward the floor | Can strain the shoulder capsule or compress the ribs if done too fast | Let the chest lower on exhales over time; do not push it with effort |
| Chin pressing into the mat | Compresses the cervical spine and creates neck tension | Bring your forehead to the floor, not your chin; use a block if needed |
| Locking the elbows straight | Adds strain to the shoulder joints, especially with tight pecs | Keep a soft micro-bend in the elbows if shoulders feel tense |
| One shoulder dropping lower than the other | Creates uneven spinal rotation and can aggravate one-sided shoulder tension | Widen your hand placement slightly and actively press through both palms equally |
Address these before they become habits. A clean setup in the first 10 seconds determines how well the rest of the hold feels.
Puppy Pose Modifications and Variations
The base pose works well for most beginners, but there are meaningful ways to adjust it based on what your body needs or what you want to explore.
1. Supported Puppy Pose With Blocks
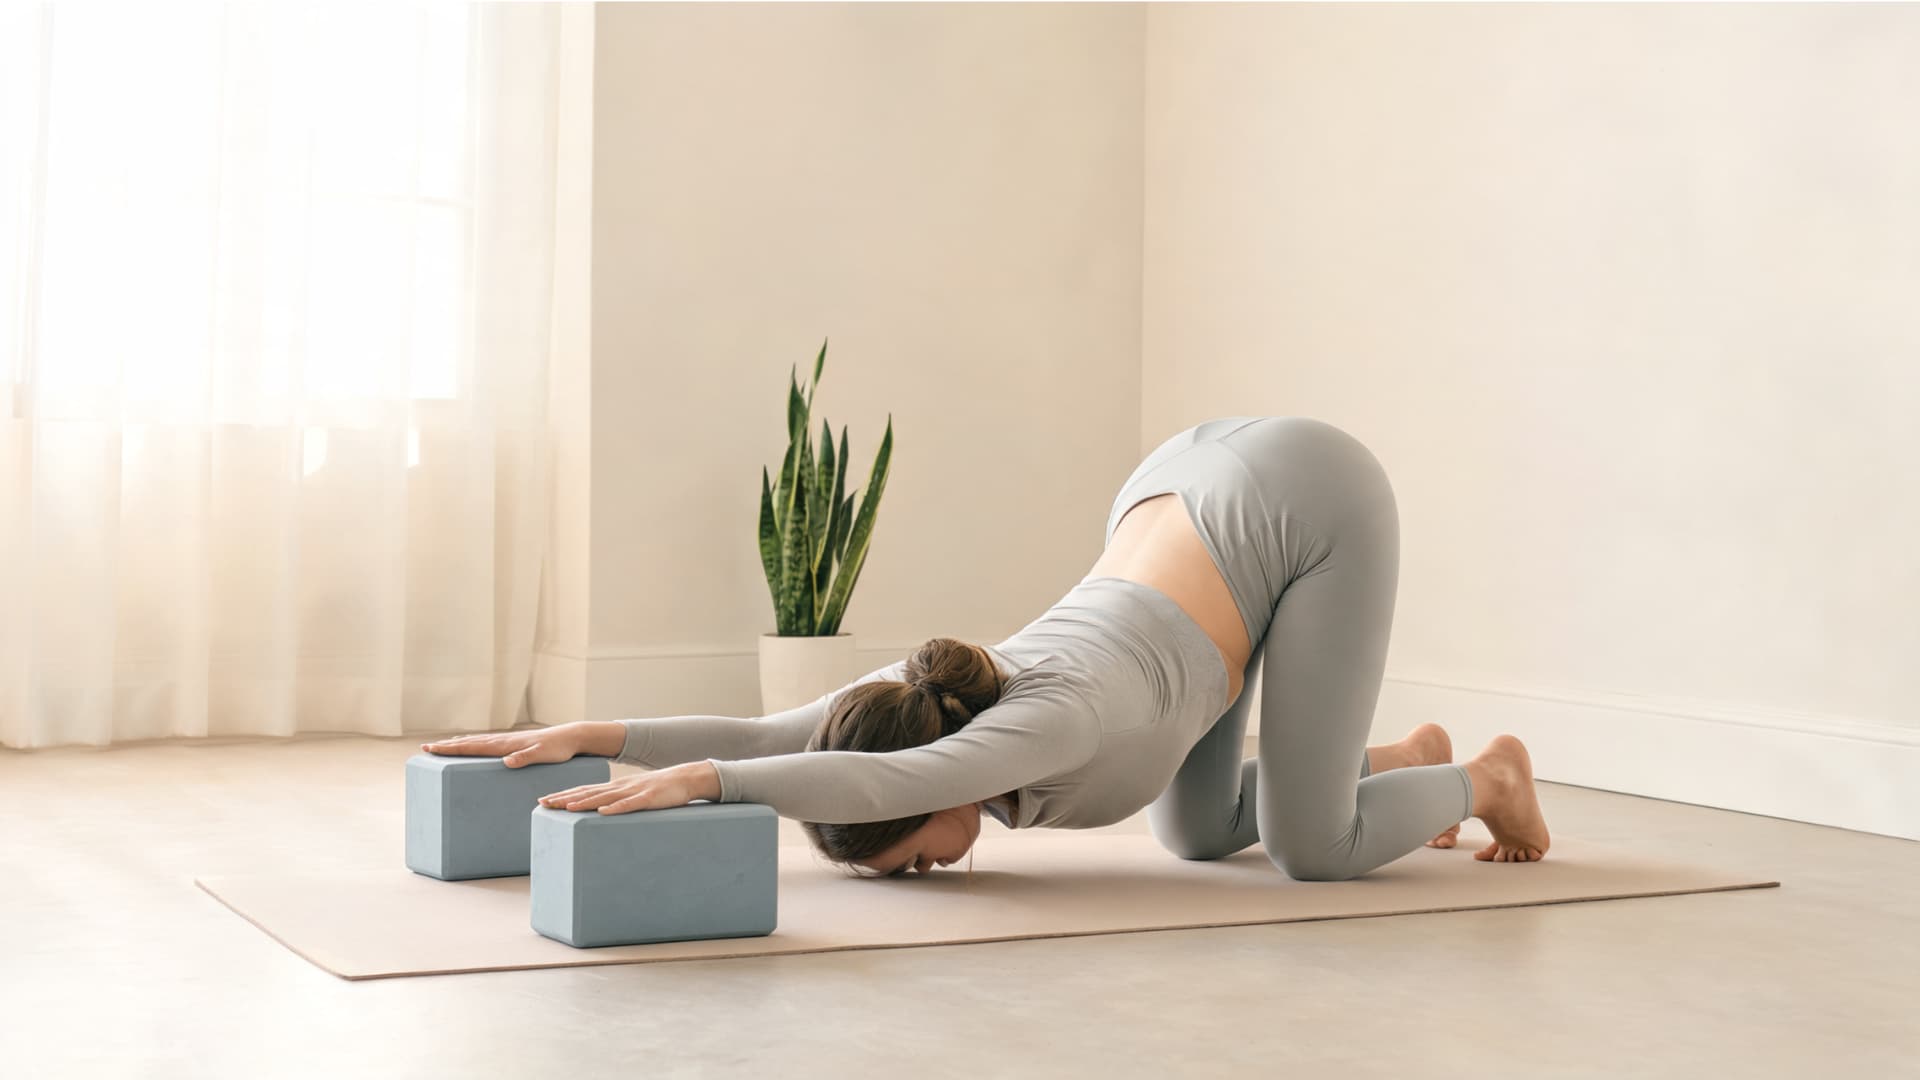
Place one yoga block under each hand before walking your arms forward. The blocks raise the floor closer to your palms, which reduces shoulder strain and keeps the arms active without forcing a depth your body is not ready for.
Alternatively, bring your elbows onto two blocks instead of your hands. This elbow-on-block variation creates a deeper shoulder stretch with more joint support and tends to suit people who find the wrist angle uncomfortable in standard puppy pose.
2. Thread-the-Needle From Puppy Pose
From puppy pose, slide one arm underneath the opposite arm with your palm facing up. Let the side of your head or shoulder move toward the mat. Use a blanket or block under the head if the floor is too far away.
This variation adds a controlled upper-back rotation that targets the area around the shoulder blade directly. Hold for a few breaths, return to center, then repeat on the other side. Keep your hips lifted and avoid shifting all your weight to one knee.
3. Wall Puppy Pose
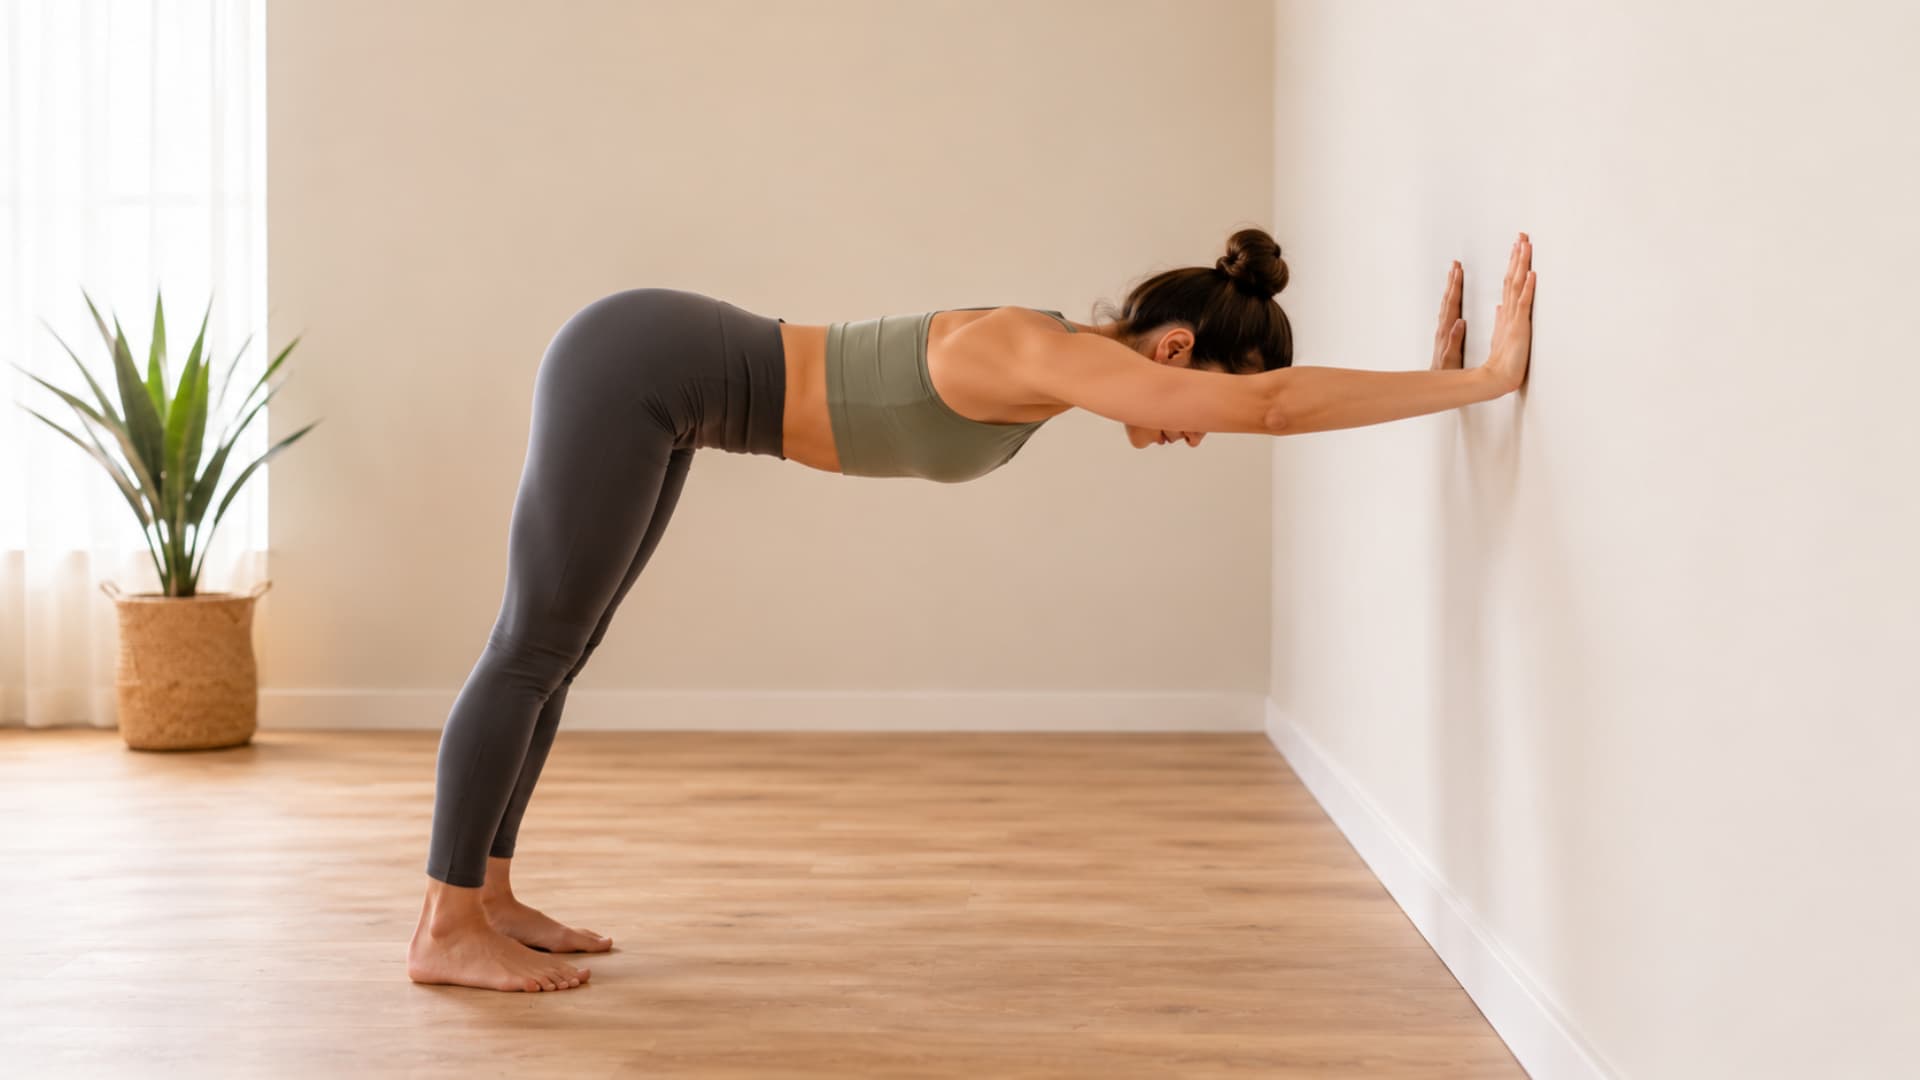
Stand facing a wall and place your palms against it at about chest height. Step your feet back, hinge at the hips, and let your chest lower until your arms and spine feel long.
This version removes all knee and floor pressure, making it a practical option during a work break, on days when kneeling is uncomfortable, or for anyone who cannot easily get to the floor. The shoulder and spine stretch is comparable to the mat version when you maintain long arms and a steady breath.
How to Sequence Puppy Pose in Your Practice
As a warm-up pose, it works well after cat-cow to introduce spinal movement before asking the thoracic spine to extend into bigger backbends. Two to three minutes of cat-cow followed by 30 to 60 seconds of puppy pose prepares the shoulder complex for cobra, camel pose, or wheel.
As a cool-down, use it after standing backbends to decompress the spine before lying down. It pairs particularly well with camel pose, which compresses the lumbar region; puppy pose immediately after creates length through the thoracic area and gives the back a gentle reset.
For restorative or yin yoga practice, puppy pose holds well at 90 seconds to 3 minutes when supported with props. In yin, the longer hold creates change in the connective tissue around the thoracic spine and shoulders rather than just muscular lengthening.
If you practice yoga after a workout, puppy pose is a reliable shoulder and upper-back opener to include in the cool-down before savasana. It requires no warm-up of its own once the body is already moving
Who Should Be Careful With Puppy Pose
Puppy pose is gentle for most bodies, but a few situations call for specific adjustments or avoidance.
People with acute rotator cuff injuries or shoulder impingement should keep the arm reach short and use blocks rather than trying to access the full range. An inflamed shoulder joint benefits from gentle movement, not sustained stretch at end-range.
Knee pain responds well to a folded blanket or towel placed under the knees before settling into the pose. This distributes pressure more evenly and usually removes the discomfort entirely.
For neck issues, the forehead-down position should feel completely passive. If it does not, elevate the support surface. The neck should not be working at all in this pose.
In late-stage pregnancy, the standard position may feel uncomfortable as the belly grows. A wider knee position, a bolster under the chest, or the wall version often works better. Consult a prenatal yoga teacher or healthcare provider before practicing.
Come out of the pose immediately if you feel sharp pain, numbness, tingling, or pressure in the neck. A safe stretch feels steady, breathable, and controllable throughout.
Puppy Pose vs. Child’s Pose: Key Differences
These two poses look similar from across the room, but they serve different purposes and feel distinctly different in the body. The table below covers what separates them.
| Feature | Puppy Pose | Child’s Pose |
| Hip position | Lifted over the knees | Dropped back to the heels |
| Primary target | Thoracic spine, shoulders, chest | Lower back, hips, nervous system rest |
| Spinal position | Long diagonal with traction | Rounded forward fold, compression |
| Best used for | Upper-body opening, shoulder mobility, thoracic extension | Rest, recovery, breath reset between poses |
| When to switch | When you need shoulder and spine work | When you need to soften and recover |
You can move between the two within a single practice. Puppy pose for active upper-body opening, then child’s pose to rest and reset before continuing.
Both poses sit well within a yin yoga practice, where longer holds let the connective tissue respond to sustained, passive stretching.
Frequently Asked Questions About Puppy Pose
These are the questions I hear most from people trying puppy pose for the first time.
What is puppy pose good for?
Puppy pose is particularly good for relieving tightness through the thoracic spine, shoulders, and chest. It is one of the more accessible upper-back openers in yoga because it removes the wrist and leg load of downward-facing dog while keeping the same reaching action through the arms.
How long should I hold puppy pose?
Beginners can start with 3 to 5 slow breaths, which is roughly 20 to 30 seconds. If the position feels comfortable, build toward 30 to 60 seconds over time. In yin yoga, holds of 90 seconds to 3 minutes target the connective tissue more directly. Always reduce the hold if breathing becomes uncomfortable.
Can beginners do puppy pose?
Yes. Puppy pose is one of the more beginner-accessible yoga poses because it requires no prior flexibility and can be fully supported with props. A folded blanket under the knees, a block under the forehead, and a smaller arm reach are all valid starting points that make the pose safe and comfortable from day one.
Is puppy pose a backbend?
It has backbend qualities, specifically a mild extension of the thoracic spine as the chest lowers toward the floor, but it is gentler than cobra, upward-facing dog, or camel. Teachers sometimes classify it as a restorative backbend or a passive heart opener rather than a full active backbend, because the spinal extension comes from gravity rather than muscular contraction.
Can puppy pose help with shoulder pain?
For shoulder tightness from sitting or postural habits, yes. The passive external rotation and sustained chest opening that puppy pose provides can release tension in the anterior shoulder and the muscles around the shoulder blade. For acute shoulder injuries or impingement, keep the range small, use blocks, and check with a physiotherapist before practicing.
What poses go well after puppy pose?
Cat-cow to reintroduce gentle spinal movement, child’s pose to rest the lower back, seated forward folds, or gentle seated twists. If you are warming up for a deeper backbend practice, thread-the-needle from puppy pose followed by a low lunge is a reliable upper-body prep sequence. You can explore the low lunge in detail if you want to build a fuller warm-up around it.
Is the extended puppy pose the same as the melting heart pose?
Yes. Extended puppy pose (Uttana Shishosana), melting heart pose, and Anahatasana are different names for the same basic shape. The melting heart name refers to how the chest sinks toward the mat when you exhale fully into the pose. Some teachers use the two names interchangeably; others use melting heart specifically for the version where the chest fully contacts the mat.
Summing Up
Puppy pose is a simple way to release tightness in your shoulders, chest, and upper back when you practice it with steady breath and proper alignment.
Instead of pushing for depth, I focus on how your body feels in each step, because you get more benefit when you stay relaxed and controlled.
You’ve seen how small adjustments, props, and mindful movement can make a big difference in comfort and results. When you understand this pose properly, it becomes easier to improve posture and reduce daily stiffness.
I encourage you to try it in your routine and notice the changes for yourself, then share your experience or check out more beginner yoga poses that support your body.