


Ever tried following the Surya Namaskar steps and wondered whether they were in the right order? Trust me, I know it can get complicated.
The flow now looks simple, but when in the early days, I was on the mat, the breath, feet, hands, and bends felt like a lot to remember.
This is what I will solve. Here, you’ll learn the full sequence in a calm, practical way, like someone is beside you, cueing one move at a time. I will explain each pose, cover breathing, body placement, and small adjustments to make the practice safer.
By the end, you’ll know how to move with confidence instead of guessing during daily practice, even as a new yoga beginner today.
What Is Surya Namaskar?
Surya Namaskar is a traditional yoga sequence made of 12 connected poses. In simple words, it’s a flowing practice where you move from standing to folding, then down to the mat, and back to standing again.
The name comes from two Sanskrit words: “Surya,” which means sun, and “Namaskar,” which means salutation or respectful greeting. That’s why many people know it as the Sun Salutation. But it’s not just a symbolic bow to the sun.
It’s also a structured way to bring your body, breath, and attention into one steady rhythm before the rest of your day or yoga session begins.
Yoga philosophy and practice shows why Surya Namaskar differs from random stretching, with each pose having a defined purpose rather than just targeting tight muscles.
Instead, you follow a set sequence that prepares you for the next, making the practice feel smooth once the pattern is understood. It’s common in yoga classes like Hatha, Vinyasa, and Indian yoga.
Surya Namaskar Pose With Steps and Breathing
Follow these poses in order. Move at a pace where your breath doesn’t feel rushed. The goal is not to achieve a perfectly smooth flow. The goal is to understand where your body goes, how you breathe, and how one pose prepares you for the next.
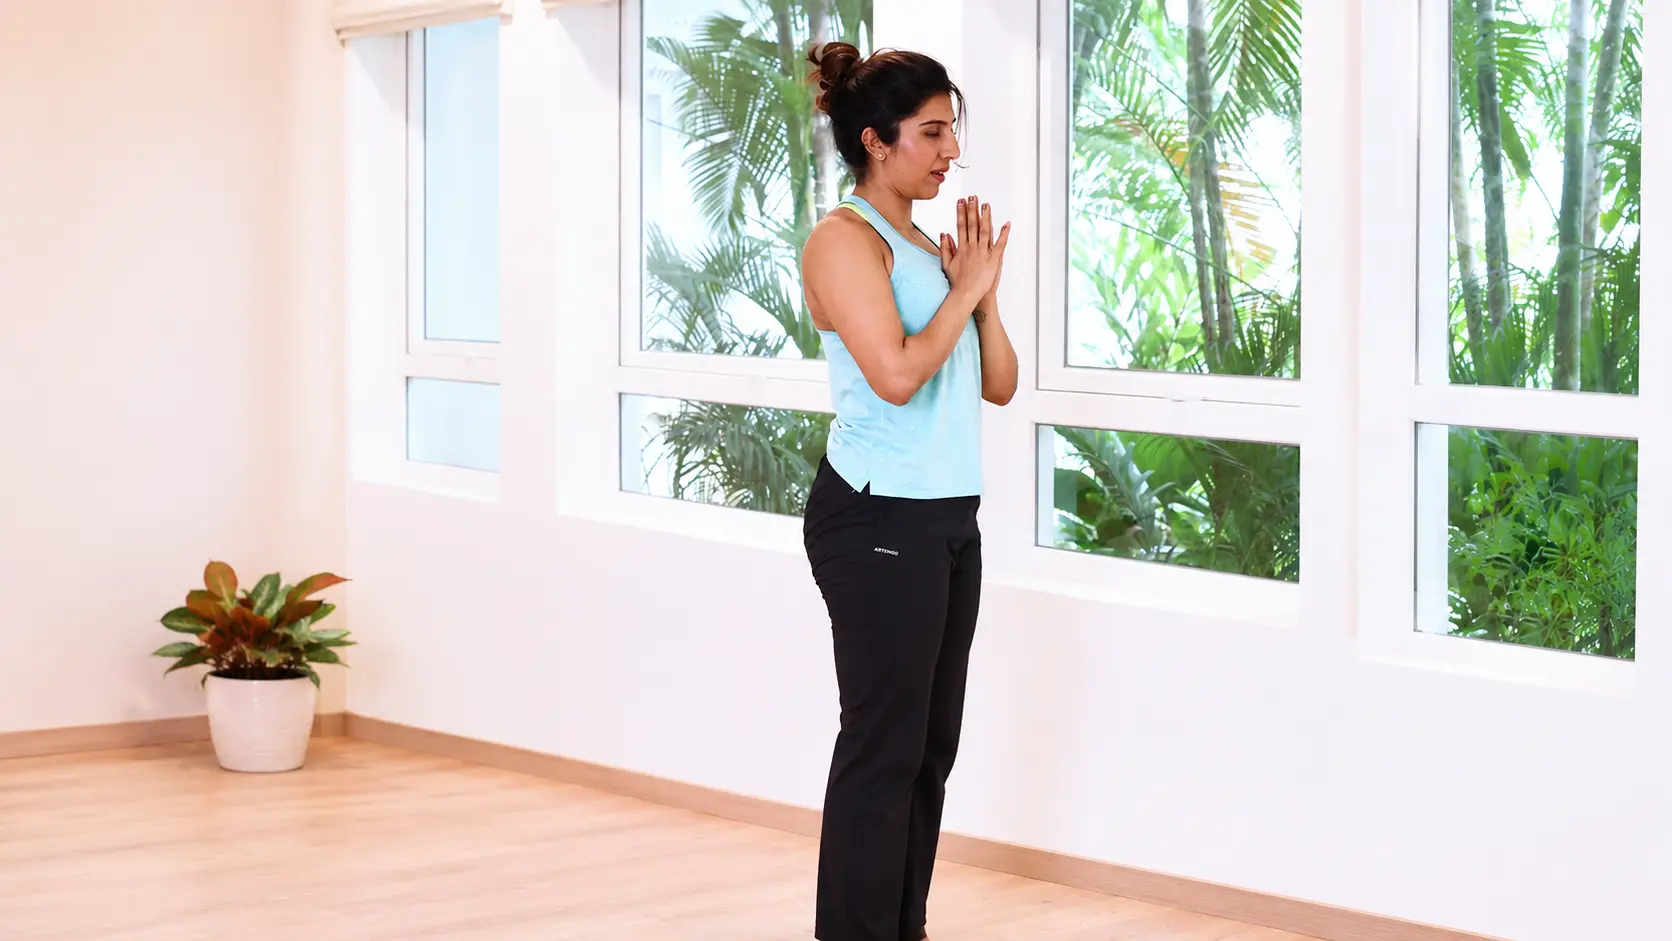
Step 1: Pranamasana, Prayer Pose
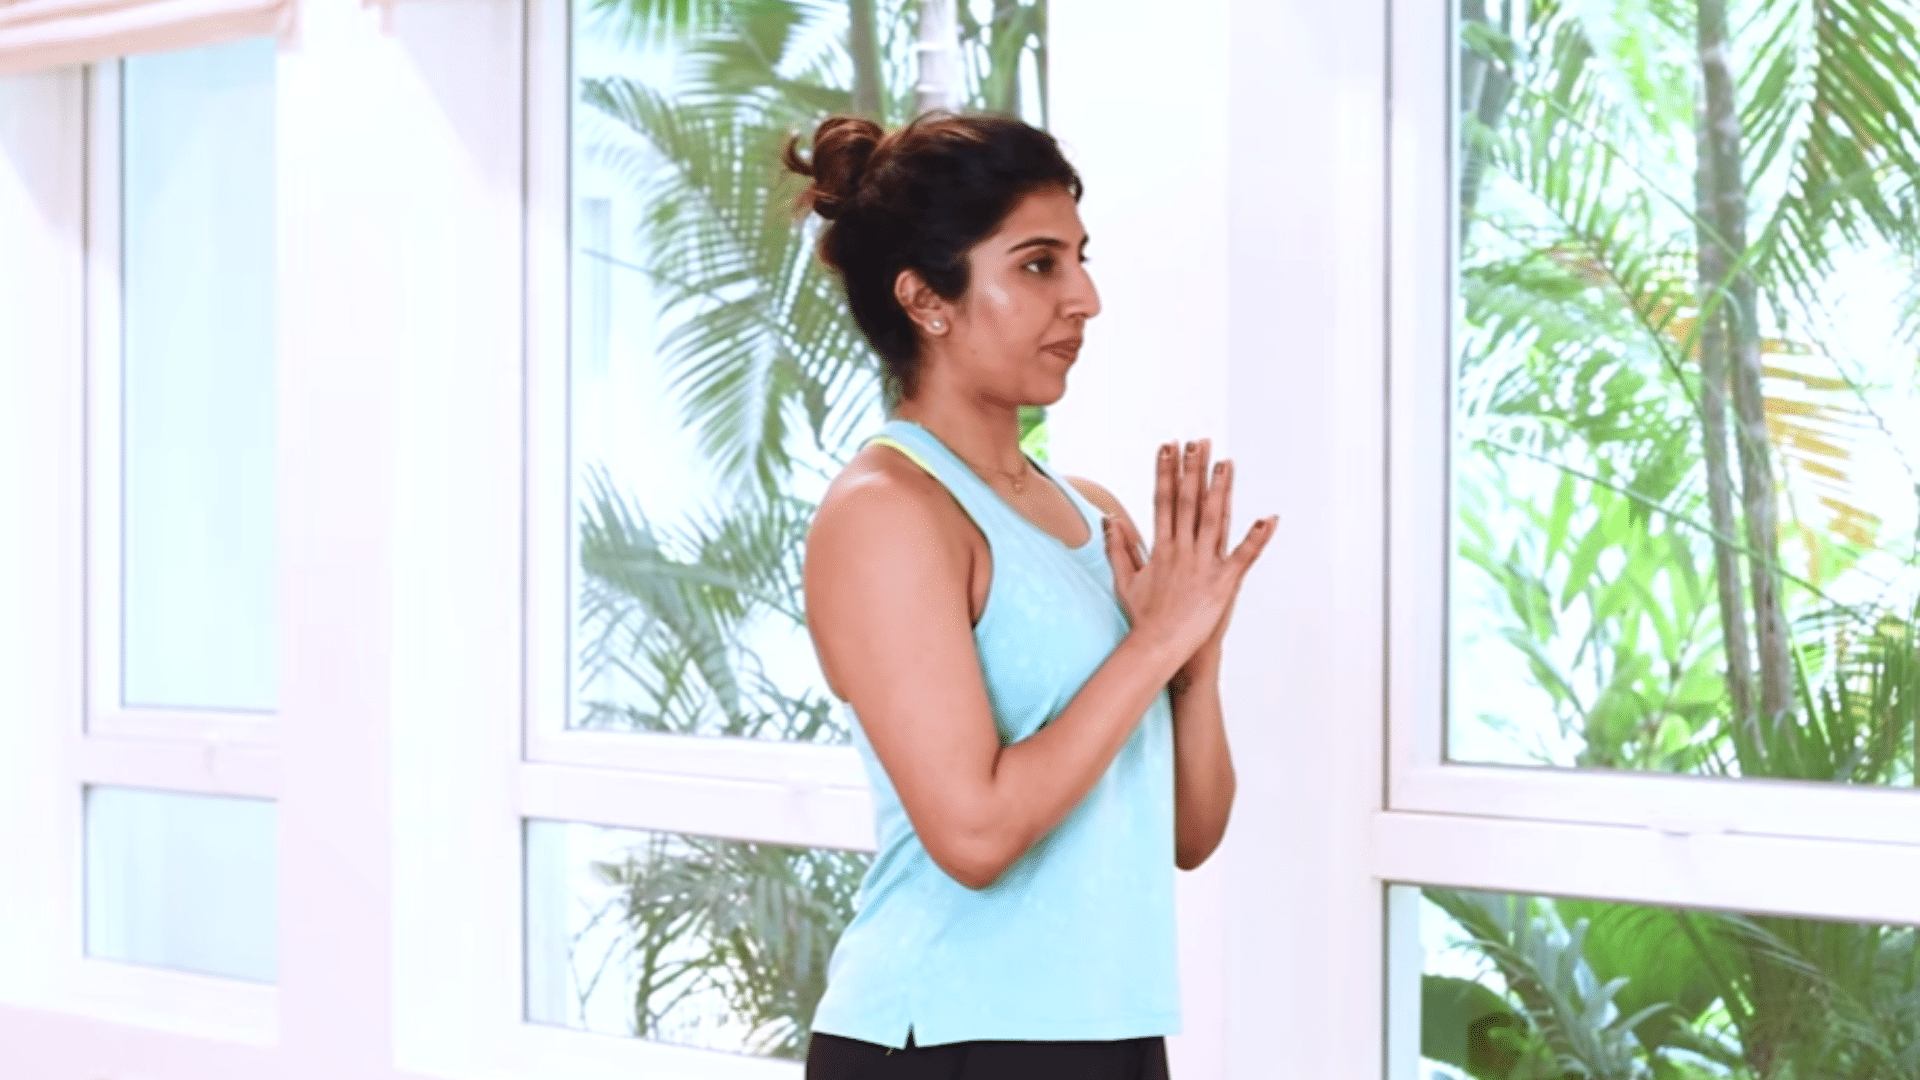
Pranamasana creates a moment of stillness before movement begins. It helps you become aware of your posture, balance, and breathing pattern. This pose helps in mental focus and prepares you to move with intention rather than rushing through the sequence. Starting with awareness often makes the entire practice feel more coordinated and grounded.
- Stand at the top of your mat with your spine tall and your body facing forward.
- Keep your feet together if you feel steady. If balance feels shaky, place your feet hip-width apart. Inhale and roll your shoulders gently back. Let your chest open without forcing it.
- Exhale and keep your pelvis neutral so your lower back feels long and supported. Inhale softly, then bring your palms together at the center of your chest.
- Exhale gently, soften your face, look straight ahead, and pause before moving into the next pose.
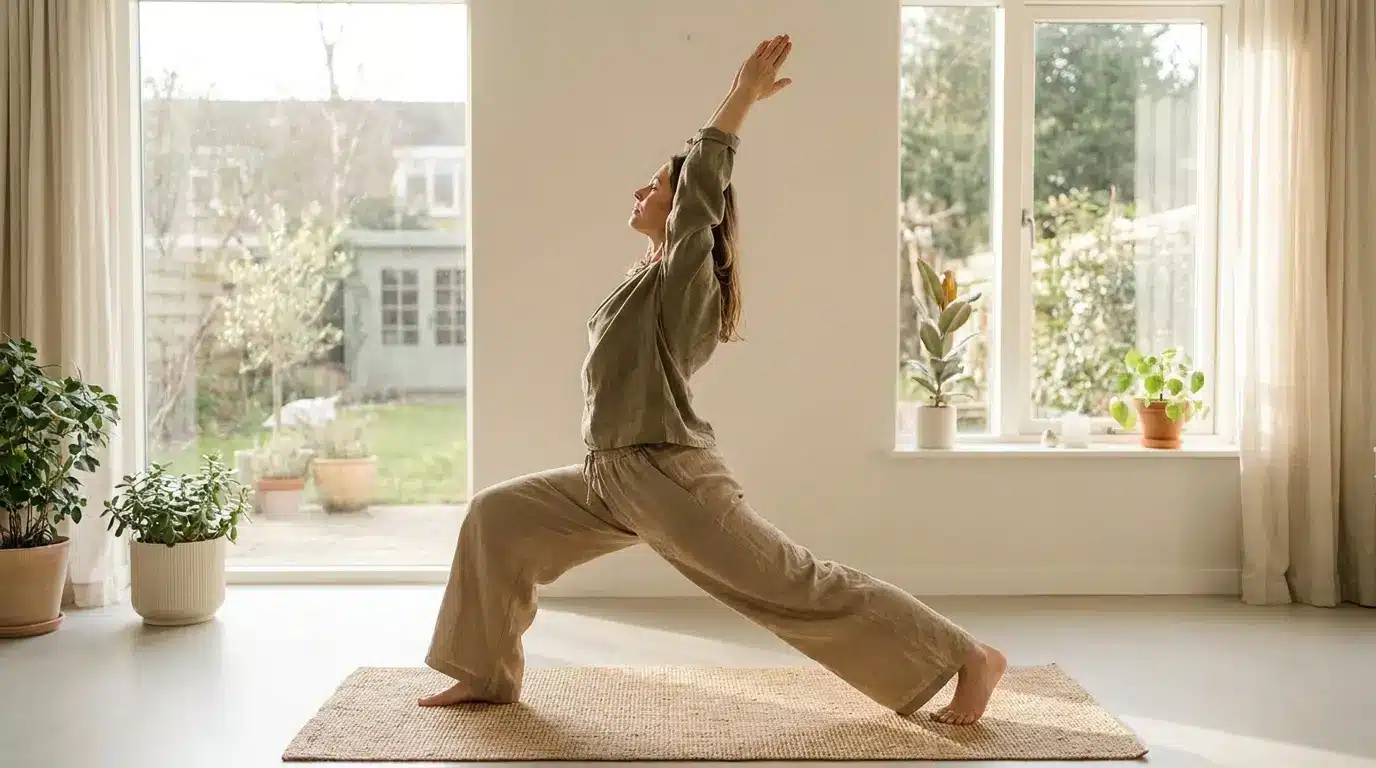
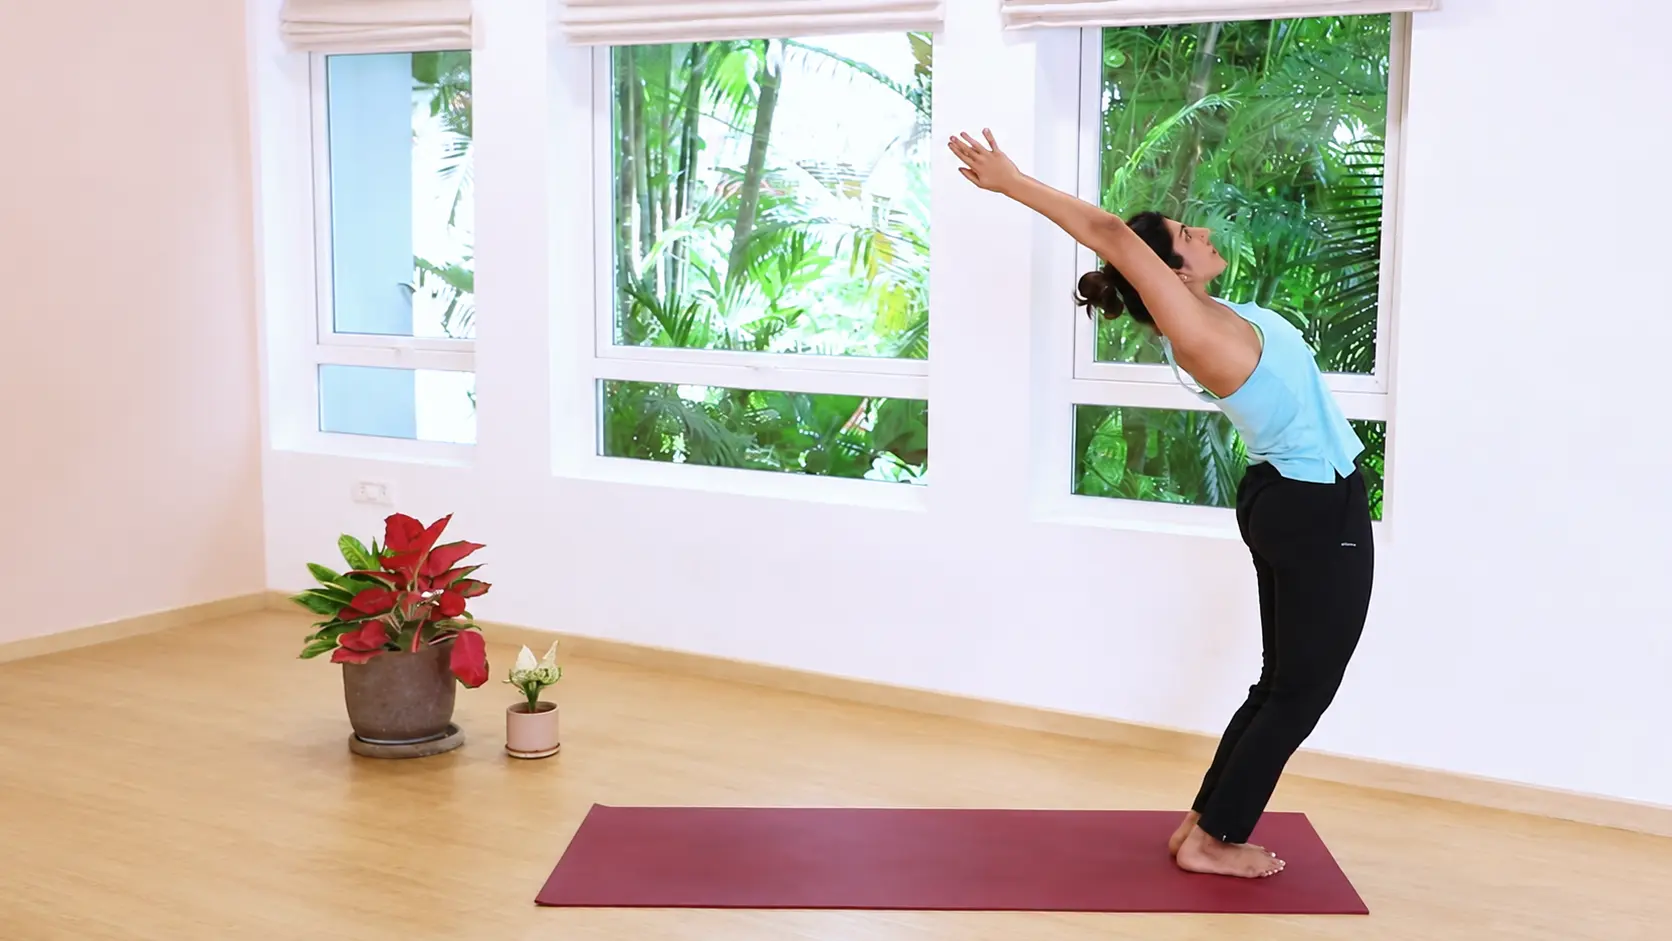
Step 2: Hasta Uttanasana, Raised Arms Pose
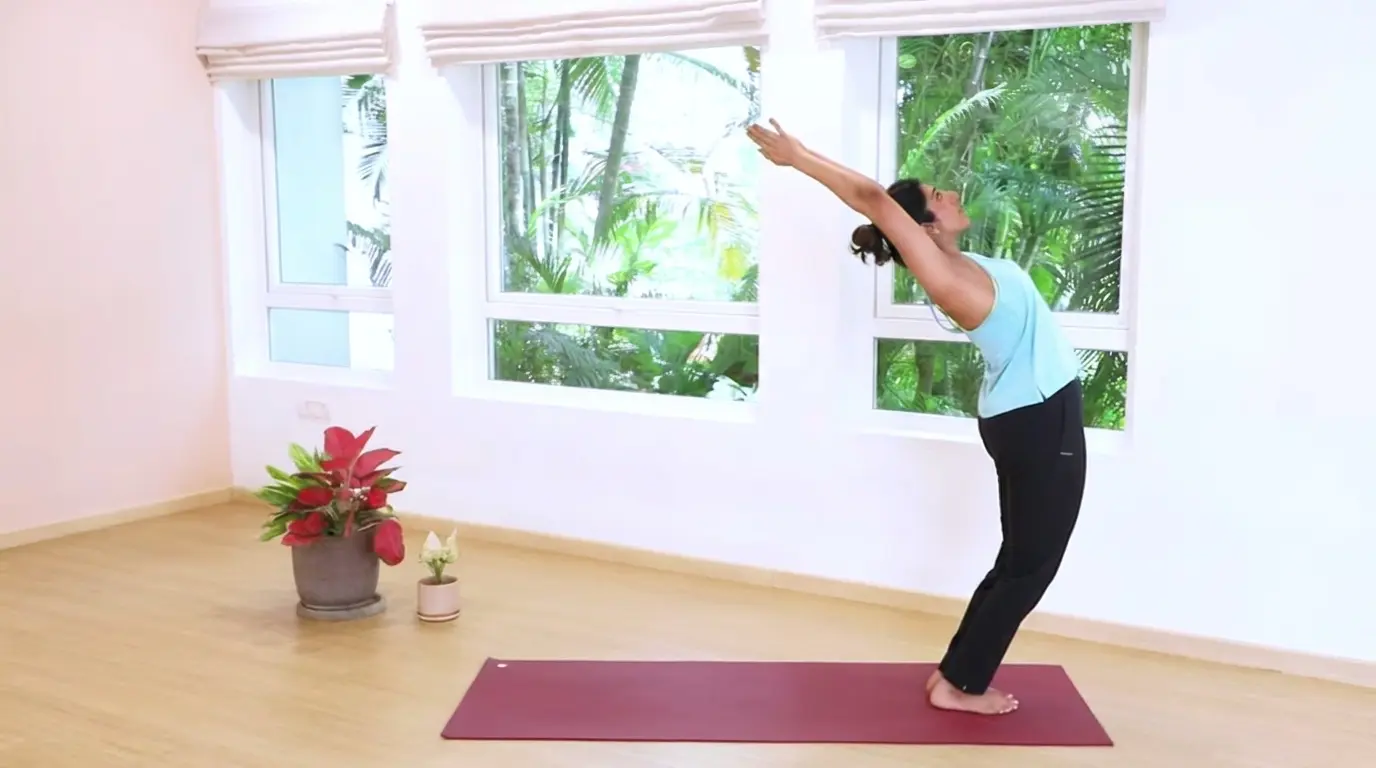
Hasta Uttanasana introduces upward movement into the sequence and helps create a sense of expansion through the front of the body. It encourages better postural awareness and counters the forward-rounded positions many people spend time in during daily activities.
- Inhale and raise your arms upward, keeping your spine long as your body lifts. Keep your knees slightly soft so the backbend does not press into your lower spine.
- Inhale again and gently tuck your tailbone while moving your navel slightly forward. Lift your chest first, then begin to arch back with control.
- Keep your palms together if that feels easy. If your elbows bend or your neck feels tight, separate your hands. Exhale softly and keep your shoulders relaxed as you hold the pose for a brief moment.
Tip: Listen to your body as you lift. Keep the movement gentle, give your shoulders room, and let the backbend come from your chest, not your hips.
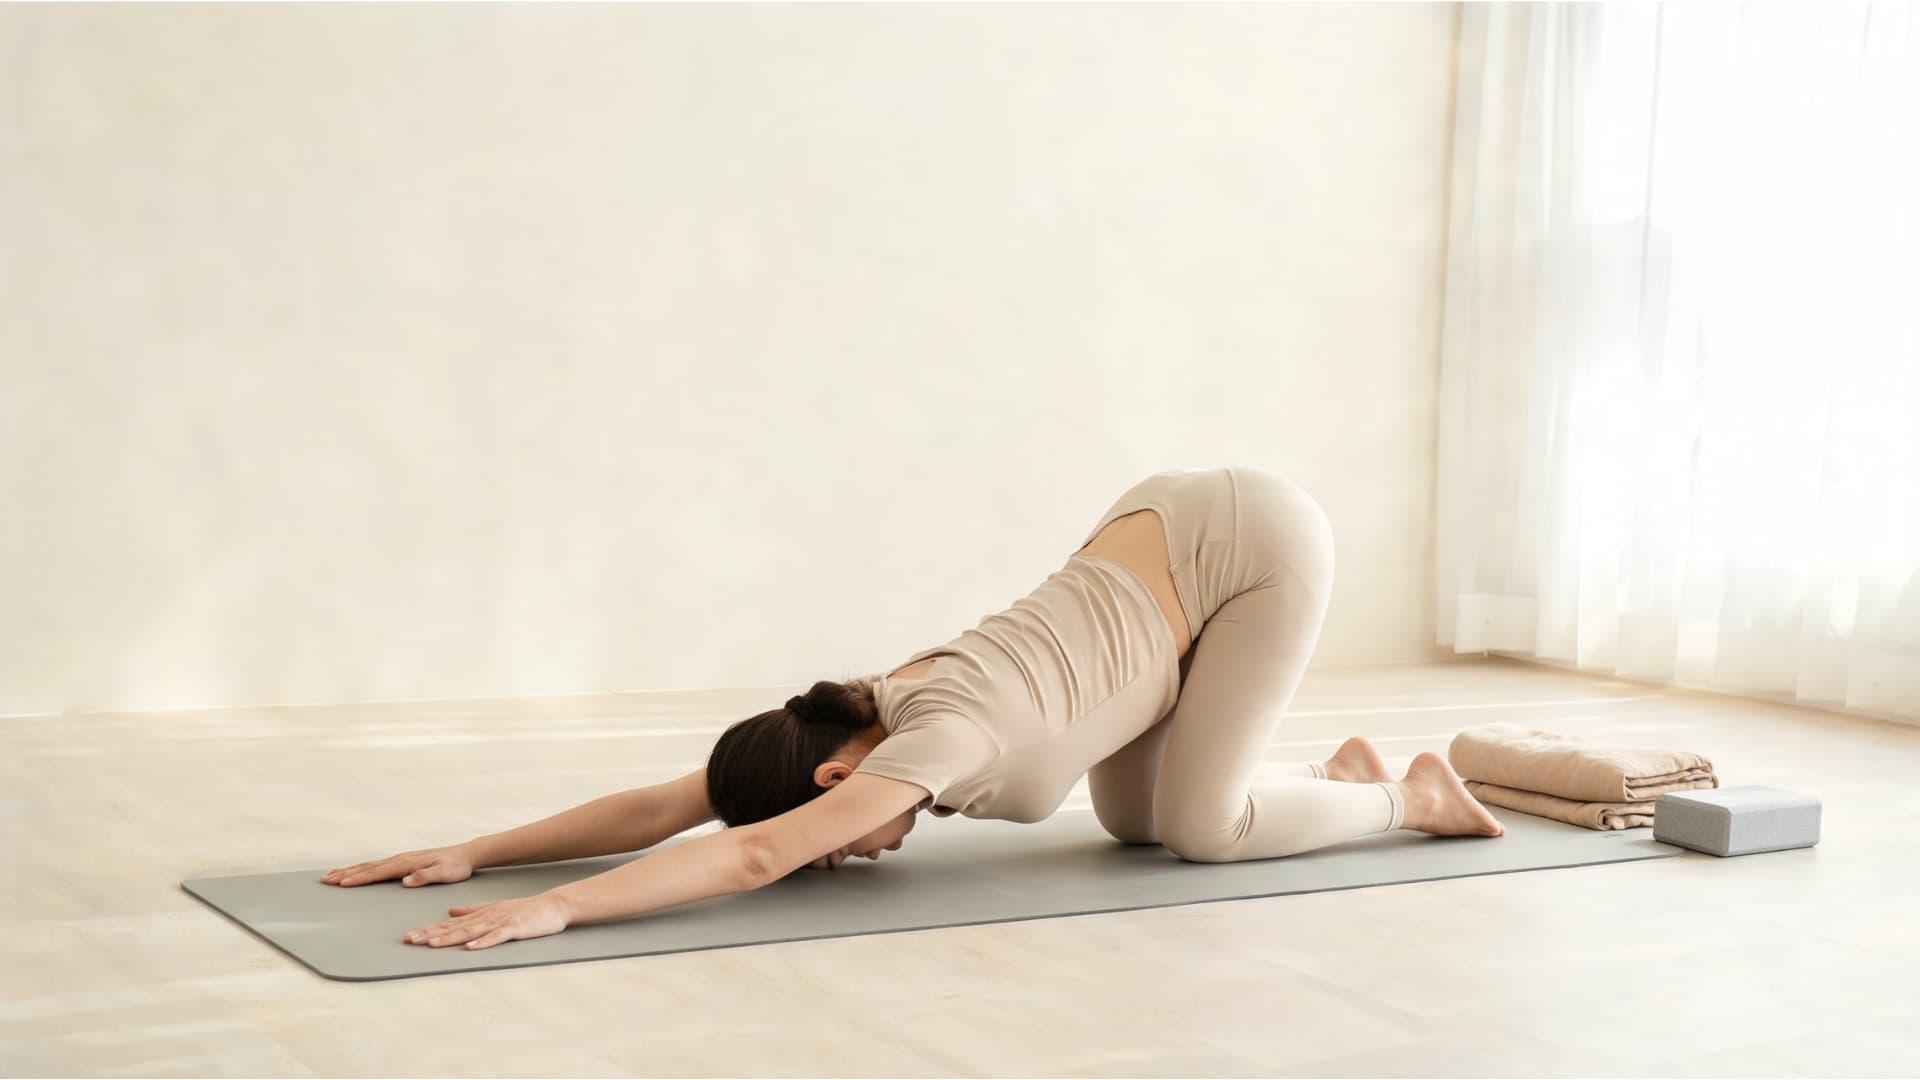
Step 3: Padahastasana, Standing Forward Fold

Padahastasana shifts your attention inward by drawing the body toward the earth. Many practitioners find this position calming because it helps in a slower pace and greater body awareness. The pose also helps you notice areas of tension in the back body, making it easier to move mindfully throughout the remaining sequence.
- Exhale and fold forward from your hips, keeping the movement slow and steady. Bring your palms to the mat if they reach without strain.
- If the floor feels far away, bend your knees and place your fingertips down instead. Exhale again and let your chest move closer to your thighs without pushing your body too hard.
- Soften your legs if your hamstrings feel tight, and let your neck hang loose. Keep your head relaxed so you are not lifting through the neck or holding tension in your face
Step 4: Ashwa Sanchalanasana, Equestrian Pose
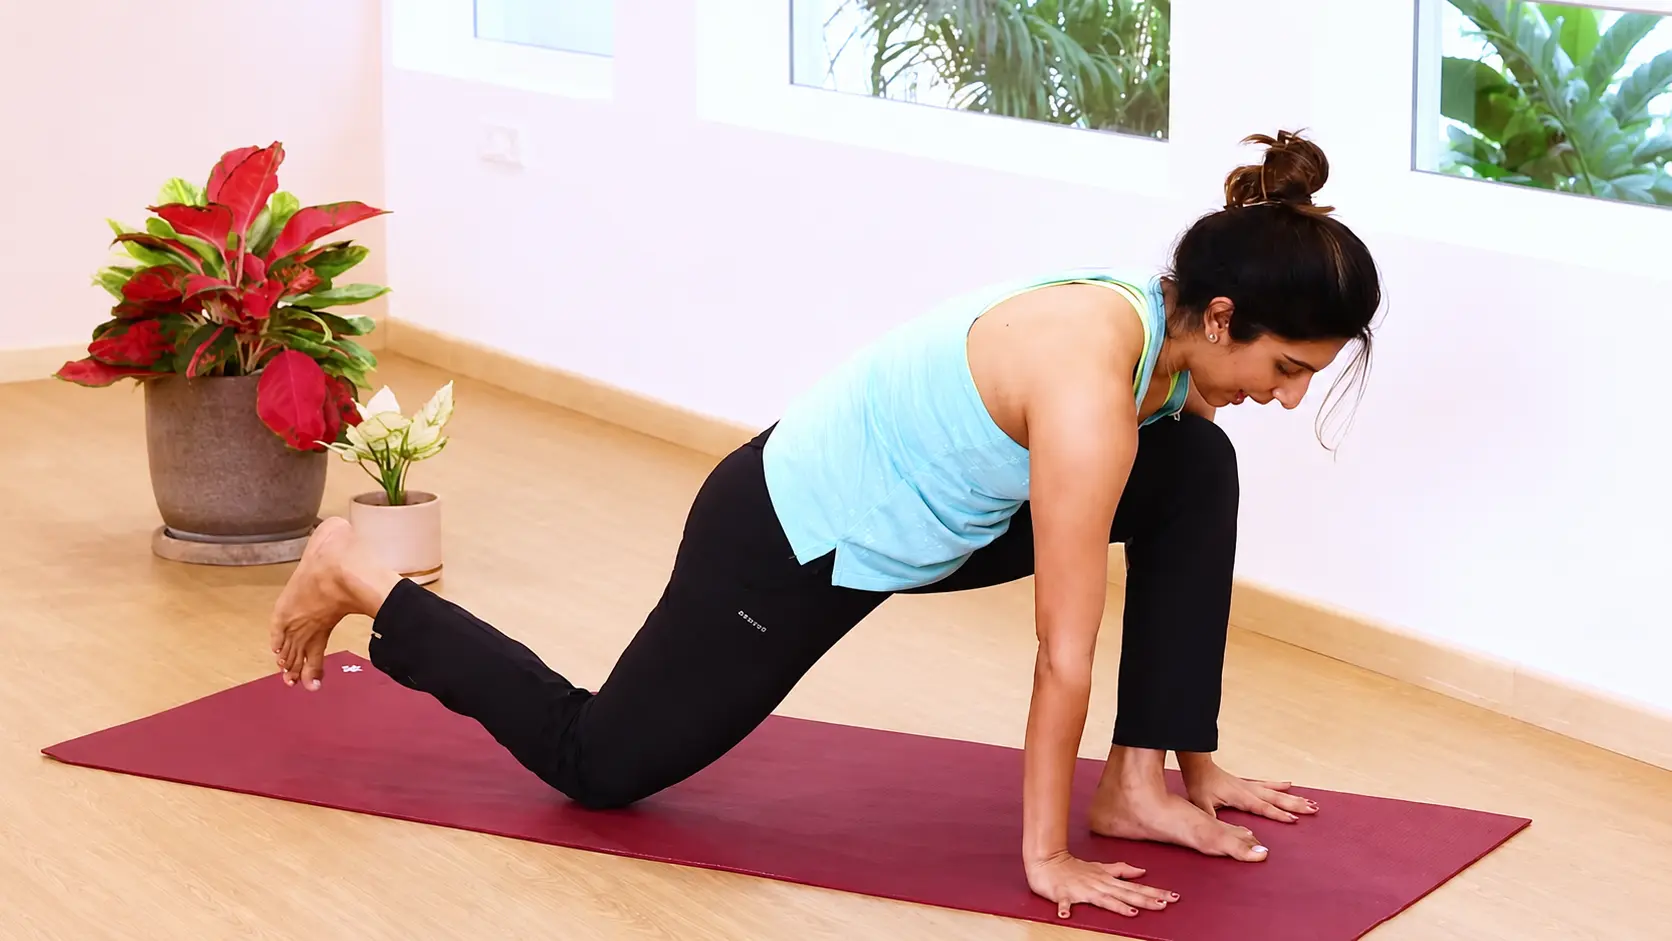
Ashwa Sanchalanasana introduces a split stance that challenges coordination and stability. It asks the lower and upper body to work together while creating space through the hips and torso.
This pose often improves confidence in transitional movements by teaching controlled stepping, balanced weight distribution, and steady body positioning.
- Inhale and step your right foot back with care. Lower your right knee to the mat and relax the toes of your back foot.
- Keep your left knee bent and place your fingertips in line with your front toes. Inhale again and let your hips move down gently without collapsing into them.
- Lift your chest, keep your spine long, and look forward with a soft gaze. Exhale softly and steady your base before moving into the next pose.
Tip: Move with patience here. If your hips feel heavy, lift through your chest and press your fingertips down so you feel supported, not dropped into the pose today
Step 5: Kumbhakasana, Plank Pose
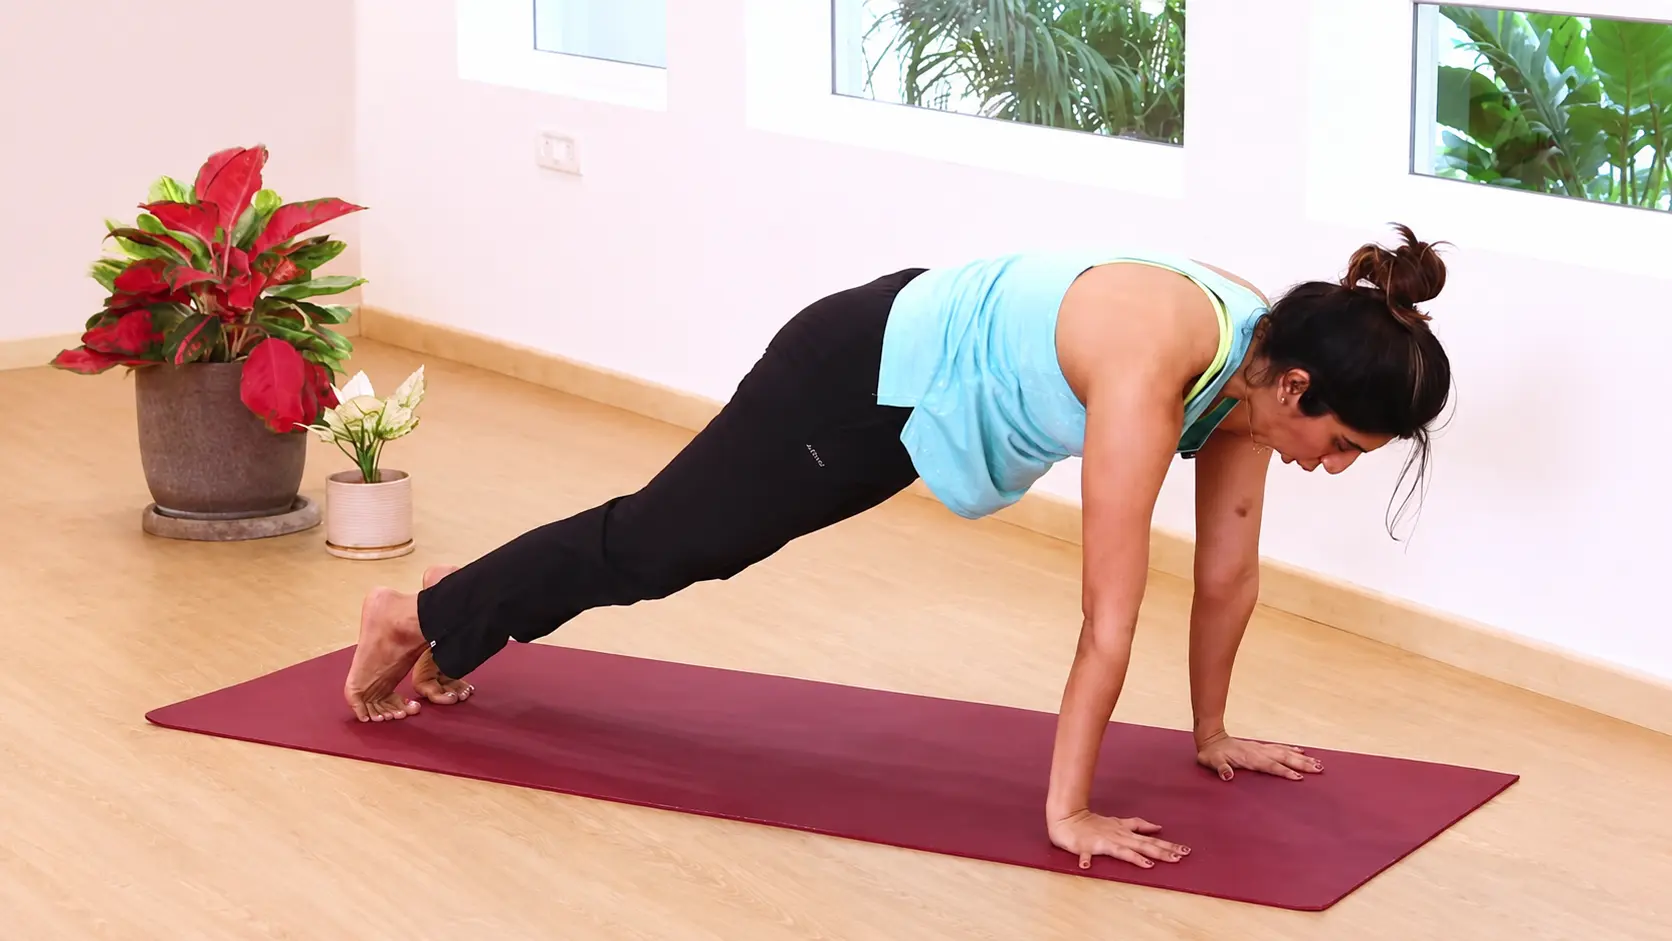
Kumbhakasana develops body awareness through active engagement rather than movement. Holding the body in one strong line teaches control, concentration, and endurance. Many yoga practitioners view this pose as a bridge between flexibility and strength because it requires multiple muscle groups to support the body at the same time.
- Exhale and step your left foot back into plank. Keep your shoulders stacked right above your wrists so your arms feel strong and steady.
- Draw your belly in and make one long line from your shoulders to your heels. Inhale and press through your hands while keeping your chest broad.
- Exhale and avoid sinking your hips or lifting them too high. If a full plank feels too much, try chair yoga routines to support strength safely without putting pressure on the joints.
Tip: Set your hands before you step back. If full plank feels too strong today, lower your knees and keep your belly active so your body stays steady and safe here
Step 6: Ashtanga Namaskara, Eight-Limbed Pose
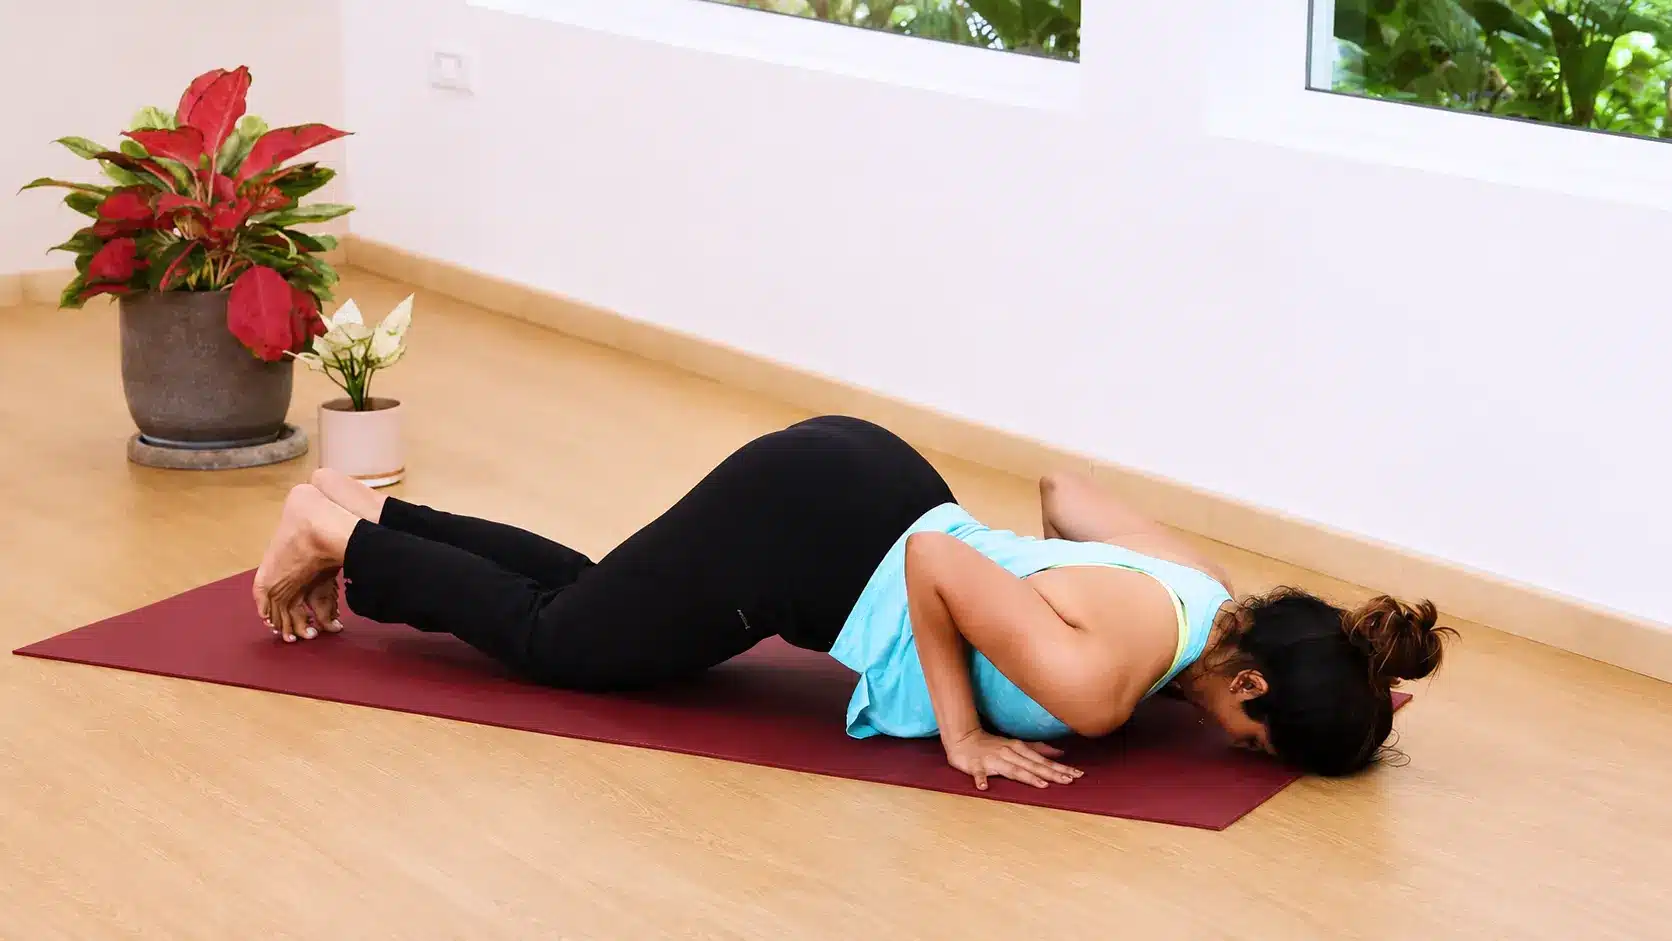
Ashtanga Namaskara teaches controlled lowering and mindful body placement. Unlike simply dropping toward the floor, this pose encourages awareness of how different parts of the body share effort during movement. It serves as a useful learning stage for beginners because it develops coordination and prepares the body for deeper backbending positions.
- After you exhale, pause softly and lower your knees where they naturally land. Keep your knees steady, without moving them too far forward or too far back.
- Shift your hips slightly behind you and look toward the spot where your chin or forehead will land. Hold gently after the exhale and lower your body diagonally with a small scooping action.
- Bring your chest between your hands while keeping your elbows close and controlled. Rest your chin or forehead on the mat, choosing the option that feels safe for your neck
Step 7: Bhujangasana, Cobra Pose
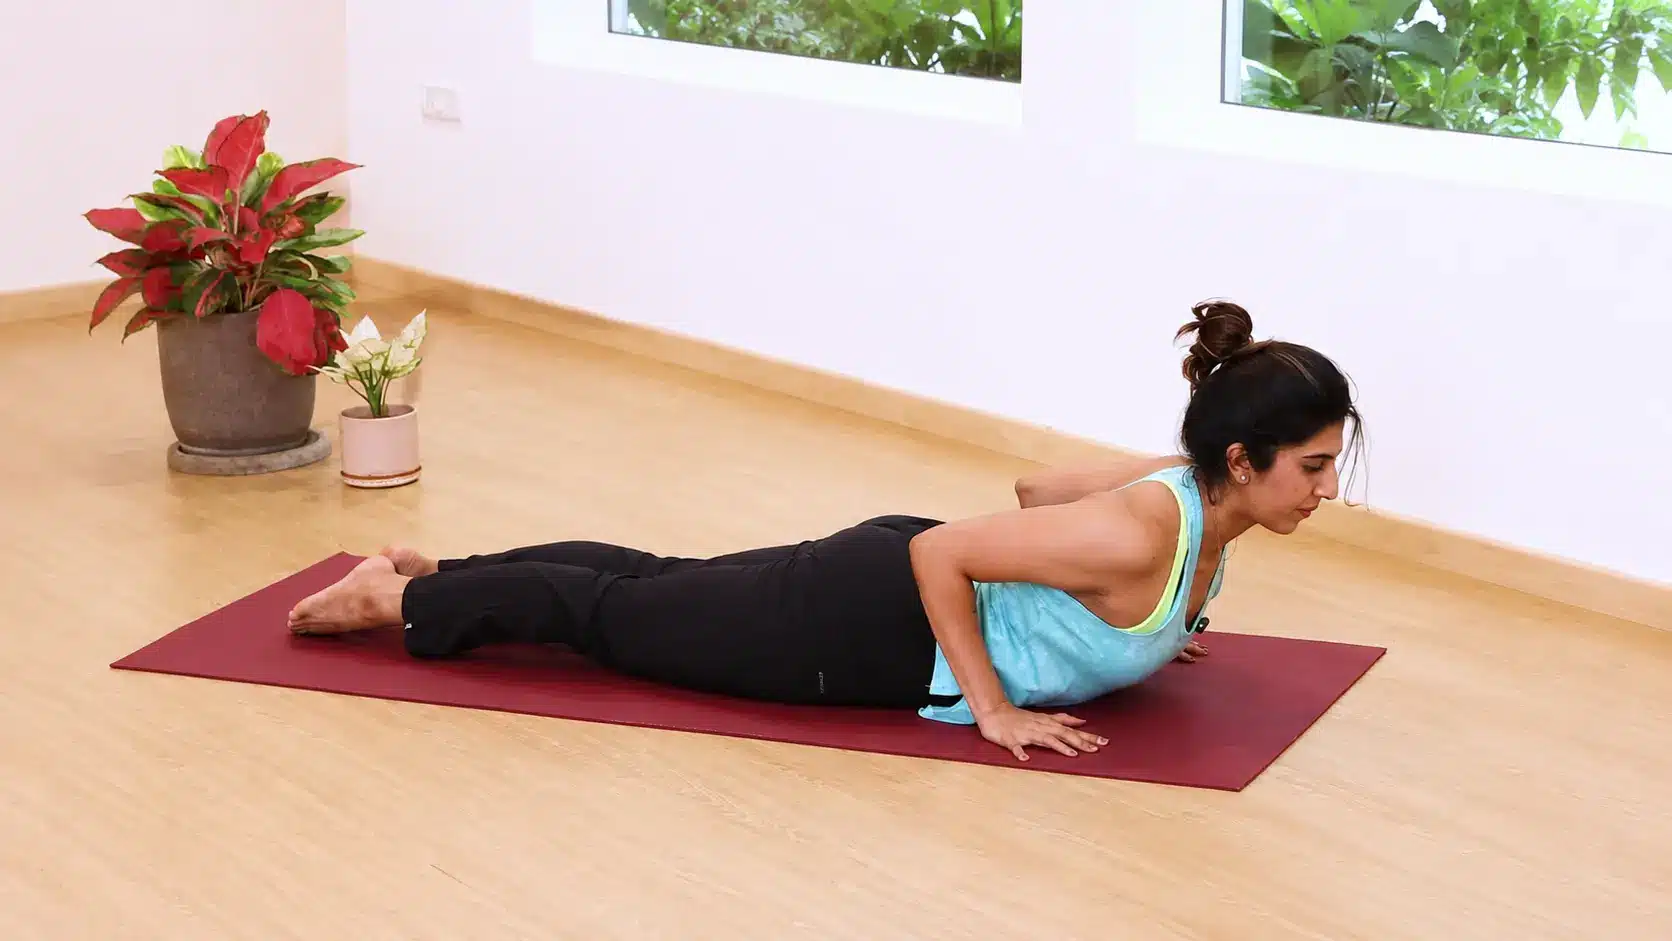
Bhujangasana encourages a feeling of openness through the front of the body while promoting awareness of spinal movement. The pose introduces gentle extension after several forward-moving actions in the sequence.
Many practitioners appreciate Cobra because it creates a balance of strength and mobility in your back without requiring an aggressive range of motion.
- Inhale and use your toes to guide your body forward with control. Slide your chest between your hands before lifting into Cobra Pose.
- Keep your elbows slightly bent so your shoulders and back stay relaxed. Inhale again and lift from your chest instead of pushing hard through your palms.
- Keep your neck easy and move your shoulders away from your ears. Hold a low Cobra if that feels better for your back, and avoid forcing height.
Tip: Keep your Cobra soft today. Lift only as much as your back allows, and let your chest lead the movement instead of pressing too hard through your hands
Step 8: Parvatasana, Mountain Pose
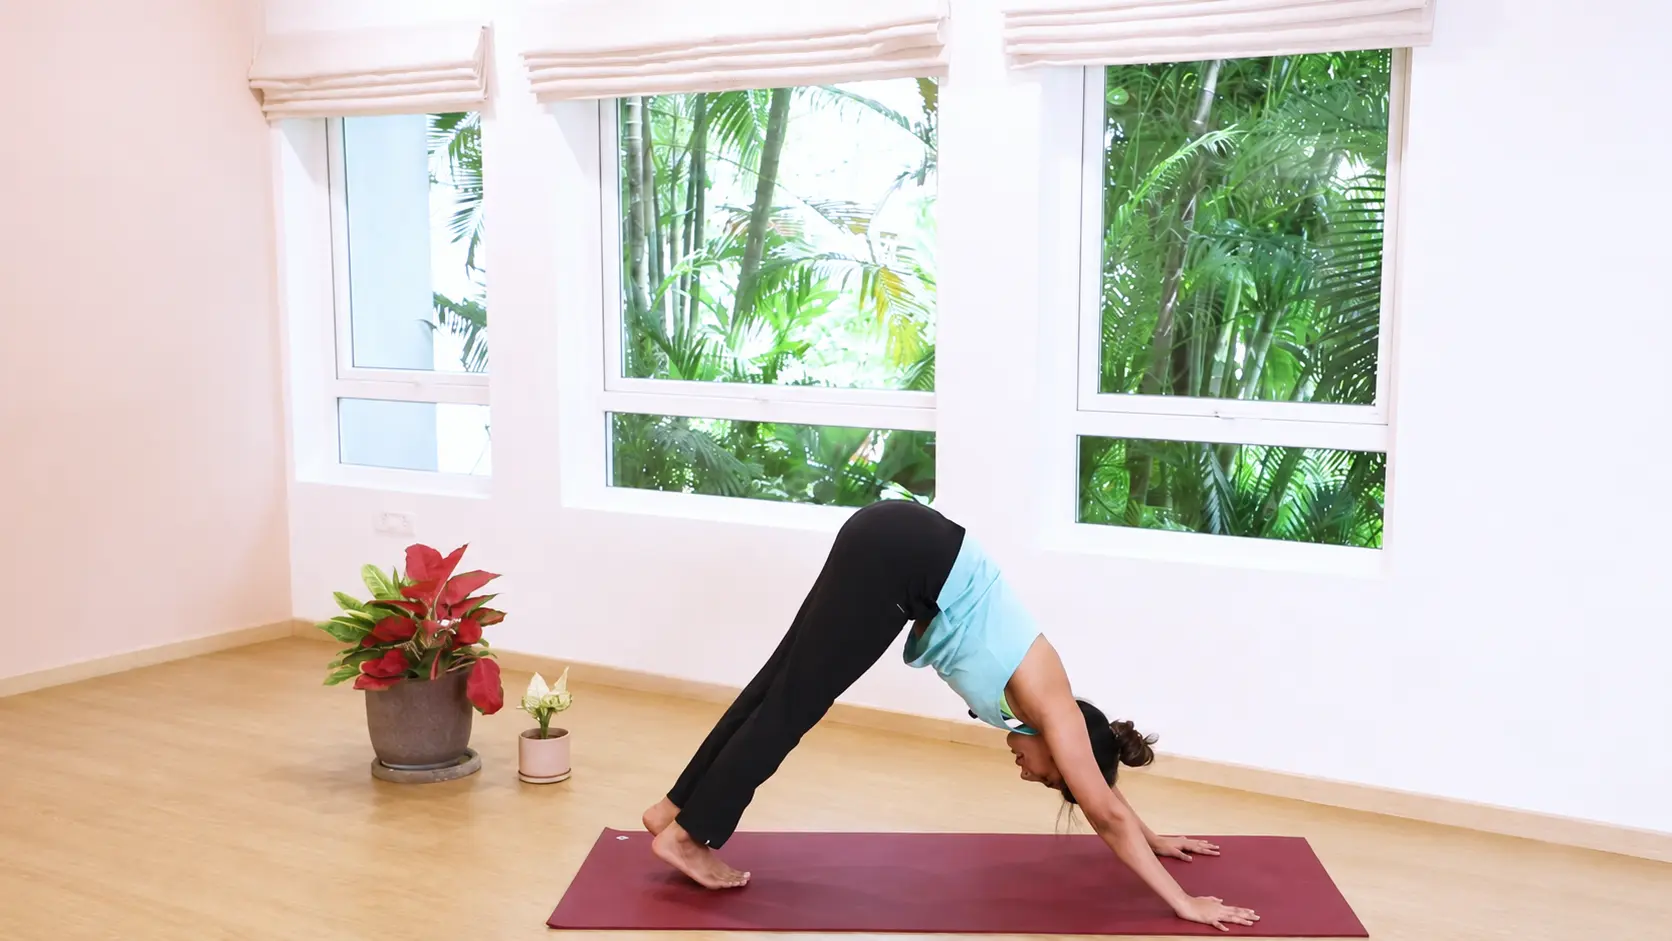
Parvatasana creates a sense of length and spaciousness throughout the body. It shifts attention toward alignment and encourages even distribution of effort between the upper and lower body. This pose often acts as a reset point within the sequence, allowing practitioners to reconnect with their breath before moving forward again.
- Tuck your toes and prepare to liftyour hips up and back. Exhale and press your palms into the mat as your hips rise.
- Create length through your spine before thinking about straightening your legs. Bend your knees if your back rounds or your body feels stuck.
- Push your hips farther back while keeping your neck and shoulders free. Let your heels move toward the floor, but do not force them to touch.
Tip: Focus on space in your spine first. Your heels do not need to reach the mat today, especially if your legs or back feel tight
Step 9: Ashwa Sanchalanasana, Equestrian Pose
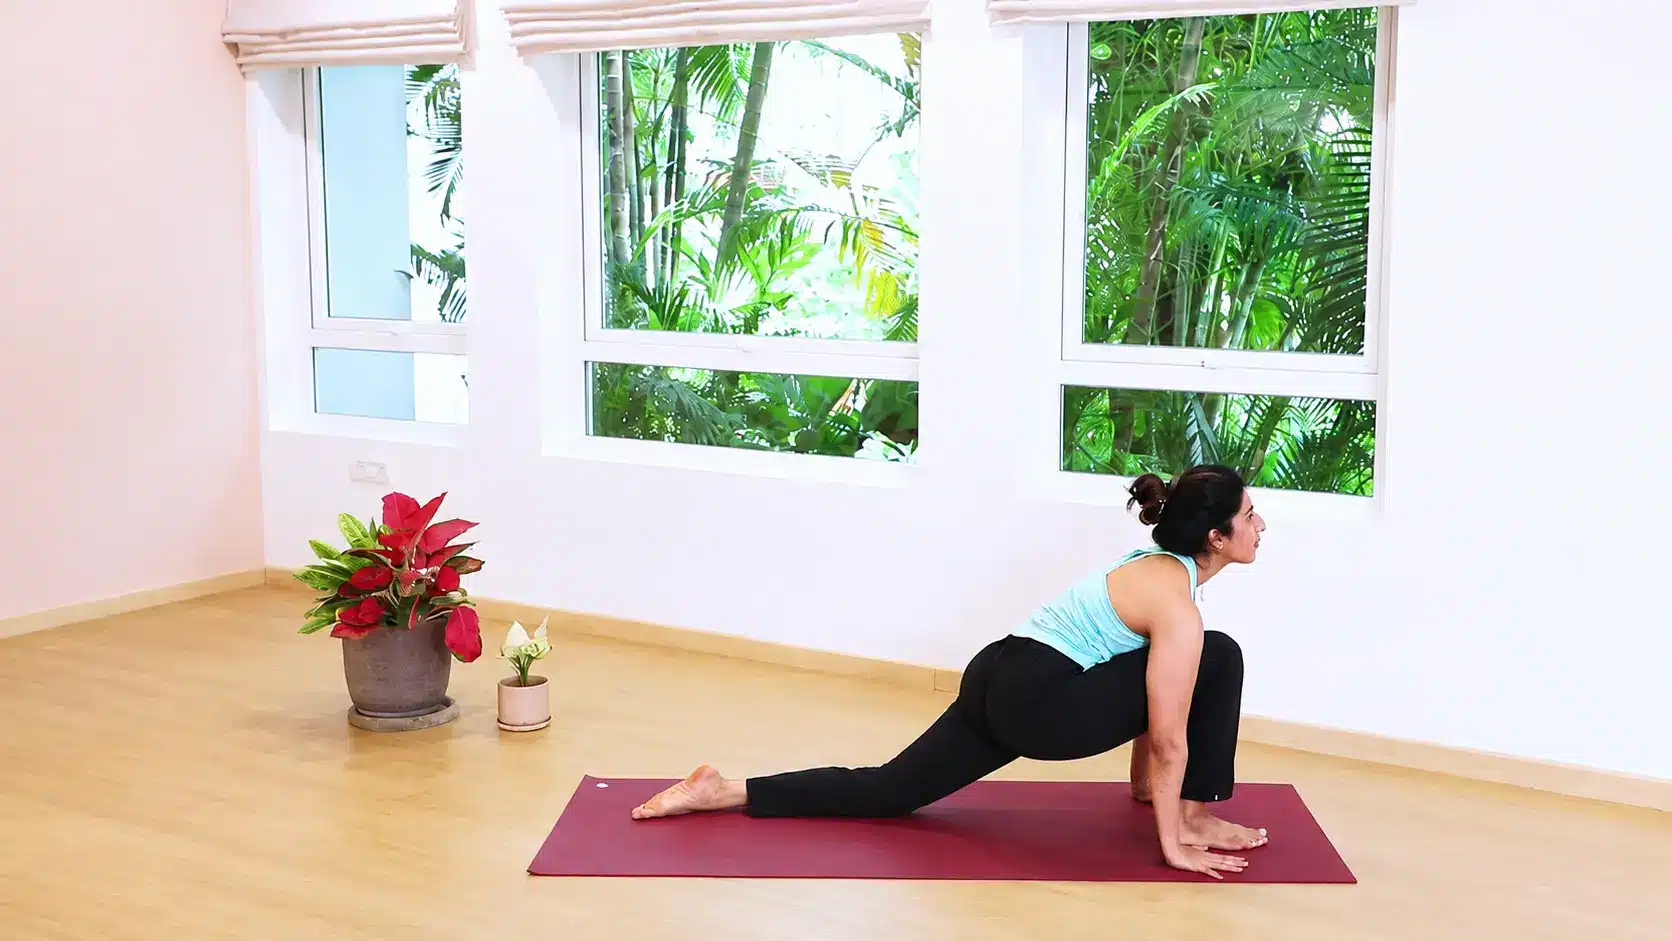
Returning to Ashwa Sanchalanasana on the opposite side helps maintain balance throughout the practice. Repeating the pose with the other leg forward allows both sides of the body to receive equal attention. This symmetrical approach supports better movement patterns and helps prevent one side from doing more work than the other.
- Inhale and step your right foot forward between your hands. If your foot gets stuck halfway, lower your left knee to the mat.
- Use your hand to help bring your right foot forward if needed. Place your fingertips in line with your front toes again.
- Relax the back toes and let your hips drop gently without collapsing. Inhale again, lift your chest, and look forward with a soft gaze
Step 10: Padahastasana, Standing Forward Fold
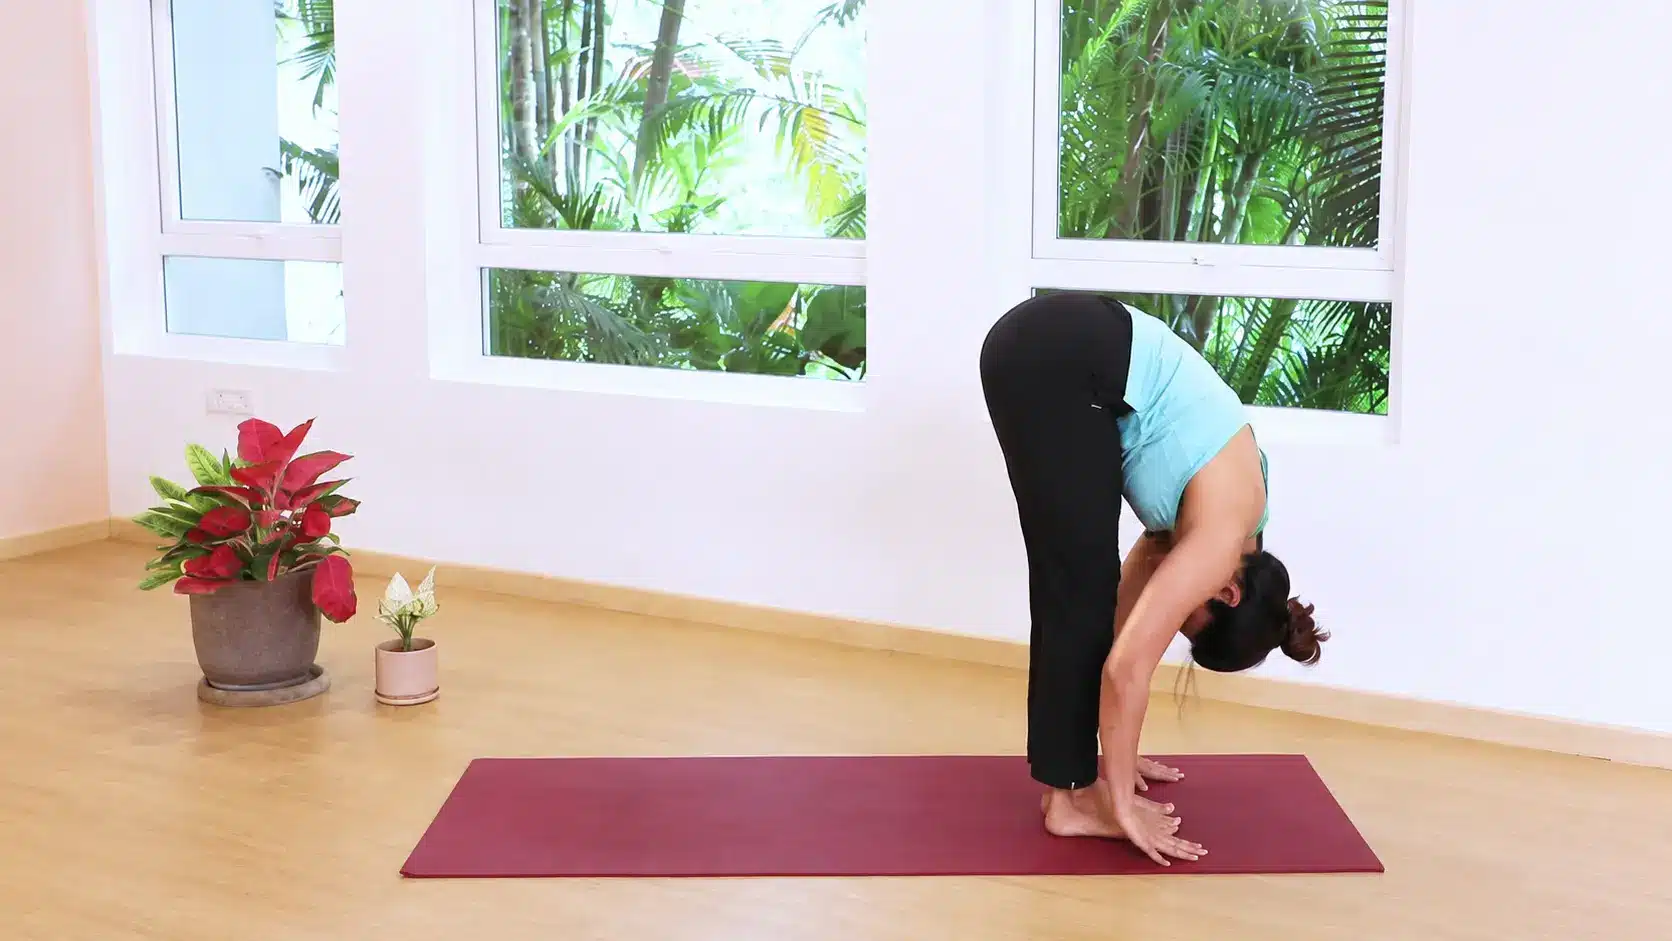
The second Standing Forward Fold acts as a transition between the lower and upper phases of the sequence. It provides a brief pause where the body can settle before returning to standing. Many practitioners use this moment to reconnect with their breathing rhythm and notice how the previous poses have affected their bodies.
- Exhale and step your left foot forward to meet your right foot. Join your feet at the top of the mat, or keep a small gap for balance.
- Fold over your legs and let your head hang naturally. Bend your knees if the backs of your legs feel tight.
- Keep your hands or fingertips near the floor without forcing the stretch. Exhale again and allow your neck, shoulders, and face to soften.
Tip: Let this fold feel calm. Bend your knees as much as you need, and give your back room to release before you come up again
Step 11: Hasta Uttanasana, Raised Arms Pose
The second Raised Arms Pose creates an uplifting transition back toward an upright position. It helps reestablish length through the body after the forward fold and encourages smooth, controlled movement. This pose also reinforces postural awareness, making the return to standing feel stable rather than rushed.
- Inhale and extend your arms forward before lifting your upper body. Rise slowly instead of swinging up suddenly.
- Lengthen through the front of your body as you come to stand. Take your arms overhead and keep your movement steady.
- Gently tuck your tailbone, lift your chest, and arch back only a little. Keep your palms joined if that feels natural, or separate your hands to make more shoulder space.
Tip: Come up slowly so your balance stays steady. Keep the backbend small today if your lower back, neck, or shoulders need more care.
Step 12: Pranamasana, Prayer Pose
The final Pranamasana marks the completion of one side of the sequence. It offers an opportunity to pause, observe, and acknowledge the work you have done.
Rather than ending abruptly, this pose helps create a clear closing point that encourages reflection before beginning another round or finishing the practice.
- Exhale and bring your palms back to the center of your chest. Stand tall with both feet grounded on the mat.
- Soften your shoulders and let your arms feel relaxed. Keep your face calm and your gaze steady.
- Let your breath settle before moving into the next side or the next round. If you are stopping here, release your hands by your sides and notice how your body feels
| Full round note: These 12 steps complete one side of Surya Namaskar. For a balanced full round, repeat the sequence and take the opposite leg back in Step 4. This gives both sides equal work. Keep the pace slow until your breath and body position feel steady. |
Watch the full video for a step-by-step guide:
Benefits of Surya Namaskar
Surya Namaskar is useful because it brings many types of movement into one short practice. It can warm your body, wake your spine, and steady your focus without needing a long routine or extra equipment. Here are the main benefits you can expect when you practice with care:
- Full-body movement: Surya Namaskar engages your arms, legs, back, core, shoulders, and hips in a single sequence. You fold, step, hold, lift, and press back to give the body a complete movement pattern rather than an isolated stretch.
- Better coordination: Since each pose connects to a breath cue, your body and mind learn to work together. This can help you move with more control, especially if you usually feel clumsy in yoga flows.
- Morning readiness: The sequence feels sufficiently active to shake off sleep stiffness. Even a few slow rounds can help you feel more awake before work, study, or a longer yoga practice.
- Steady fitness support: Regular practice can help with strength, mobility, and daily activity goals. It works best when paired with good food, enough rest, and other healthy habits.
Surya Namaskar Variations
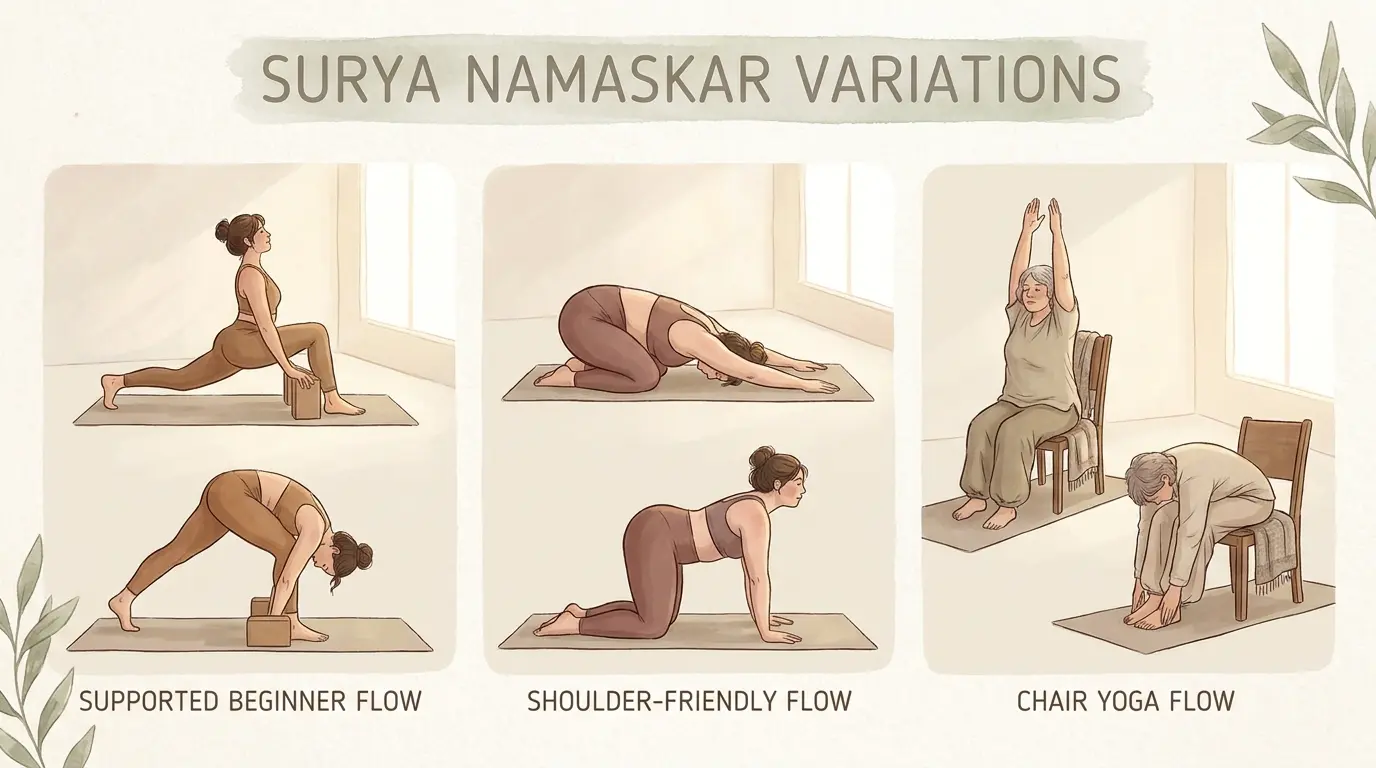
Surya Namaskar doesn’t have to look the same for everyone. Your body may need a lighter version on some days and a fuller version on others. That’s normal. The right variation helps you keep the rhythm of the practice without forcing your wrists, shoulders, back, hips, or knees into positions they’re not ready for.
Choose the version that lets you breathe smoothly and move without strain. Here are three useful ways to adjust the practice based on your comfort and body needs
1. Supported Beginner Variation
The supported beginner variation is for days when the full sequence feels too strong or too tight. It keeps the same flow but gives your body more room.
You can widen your stance, bend your knees, lower your knees in a plank, and use fingertips instead of flat palms. This version is useful when you’re learning the order, building strength, or returning to practice after a break.
- Best for building confidence: Choose this variation if balance, tight hamstrings, wrist pressure, or plank strength makes the classical version feel hard.
- How to adjust it: Keep feet hip-width apart, bend the knees in forward folds, lower the knees in plank, and separate the hands in Raised Arms Pose if the shoulders feel restricted
2. Shoulder-Friendly Variation
The shoulder-friendly variation is helpful when lowering through Ashtanga Namaskara feels uncomfortable around the shoulders or neck. Instead of bringing the chest down, you can move from plank into Child’s Pose, then use a gentle Cat-Cow action before returning to Parvatasana.
This keeps the practice moving but reduces pressure on the upper body. Use this version carefully if you already have pain or an old injury.
- Best for upper-body discomfort: Try this option when the chest-lowering movement creates strain, pinching, or fear of putting too much load on the shoulders.
- How to modify it: Replace Ashtanga Namaskara with Child’s Pose, use Cat-Cow instead of Cobra, then tuck the toes and return to Parvatasana with contro
3. Chair Surya Namaskar
Chair Surya Namaskar is a gentle option when getting down to the mat feels difficult or unsafe. It keeps the idea of the practice alive through supported standing movements, seated stretches, and controlled breathing.
You can use the chair to steady your hands during folds, soft lunges, and upward stretches. This version works well for older adults, beginners with limited mobility, or anyone who wants a lighter practice.
- Best for limited mobility: Choose this variation if floor poses feel uncomfortable, balance feels uncertain, or your knees, hips, or back need extra support during practice.
- How to practice it: Use a stable chair, move slowly through reach-and-fold actions, keep your breath steady, and avoid leaning too heavily on the chair.
Who Should Be Careful While Doing Surya Namaskar?
Surya Namaskar can support strength, flexibility, and steady breathing, but it is not the same experience for every body. As a yoga therapist, I always look at how a person feels during the movement, not just how the pose looks. The table below can help you understand when the sequence may need extra care, support, or guidance.
| Who Should Be Careful | Why | Safer Choice |
|---|---|---|
| Shoulder or neck pain | Plank, lowering, and Cobra may strain the area. | Use supported versions. |
| Wrist pain | Weight-bearing poses can feel sharp. | Use props or teacher guidance. |
| Back pain | Folds and backbends may aggravate symptoms. | Bend knees and keep Cobra low. |
| Pregnancy | Some poses may not suit this stage. | Practice with prenatal guidance. |
| Heart or blood pressure concerns | Fast rounds may feel too intense. | Move slowly after medical advice. |
| Surgery or illness recovery | The body may not be ready for load. | Wait for clearance and restart gently. |
| Dizziness | Folds and quick changes may worsen it. | Stop, rest, and ask for guidance. |
Being careful does not mean Surya Namaskar is off-limits forever. It means your practice may need to look different right now. If you feel sharp pain, dizziness, breathlessness, or fear while moving, stop and choose a gentler option
Frequently Asked Questions (FAQs)
Can we do Surya Namaskar during periods?
It depends on how your body feels. If your flow is heavy, cramps are strong, or energy feels low, it’s better to rest or choose gentle yoga instead. If you feel comfortable, keep the practice slow, reduce the rounds, and avoid pushing through discomfort.
What is 108 Surya Namaskar?
108 Surya Namaskar means completing 108 rounds in one practice session. It is usually done by experienced yoga practitioners during special events or personal challenges. Beginners should not start with this. Build strength, breath control, and stamina slowly before trying a high number of rounds.
Are Surya Namaskar mantras compulsory?
No, Surya Namaskar mantras are not compulsory. You can practice the sequence with only movement and breathing. Mantras are optional in traditional practice. Some people use them to add focus and devotion, while others keep the practice simple and physical.
Can Surya Namaskar replace a gym workout?
Surya Namaskar can support strength, flexibility, stamina, and daily movement, but it may not fully replace a gym workout for every goal. If you want heavy strength training, muscle gain, or sport-specific fitness, you may still need other exercises along with yoga
Bottom Line
You’ve now got a clear map of the Surya Namaskar steps, from the first steady standing pose to the final pause at the heart. What matters most is not how fast you move.
It’s how honestly you listen to your body while you breathe, bend, step, and rise.
Start with one slow round on each side. Let your feet find the mat, let your shoulders soften, and don’t rush the parts that feel awkward.
That’s where the practice starts to teach you. Come back to this guide whenever the sequence feels unclear.