


| Disclaimer: This article is for informational and educational purposes only. It does not constitute medical advice and should not replace consultation with a qualified healthcare provider. Always consult a doctor before making changes to your exercise routine, especially if you have an injury, medical condition, or are pregnant. |
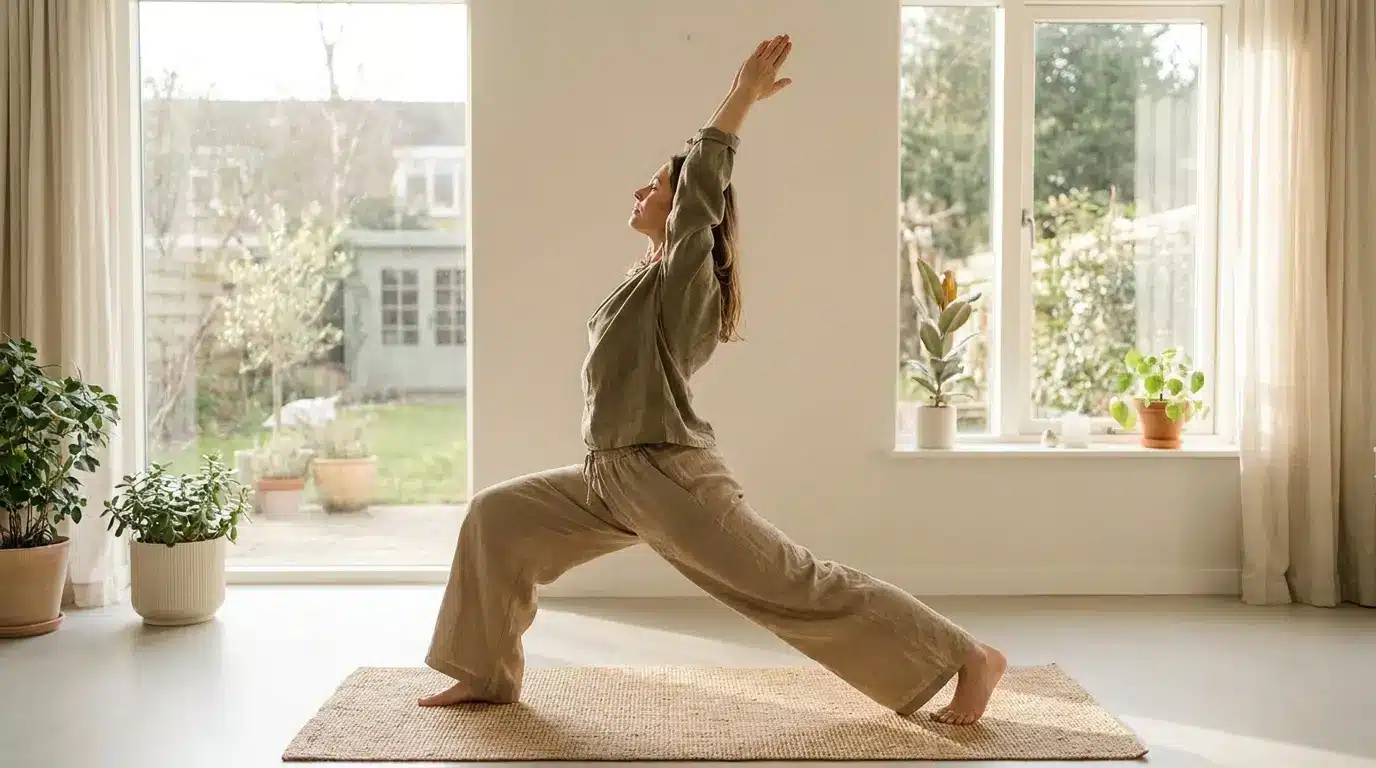
Restorative yoga poses work by putting your nervous system into a parasympathetic state, the physiological opposite of stress, so your muscles can release tension they have been holding without any active effort on your part.
I teach this style to students who are tired, overstimulated, or recovering, and it consistently produces more physical release than sessions twice as intense.
If you sit for long hours, carry chronic stress, or simply feel like your body never fully switches off, these poses give your system a clear signal to rest.
| Difficulty | Beginner to Advanced |
| Duration | 10 to 60 minutes per session; 3 to 5 minutes per pose |
| Props Needed | Bolster or firm pillow, 2 to 3 blankets, yoga blocks, strap (household substitutes work) |
| Best Time | Evening, after work, or on rest days |
| Avoid If | Recent abdominal surgery, unmanaged high blood pressure (for inversions), second or third trimester pregnancy without modifications |
What Restorative Yoga Actually Does to Your Body
Most yoga styles ask your muscles to work. Restorative yoga does the opposite: props hold your body so your muscles do not have to. Understanding what restorative yoga functionality means looks at that shift physiologically. When your muscles are fully supported and not gripping, your brain receives a signal that the environment is safe.
Heart rate slows. High cortisol triggers quiet down. The vagus nerve is activated, shifting your autonomic nervous system from sympathetic overdrive to parasympathetic recovery.
This is not passive relaxation in the sense of doing nothing. Your body is actively repairing: blood circulation improves in areas that were compressed during sitting, fascia softens around joints that have been held rigid, and your diaphragm deepens its movement because your chest is no longer tight.
Props You Will Need Before You Begin
Every restorative yoga pose depends on support, so setting up your props before you start matters. You do not need to spend anything. Here is what works:
- Bolster or firm pillow: The primary support for most poses. A couch cushion or folded duvet works well.
- Blankets or folded towels: Used under the knees, head, or hips to close small gaps and reduce pressure.
- Yoga blocks or thick books: Raise supports to the right height so you do not have to strain.
- Strap or long scarf: Helpful for poses like Supported Happy Baby if reaching your feet creates shoulder tension.
- Eye pillow or folded cloth: Covering your eyes deepens relaxation by reducing visual input to the brain.
The goal is to be so supported that you feel no need to grip, hold, or adjust. If you find yourself shifting every thirty seconds, add more props until the position feels genuinely settled.
Best Restorative Yoga Poses for Relaxation and Stress Relief
The thirteen poses below cover the full range of restorative positions: forward folds, gentle backbends, side-lying shapes, inversions, and twists. You do not need to practice all of them. Start with two or three that match what your body needs today.
1. Legs Up the Wall (Viparita Karani)
This is the pose I recommend first to students who are on their feet all day or who sit with their legs dependent for long hours.
Reversing the leg position drains pooled fluid from the lower limbs and reduces the load on the cardiovascular system almost immediately. Most people feel a noticeable shift within the first two minutes.
Benefits: Relieves tired and swollen legs, improves venous return, calms the nervous system
How to do it:
- Sit sideways close to a clear wall with one hip touching it and both knees bent.
- Swing your legs up the wall as you lower your back to the floor, adjusting your hips until they are as close to the wall as is comfortable.
- Rest your arms slightly away from your sides, palms up.
- Keep your legs relaxed against the wall rather than pressing them straight. A soft bend at the knee is fine.
- Stay for three to ten minutes, then bend your knees, roll to one side, and pause before sitting up.
Modification: Place a folded blanket under your hips if your lower back lifts off the floor. Move farther from the wall if your hamstrings feel pulled rather than released.
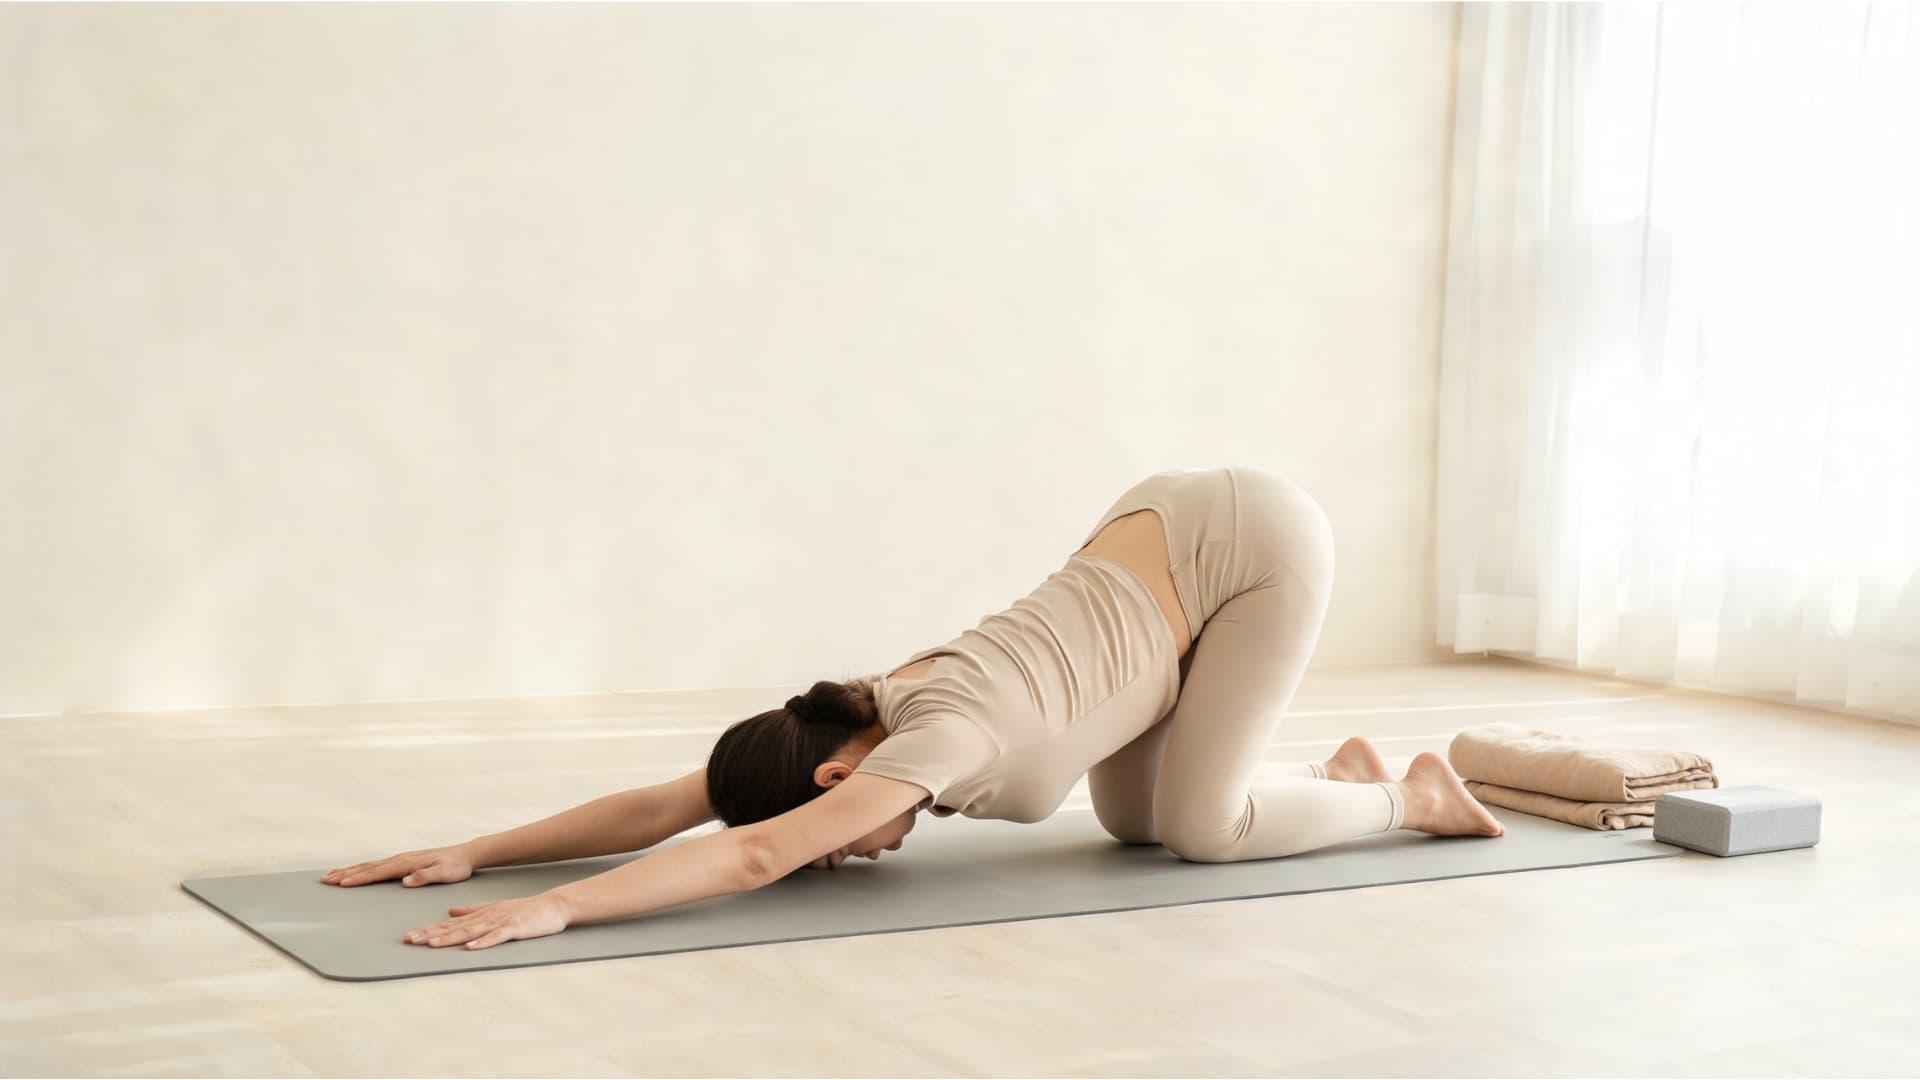
2. Supported Child’s Pose (Balasana)
Supported Child’s Pose is a forward fold with your body fully off the floor. The weight of your torso sinking into the bolster is one of the clearest proprioceptive cues for the nervous system to downregulate.
I use this at the start of every restorative sequence because it is accessible for almost everyone and takes less than a minute to settle into.
Benefits: Calms the mind, decompresses the lower spine, gently opens the hips
How to do it:
- Place a bolster or firm pillow lengthwise on your mat.
- Kneel with your knees slightly wider than your hips and bring your big toes together behind you.
- Lower your chest and belly onto the bolster so it carries your full weight.
- Turn your head to one side and rest your arms loosely on the floor beside the bolster.
- Halfway through your hold, turn your head to the other side to balance the cervical spine.
Modification: Slide a folded blanket between your hips and heels if there is a gap, or under your knees if they feel pressed against the mat.
3. Reclined Bound Angle Pose (Supta Baddha Konasana)
This is the pose that surprises students most. The inner thighs and hip flexors are two of the first areas to hold chronic tension from prolonged sitting, and this shape addresses both without any active effort.
The key is not how wide the knees open but how well the knees are supported so the inner thighs can release passively.
Benefits: Opens the hips and inner groin gently, encourages deeper diaphragmatic breathing, and releases hip flexor tension
How to do it:
- Place a bolster or long pillow behind you lengthwise and sit in front of it with knees bent.
- Bring the soles of your feet together and let your knees fall out to the sides.
- Slide a folded blanket or pillow under each knee so the inner thighs rest rather than hang.
- Lie back onto the bolster, adjusting until your head, back, and chest feel comfortable.
- Rest your arms beside your body, palms up, and let your legs feel heavy.
Modification: Move your feet farther from your body or add more height under your knees if you feel any pull at the inner groin.
4. Supported Savasana (Supported Corpse Pose)
Supported Savasana is the most restorative yoga pose there is. The bolster under the knees removes the anterior tilt of the pelvis that makes lying flat uncomfortable for many people, especially those with tight hip flexors.
Practiced as a standalone, five minutes in this position produces measurable reductions in heart rate and muscle tension.
Benefits: Full-body muscular release, stress relief, preparation for sleep
How to do it:
- Lie on your back with legs extended and a bolster or rolled blanket placed under your knees.
- Let your feet fall naturally to the sides rather than holding them upright.
- Rest your arms slightly away from your body, palms up or down, whichever feels less effortful.
- Adjust your head until your chin and forehead are roughly level (add a folded blanket under the head if your neck cranes back).
- Close your eyes, breathe naturally, and allow each exhale to soften a different area of the body.
Modification: Cover yourself with a blanket if you feel cold. Warmth deepens muscle relaxation significantly in this pose.
5. Supported Bridge Pose
The active version of Bridge Pose builds strength. The supported version does the opposite: your pelvis rests on a block or blanket, your chest opens passively, and your lower back releases from the compression of long sitting.
I recommend this for anyone who spends hours at a desk and feels a dull ache through the lumbar spine by evening.
Benefits: Passively opens the chest and anterior spine, relieves lumbar compression, counters forward-head posture
How to do it:
- Lie on your back with knees bent and feet flat on the mat, hip-width apart.
- Press gently through your feet and lift your hips just enough to slide a yoga block, firm pillow, or folded blanket under your sacrum (the flat bone just above your tailbone).
- Lower your hips onto the support and release any effort in your legs and glutes.
- Let your arms rest on the floor and your chest open toward the ceiling without forcing it.
- Stay three to five minutes, then press through the feet, lift the hips, remove the support, and lower slowly.
Modification: Use the lowest height of a block or a single folded blanket if the lift feels sharp in your lower back.
6. Supported Reclining Twist
Twists in active yoga require muscular engagement to maintain the rotation. In a supported reclined twist, your knees rest on a prop and gravity does the work.
The result is a gradual release of the erector spinae and quadratus lumborum, the muscles along each side of the spine that accumulate tension with repetitive seated posture.
Benefits: Releases spinal and paraspinal tension, supports digestive motility, decompresses the thoracic spine
How to do it:
- Lie on your back with knees bent and feet flat.
- Bring both knees toward your chest, then lower them slowly to the right side.
- Place a bolster, pillow, or folded blanket under your knees so they rest fully supported rather than hanging.
- Keep both shoulders heavy on the floor. If your left shoulder lifts, add height under the knees until it settles.
- Turn your head gently to the left if comfortable, or keep your gaze toward the ceiling.
- Hold three to four minutes, then draw the knees back to center and repeat on the left side.
Modification: Raise the prop height under your knees if your lower back feels any pulling in the twist.
7. Supported Half Frog Pose
This is a prone hip opener, meaning you are face down, which makes it distinct from the other poses here. Prone positioning alone can release tension in the anterior hip and thigh that is difficult to access in any supine position.
I use this with students who do not respond to supine hip openers, usually because the psoas is too guarded to release when facing upward.
Benefits: Gentle hip flexor and quad release, reduces sitting-related anterior hip tightness
How to do it:
- Place a bolster or long pillow lengthwise on your mat and lie face down so your chest and belly rest on it.
- Turn your head to one side and let your arms rest beside the bolster.
- Bend your right knee out to the right, keeping it roughly in line with your hip, not higher.
- Place a folded blanket under your right knee and lower leg so that your leg feels fully supported.
- Keep your left leg extended straight behind you.
- Hold for three to five minutes, then switch sides.
Modification: Keep the bent knee closer to your body if the hip feels any sharp pinch at the outer joint.
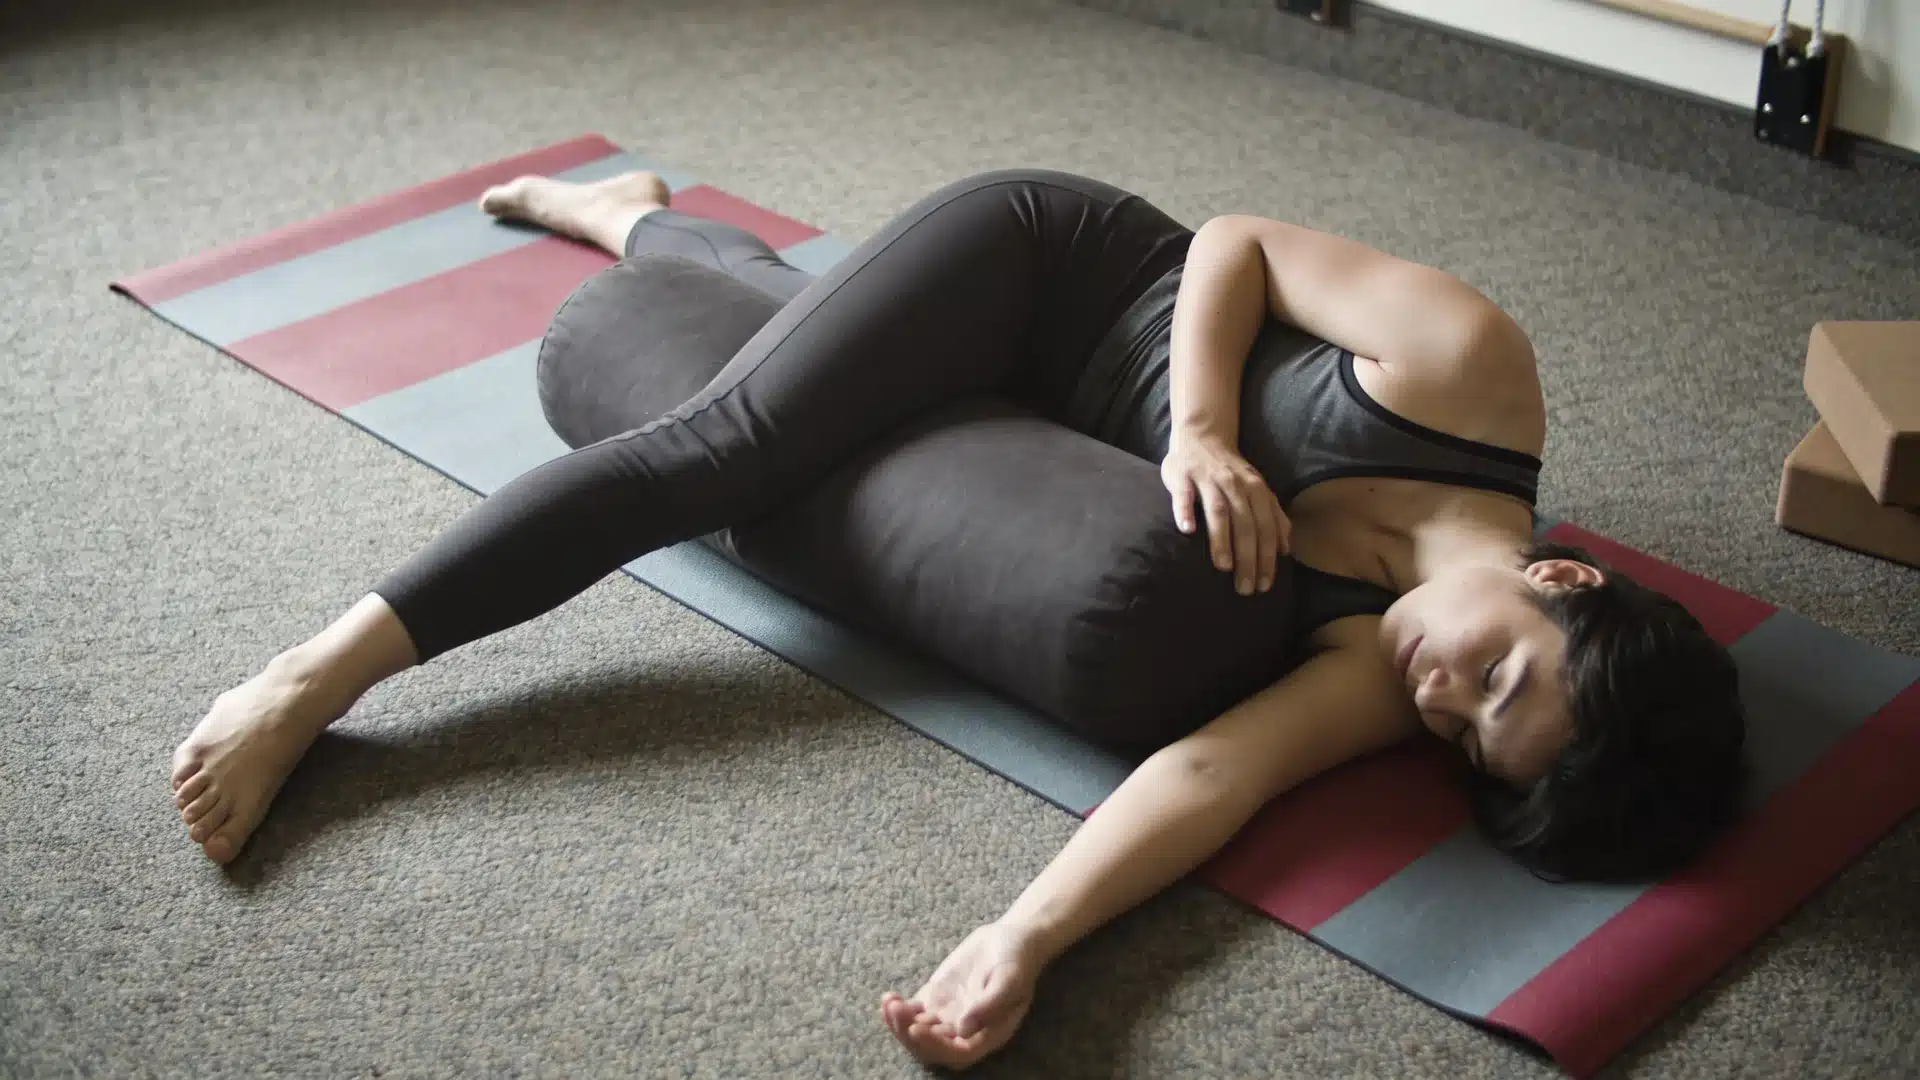
8. Side-Lying Restorative Pose
Side-lying is the most neurologically settling of all body positions. It mirrors the fetal posture that the nervous system associates with safety, which is why many people fall asleep more easily on their sides than on their backs.
I recommend this pose for students who find lying flat triggering, who are pregnant, or who are in early recovery from illness.
Benefits: Deep parasympathetic activation, safe for pregnancy and post-surgery recovery, reduces anxiety
How to do it:
- Place a folded blanket under your head to keep your neck in a neutral position relative to your spine.
- Lie on your right side with knees slightly bent and your body in a comfortable curled position.
- Place a bolster, pillow, or folded blanket between your knees and lower legs.
- Rest your right arm in front of you or under your pillow, not pressing into your shoulder.
- Place your left hand on your belly, on the mat in front of you, or on the bolster.
- Stay five to ten minutes, then slowly roll to the other side if you want to balance.
Modification: Place a pillow behind your back if you feel you might roll backward, or if you need more sense of containment to relax.
9. Supported Fish Pose (Matsyasana Variation)
If your thoracic spine is rounded from sitting at a screen, Supported Fish Pose is the direct anatomical counter.
The bolster under your upper back creates a passive extension of the thoracic vertebrae, widening the spaces between them and opening the intercostal muscles so breathing naturally deepens. Most students notice their breathing changes within the first thirty seconds.
Benefits: Passively extends the thoracic spine, opens the chest and shoulders, and improves breathing mechanics
How to do it:
- Place a bolster, firm pillow, or thick folded blanket lengthwise on your mat.
- Sit in front of the support with knees bent and feet flat.
- Slowly recline so the support sits under your upper back (between shoulder blades and base of neck).
- Add a folded blanket under your head if your neck cranes back uncomfortably.
- Let your arms open out to the sides, palms up, and allow your shoulders to soften toward the floor.
- Hold three to five minutes, then bend your knees, roll to one side, and press up slowly.
Modification: Use a single folded blanket rather than a full bolster if any height under the upper back sends sensation into your lower back or neck.
10. Supported Butterfly Forward Fold
Forward folds activate the dorsal vagal system in a way that back bends and neutral positions cannot.
The combination of hip opening, spinal flexion, and a supported rest for the forehead creates a particularly strong parasympathetic response. This is why many students feel drowsy within a minute of settling into this shape.
Benefits: Releases adductor tension, activates deep relaxation, quiets mental chatter
How to do it:
- Sit on your mat with knees bent and the soles of your feet together, knees falling open.
- Place folded blankets or pillows under each knee if the inner groin feels strained.
- Place a bolster, stacked pillows, or folded blankets in front of your body at a height where your torso can rest without rounding the mid-back sharply.
- Fold forward from the hips and let your chest, belly, or forehead rest on the support.
- Relax your arms on the floor or around the support. Let your head feel completely heavy.
- Hold three to five minutes, then press your hands into the floor and slowly roll back up.
Modification: Sit on a folded blanket to tilt the pelvis forward if your back rounds severely in the fold, or increase the height of the front support.
11. Stonehenge Pose
Stonehenge Pose uses the same principle as Legs Up the Wall but with the calves elevated horizontally rather than vertically. This position is particularly effective for lower back decompression because the ninety-degree bend at the hip and knee removes all pull from the hip flexors on the lumbar spine, allowing the lumbar curve to soften completely onto the mat.
If you deal with chronic tightness in this area, the deeper work of psoas muscle release pairs well alongside this pose.
Benefits: Decompresses the lumbar spine, releases hip flexor tension, reduces sciatic discomfort
How to do it:
- Place two yoga blocks at their tallest height near the lower end of your mat, wider than hip-width apart.
- Lay a bolster or firm pillow across the two blocks, creating a raised horizontal surface.
- Sit close to the setup, then lie on your back with knees bent.
- Lift your legs one at a time and rest your calves on the bolster, with hips and knees at roughly ninety degrees.
- Let your arms rest beside your body and allow your lower back to soften fully onto the mat.
- Stay five to ten minutes, then slide your calves off the support and roll to one side before sitting up.
Modification: Use a chair seat instead of blocks and a bolster for a simpler setup that achieves the same lumbar decompression effect.
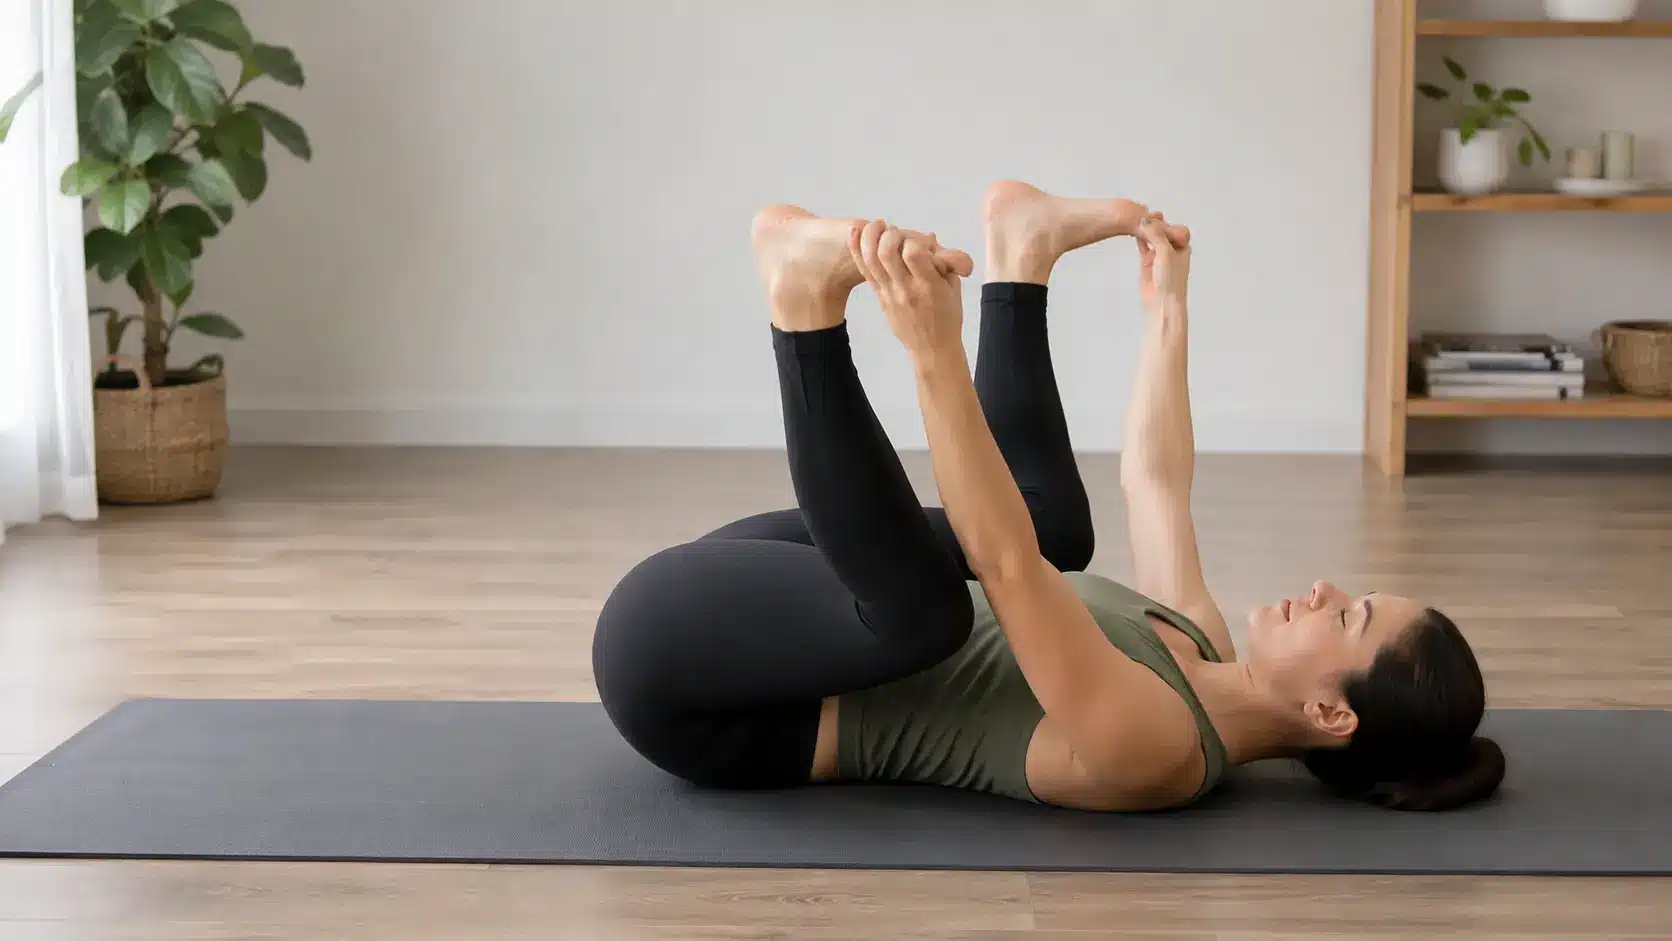
12. Supported Happy Baby Pose
Happy Baby is one of the best restorative yoga poses for the sacroiliac joints and the deep hip rotators.
In the supported version, you use a strap so your arms do not have to work, and the hold time is long enough for the piriformis and obturator muscles to actually release rather than just stretch momentarily.
Benefits: Releases the SI joints and deep hip rotators, gently lengthens the inner groin, relieves lower back stiffness
How to do it:
- Lie on your back with knees bent and feet flat.
- Bring both knees slowly toward your chest.
- Hold the backs of your thighs, your ankles, or the outer edges of your feet, depending on what keeps your shoulders relaxed on the floor.
- Open your knees wider than your torso and let them draw gently toward the sides of your ribcage.
- Keep your ankles above or in line with your knees rather than pulling them toward your face.
- Hold for two to five minutes, then release your feet and return to lying flat.
Modification: Loop a yoga strap, towel, or scarf around each foot so you can reach without lifting your shoulders off the mat.
13. Supported Seated Forward Fold (Paschimottanasana)
In an active seated forward fold, most people drive the stretch from the lower back rather than the hips, which means the hamstrings barely release and the lumbar spine compresses.
In the supported version, a bolster on your legs removes the need to reach, so your spine can decompress rather than round, and your hamstrings release over several minutes without any muscular effort.
Benefits: Calms the nervous system, reduces mental fatigue, gently releases the hamstrings and lower back
How to do it:
- Sit on your mat with both legs extended forward.
- Place a folded blanket under your sitting bones if your lower back rounds immediately at the pelvis.
- Stack a bolster, pillows, or folded blankets on top of your thighs at a height your torso can reach without strain.
- Bend your knees slightly, then fold forward from the hips, resting your chest or belly on the support.
- Relax your arms beside your legs and allow your head to rest on the bolster.
- Hold three to five minutes, then press both hands into the floor and roll slowly upright.
Modification: Bend your knees more or add extra height under your torso if your mid-back rounds into a C-shape in the fold.
Benefits of Practicing Restorative Yoga Poses Regularly
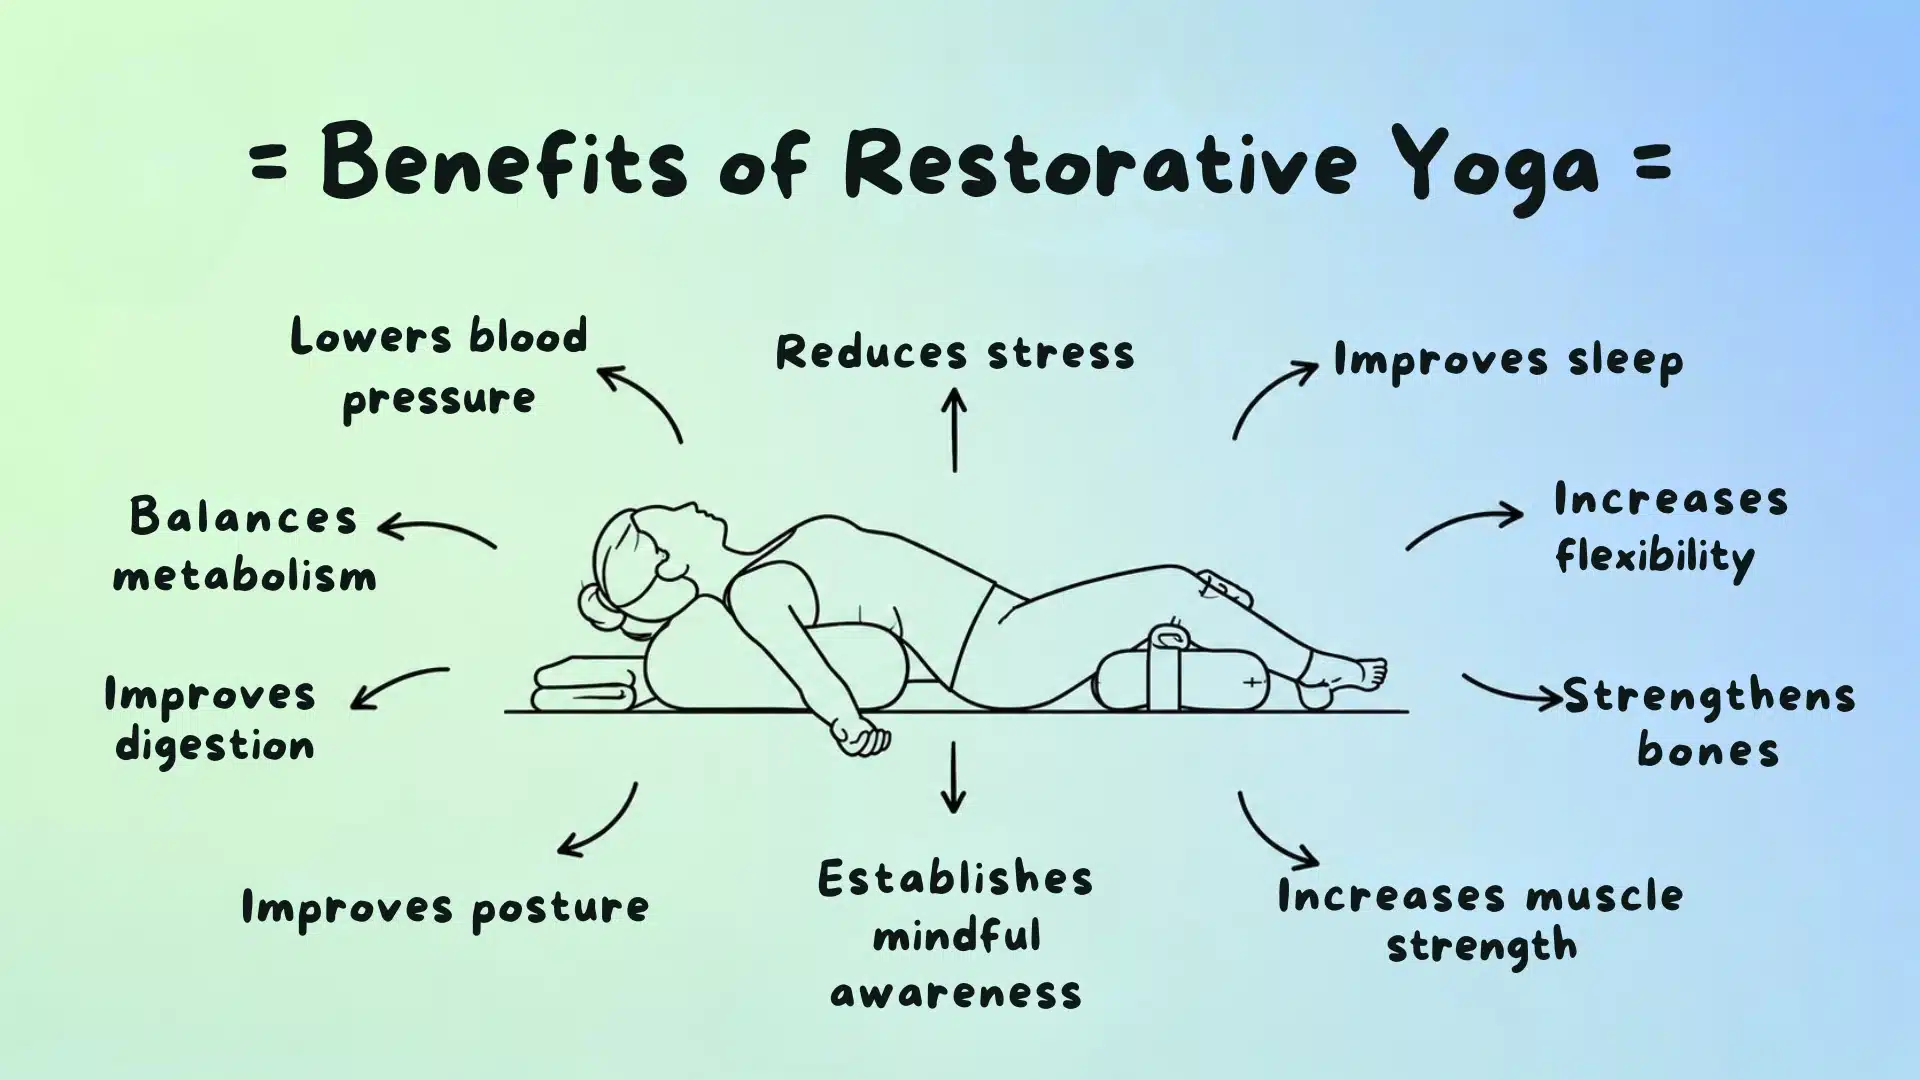
After seven years of teaching, what I have noticed is that the benefits of restorative yoga accumulate differently from active exercise. You do not feel them during the session as intensely, but the effects on sleep quality, muscular tension, and stress response compound over weeks. Here is what the practice consistently produces:
- Nervous system regulation: Extended holds in supported positions shift the body from sympathetic activation into parasympathetic recovery. This is measurable through heart rate variability within a single session.
- Muscular tension release: Passive support over three or more minutes allows muscles to release chronic holding patterns that active stretching cannot reach.
- Improved circulation: Positions like Legs Up the Wall and Stonehenge Pose use gravity to support venous return, reducing leg heaviness and swelling.
- Spinal decompression: Props reduce compressive load through the lumbar and thoracic spine, which is significant after a full day of sitting or standing.
- Better sleep preparation: A twenty-minute restorative practice before bed signals the body to lower cortisol and core temperature, two physiological prerequisites for sleep onset.
- Reduced mental rumination: Long holds and slow breathing interrupt the default mode network activity associated with anxious or repetitive thinking.
- Emotional processing space: The supported stillness of restorative yoga creates a physiological state in which the prefrontal cortex can engage rather than being overridden by the stress response.
None of these benefits requires a long session. Consistency matters more than duration. Ten minutes three times a week produces more measurable change than a single sixty-minute session once a month.
A 20-Minute Restorative Yoga Routine
This is the sequence I use most often with new students. It is short enough to do on any evening and covers the main areas where tension accumulates from modern work patterns: the lower back, hips, chest, and nervous system baseline.
| Pose | Time | Why It Is Here |
|---|---|---|
| Supported Child’s Pose | 3 minutes | Opens the session with a grounding forward fold to slow breathing and reduce cortisol before you begin. |
| Reclined Bound Angle Pose | 4 minutes | Releases the hip flexors and inner groin while opening the chest passively. |
| Supported Reclining Twist | 3 minutes each side | Decompresses the paraspinal muscles and supports digestive motility. |
| Legs Up the Wall | 5 minutes | Reverses venous pooling from sitting, calms the nervous system, and prepares the body for final rest. |
| Supported Savasana | 5 minutes | Full-body integration and nervous system reset to close the practice. |
Keep your transitions slow between poses. The value of this sequence lies in maintaining a low-arousal state throughout, not just achieving it in individual poses.
Restorative Yoga vs. Yin Yoga: What Is the Difference?
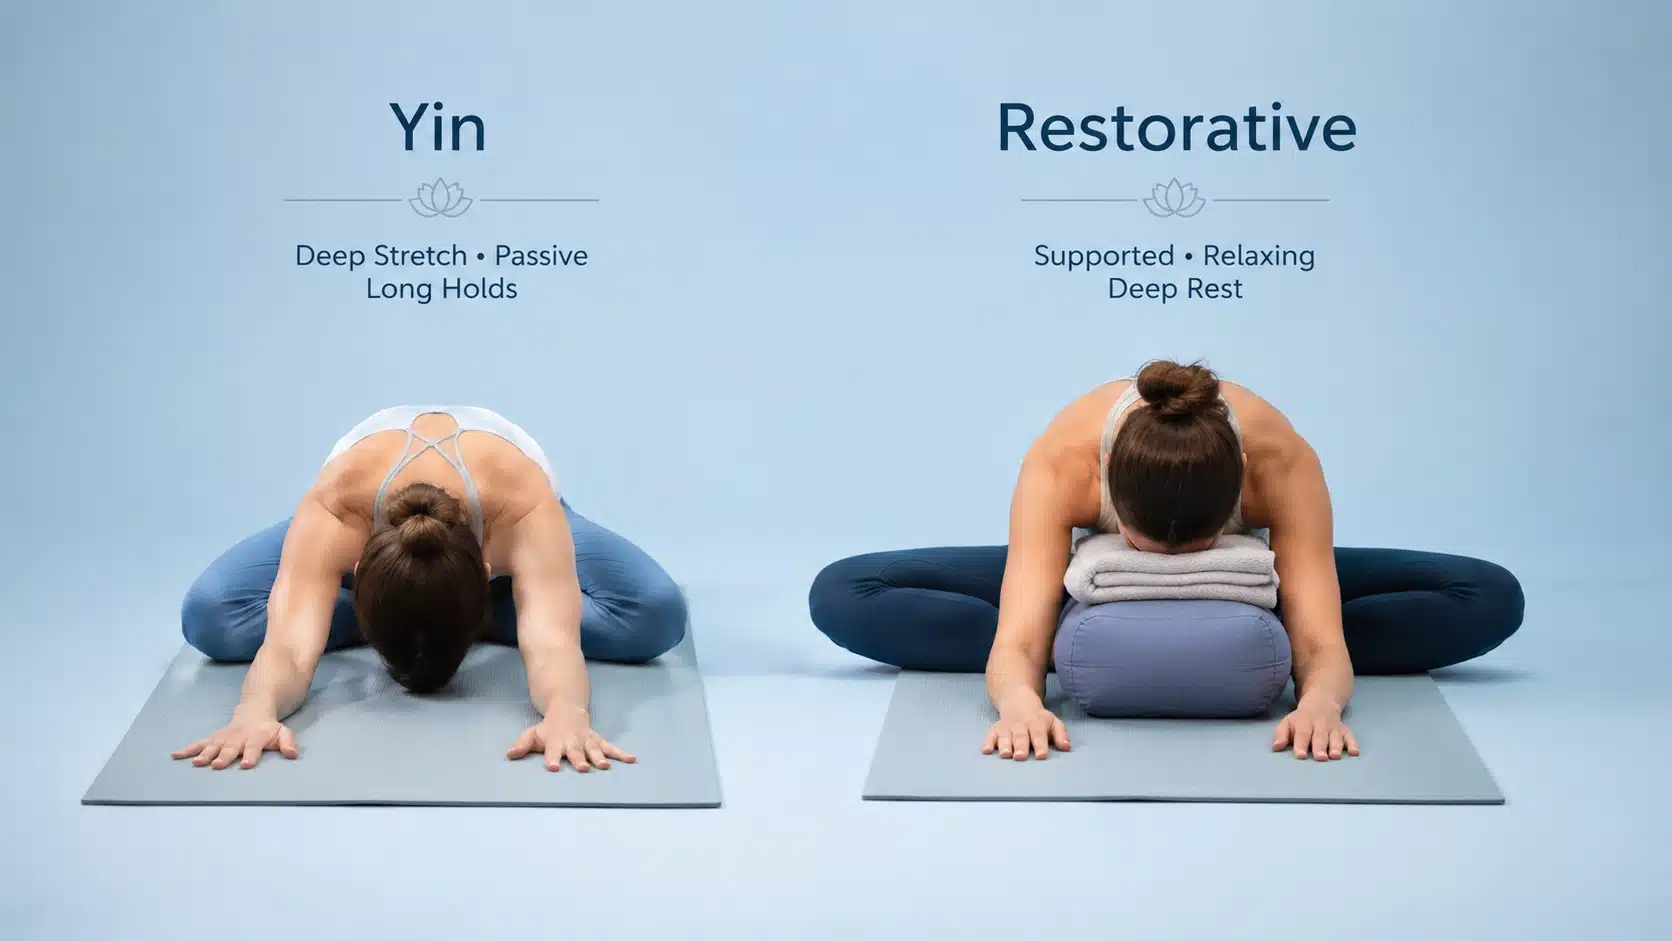
Students ask me this in almost every class. The confusion is understandable: both are slow, both use long holds, and both are presented as relaxing alternatives to active yoga. The target tissue is different, and that changes everything about how the poses should feel.
| Restorative Yoga | Yin Yoga |
|---|---|
| Body fully supported by props. Zero muscular effort required. | Uses fewer props. Muscles are relaxed, but connective tissue is loaded. |
| Target: nervous system. The goal is parasympathetic activation. | Target: fascia, ligaments, and joint capsules. The goal is connective tissue remodeling. |
| Should feel effortless and comfortable throughout the entire hold. | May involve a mild to moderate sensation that deepens over the hold. |
| Best when you are fatigued, stressed, or recovering. | Best when you are relatively rested and want to work on joint mobility. |
The practical rule I give students is simple: if you feel any sensation you have to manage or breathe through, you are doing Yin yoga, not restorative yoga. Restorative yoga should feel like being held, not like working through something.
If you want to understand more about what the slower style offers, the full breakdown of yin yoga benefits covers how it targets connective tissue differently.
For deeper work on yoga for back pain, you may find both styles useful depending on the day and your energy level.
Who Should Practice Restorative Yoga
Because the entire practice is about support rather than effort, restorative yoga has one of the broadest accessible ranges of any movement practice. It genuinely works for:
- Beginners: No prior yoga experience is needed. The poses are simpler to enter than most active yoga poses.
- Office workers: The practice directly addresses the postural and nervous system effects of prolonged sitting. A full-body stretching routine pairs well with restorative yoga on alternating days.
- Athletes: Restorative yoga accelerates recovery between training sessions by promoting blood flow and reducing systemic cortisol without adding training load.
- Seniors: Fully supported shapes mean joint stress is minimal, and the neurological benefits of parasympathetic activation are particularly valuable for older adults managing sleep and anxiety.
- People with chronic stress or insomnia: The practice directly targets the physiological mechanisms underlying both. Consistent evening practice has been shown to improve sleep onset latency.
- Pregnant individuals: With appropriate modifications, side-lying and semi-reclined restorative poses are among the safest movement options during pregnancy. Check with your provider before beginning.
When to Modify or Avoid Certain Poses
Restorative yoga is among the safest movement practices available, but a few situations require care:
- High blood pressure: Inversion poses like Legs Up the Wall may be contraindicated. Check with your doctor before practicing inversions.
- Recent abdominal or spinal surgery: Avoid poses that put any pressure through the healing area. Side-lying and supported Savasana are usually safe; anything compressing the abdomen is not.
- Advanced pregnancy: Avoid fully supine poses after the first trimester and deep twists. Side-lying poses are generally well-tolerated but confirm with your midwife or OB.
- Severe disc herniation: Forward folds may aggravate rather than relieve pain. Stonehenge Pose and Supported Savasana are typically the safest options.
If you are unsure whether a specific pose is appropriate for your situation, your best resource is a yoga therapist or a physiotherapist familiar with movement-based recovery.
Common Mistakes That Reduce the Effectiveness of Restorative Yoga
These are the patterns I correct most often in class. Each one reduces how much relaxation the practice actually produces:
- Not using enough props: If any part of your body is unsupported, your muscles are working to hold it up. Add a blanket, block, or pillow wherever there is a gap.
- Ending poses too early: Most people feel a light restlessness around the two-minute mark. This is the nervous system habituating, not a signal to move. Stay through it. The deeper release happens after three minutes.
- Holding the jaw and face: Clenched teeth and furrowed brows signal the brainstem that the body is under stress. Consciously soften your tongue, jaw, and the muscles around your eyes at the start of each pose.
- Rushing transitions: Getting up quickly between poses spikes heart rate and reactivates the sympathetic nervous system. Move slowly from pose to pose, pausing in a neutral position between each shape.
- Treating it as stretching: If you are trying to increase range of motion, you are doing a different practice. Restorative yoga is not about going deeper. The moment you feel a sensation you are reaching for, you have left restorative territory.
Getting these details right compounds over time. A practice done consistently with good setup will yield noticeably greater benefit than an occasional intense session with poor prop support.
Frequently Asked Questions
Is restorative yoga safe for chronic fatigue?
Yes. It provides deep relaxation without draining any physical energy. Since the body is fully supported by props, it lowers systemic inflammation and preserves metabolic reserves, making it an excellent recovery tool for individuals managing chronic fatigue syndrome.
Can you do these poses on a soft bed?
While possible, a firm floor is better for alignment. A mattress can cause the props to sink unevenly, which alters the angle of your joints. If practicing in bed, use extra pillows under your limbs to prevent spinal sagging.
Does it help with tension headaches?
Yes. Poses that support the upper back and neck dramatically reduce suboccipital muscle spasms. Gently resting an eye pillow over the face further dampens sensory triggers, calming the trigeminal nerve to help alleviate stress-induced tension headaches.
Can restorative yoga improve digestion?
Absolutely. Shifting into a parasympathetic state activates the “rest and digest” response. This stimulates blood flow to your gastrointestinal tract, increases intestinal motility, and helps relieve chronic bloating or cramping caused by subconscious psychological stress.
How does it affect heart rate variability?
Regular practice increases heart rate variability (HRV) by strengthening your vagal tone. A higher HRV indicates a resilient autonomic nervous system that can easily bounce back from daily psychological stressors and maintain overall emotional equilibrium.
What should you do if your mind races?
Acknowledge the thoughts without judgment and anchor your awareness to the physical weight of your body pressing into the props. You can also count the length of each exhalation to give your brain a simple, non-stimulating focal point.
Is it normal to feel cold during practice?
Yes. As your nervous system settles into a deep parasympathetic state, your heart rate and blood pressure naturally drop. This physiological shift lowers your core body temperature, so keeping a warm blanket nearby is essential for comfort.
Final Words on Restorative Yoga
Restorative yoga poses work best when I allow myself to slow down without trying to fix or force anything. The more I practice these supported shapes, the more I notice how quickly my stress response shifts in daily life.
I often return to a few key positions like Legs Up the Wall or Supported Savasana when my energy feels scattered or heavy. This kind of practice reminds me that rest is not something earned but something essential for balance.
I encourage you to listen closely to your body and choose positions that feel supportive rather than challenging.
Even a short session can reset your nervous system in meaningful ways, especially when practiced consistently over time with patience and care today practic.