


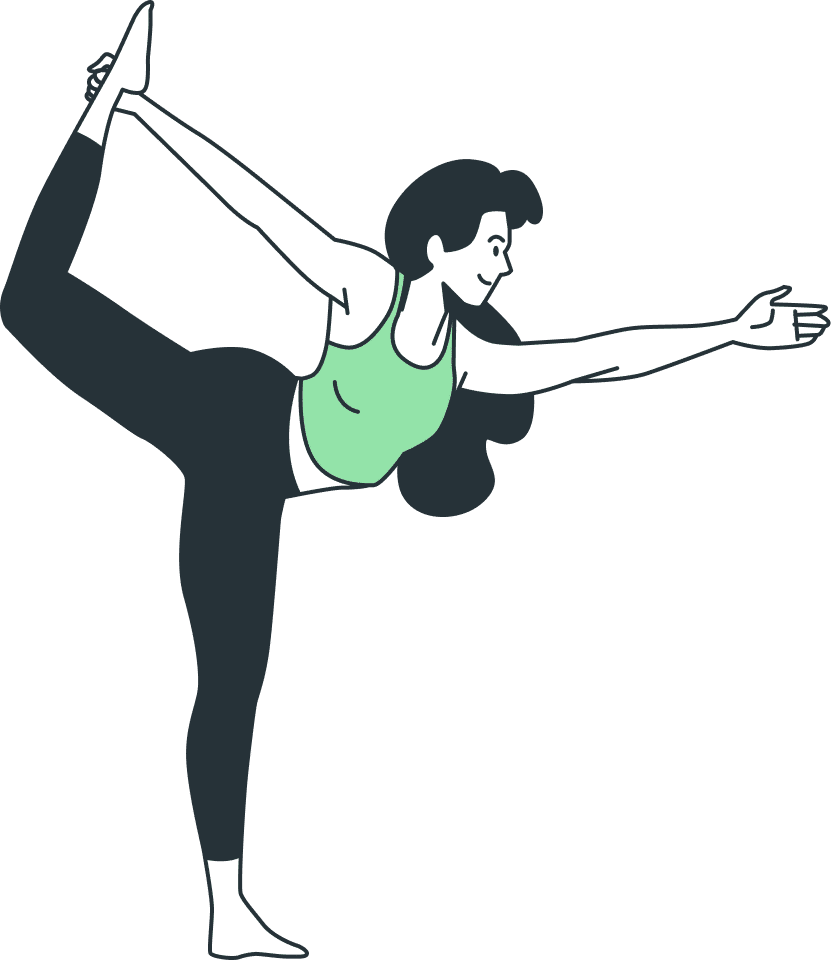


Pyramid Pose stretches the back of the front leg more intensely than almost any other standing pose, and it does it while asking your balance, hip control, and spinal length to work at the same time.
If you have folded forward and felt your lower back round or your stance wobble, you know the challenge.
Pyramid Pose is not about touching the floor. It is about learning how to stretch with control while keeping your spine long and your legs steady. I like this pose because it teaches patience, alignment, and body awareness at the same time.
You will learn what the pose is for, how it works in your body, the safest way to practice it, and simple prop variations that make it feel more supported and useful.
| Difficulty | Beginner to Intermediate |
| Duration | 3 to 5 slow breaths (30 to 60 seconds per side) |
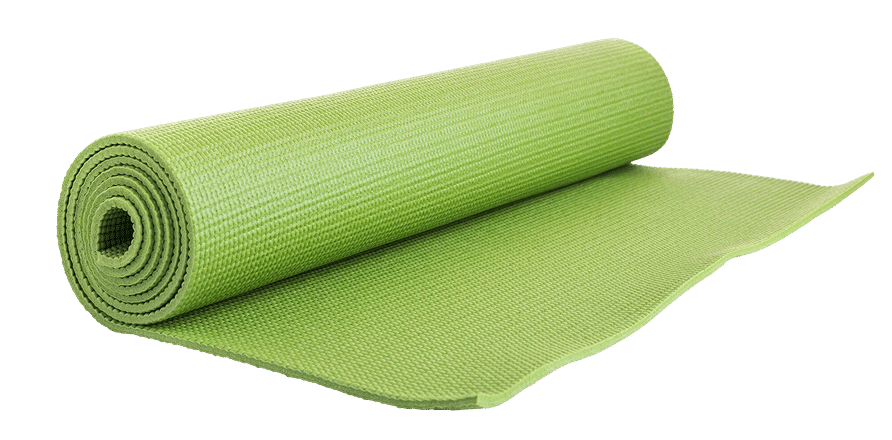
| Props Needed | Yoga mat; blocks optional but recommended for beginners |
| Best Time | After a warm-up or following a run, avoid cold muscles |
| Avoid If | Recent hamstring injury, acute sciatica, uncontrolled high blood pressure, or late-stage pregnancy |
| Disclaimer: This article is for informational and educational purposes only. It does not constitute medical advice and should not replace consultation with a qualified healthcare provider. Always consult a doctor before making changes to your exercise routine, especially if you have an existing injury or medical condition. |
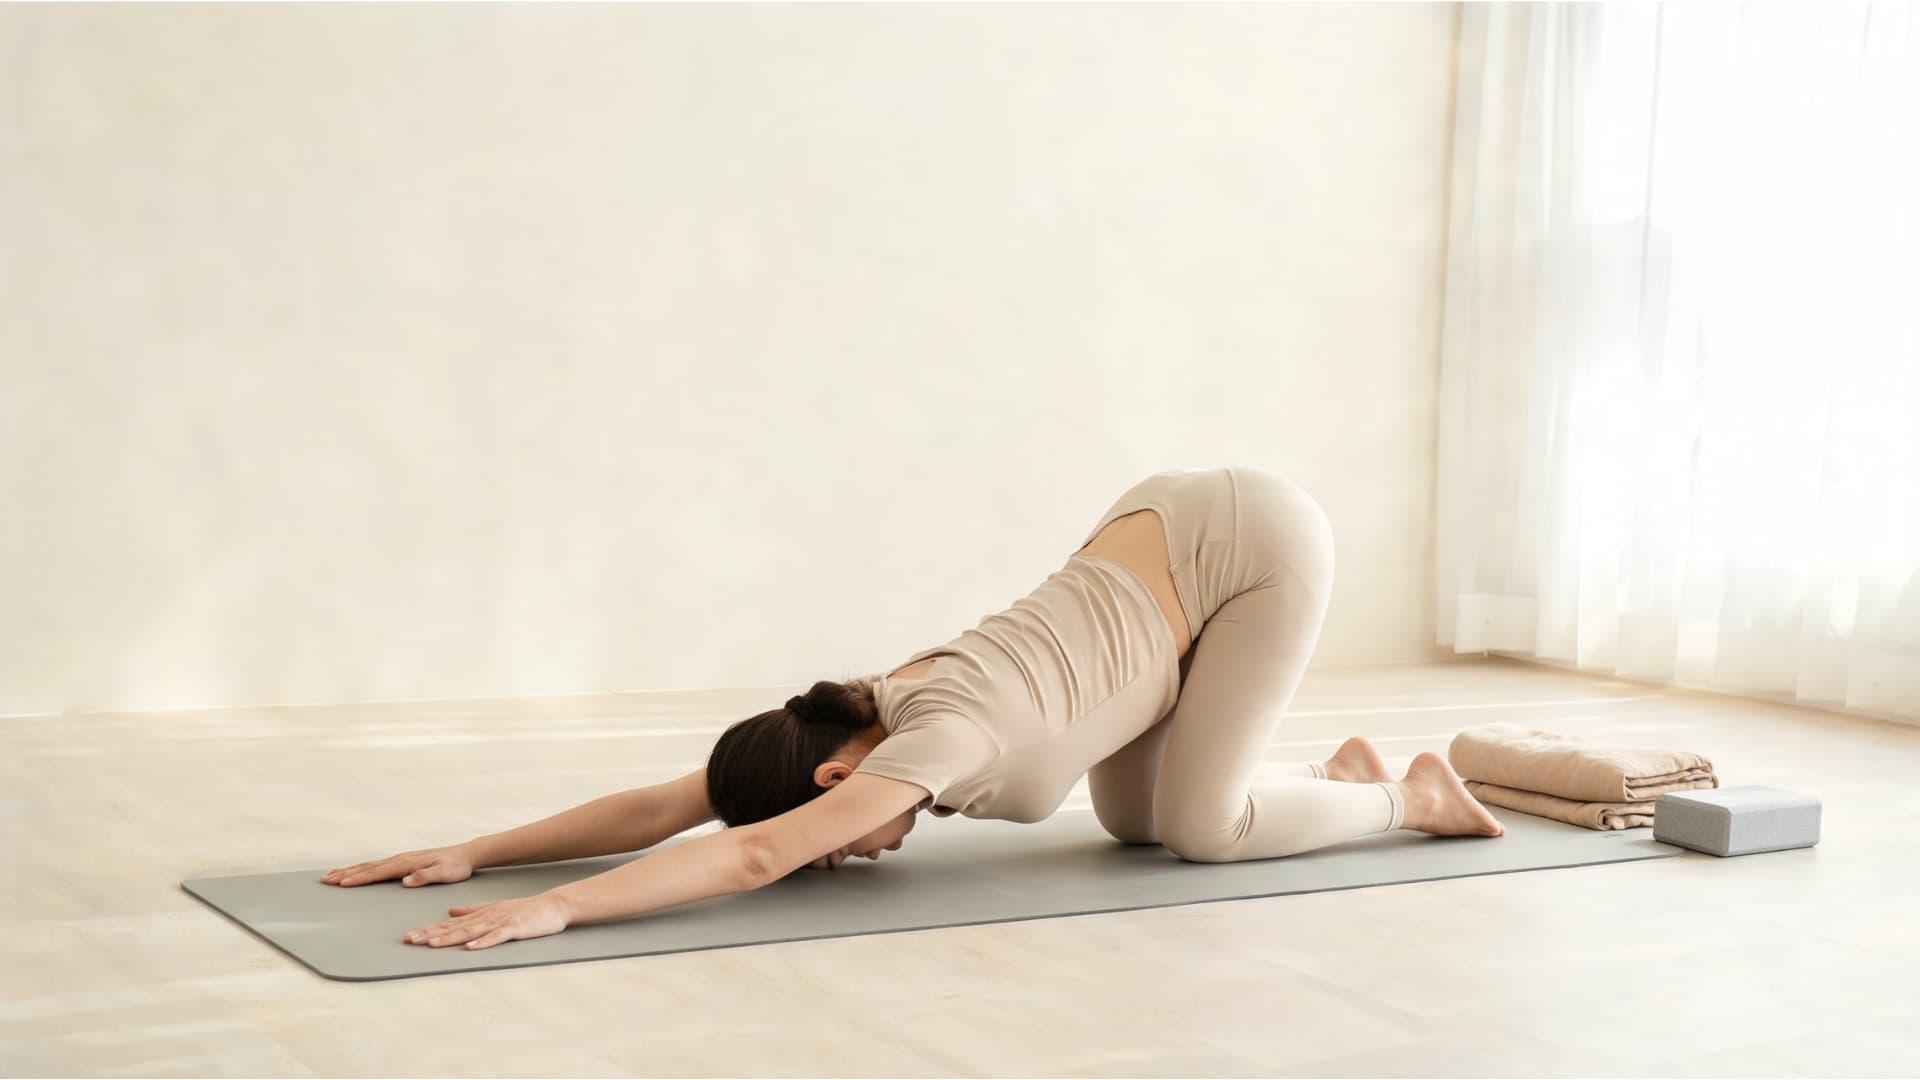
Understanding Pyramid Pose
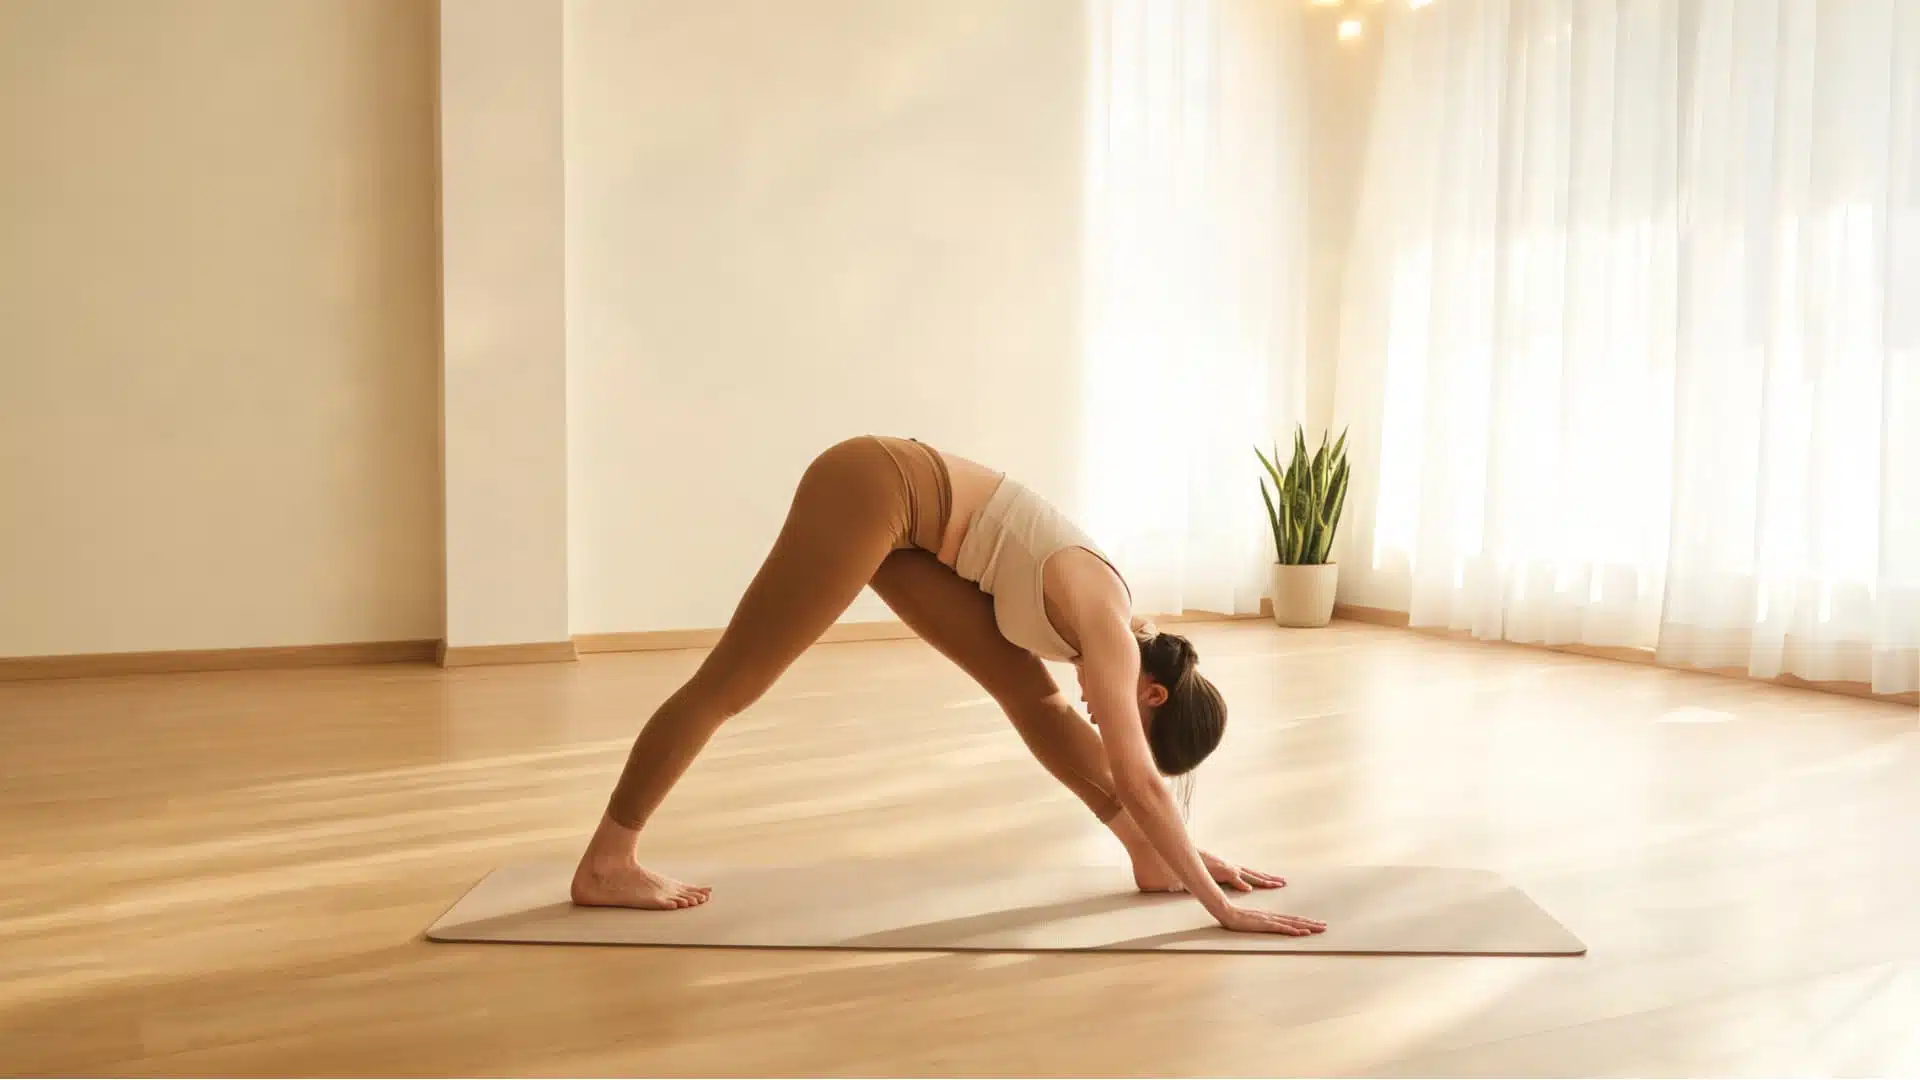
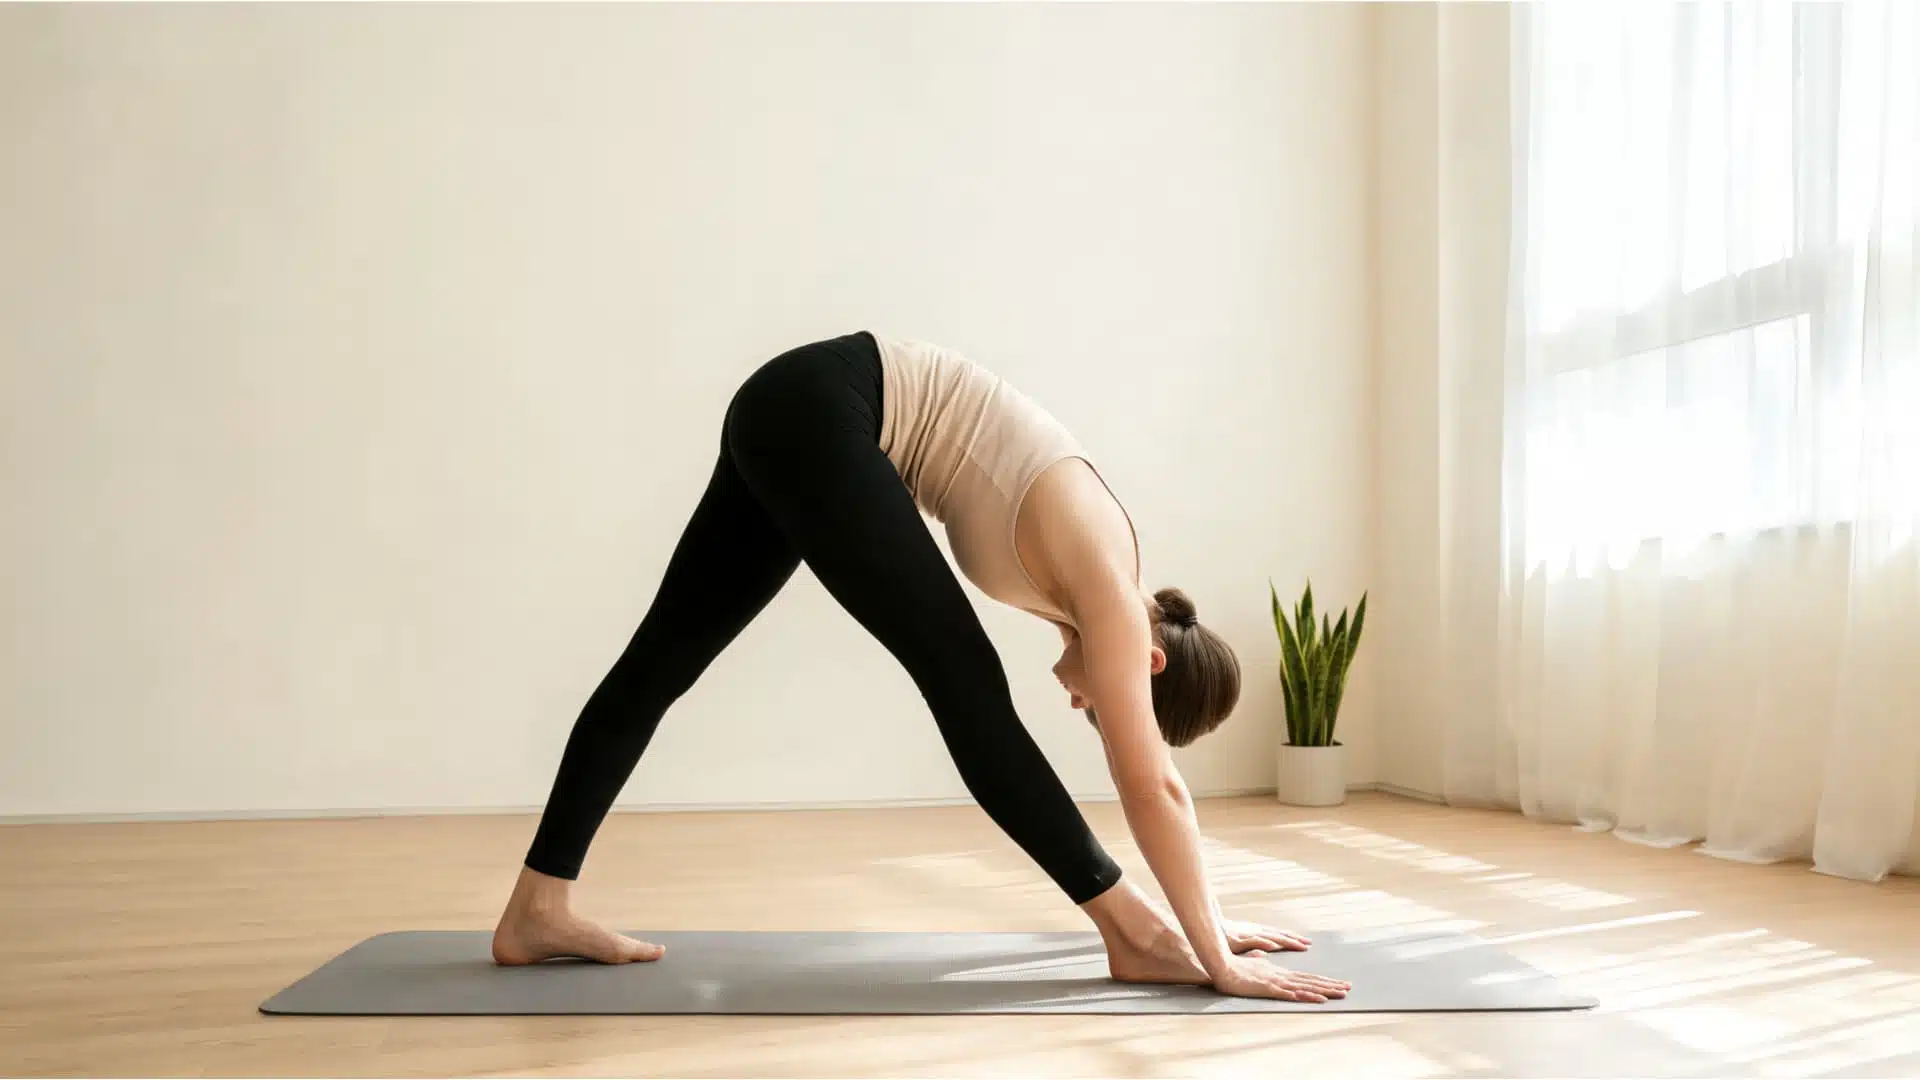
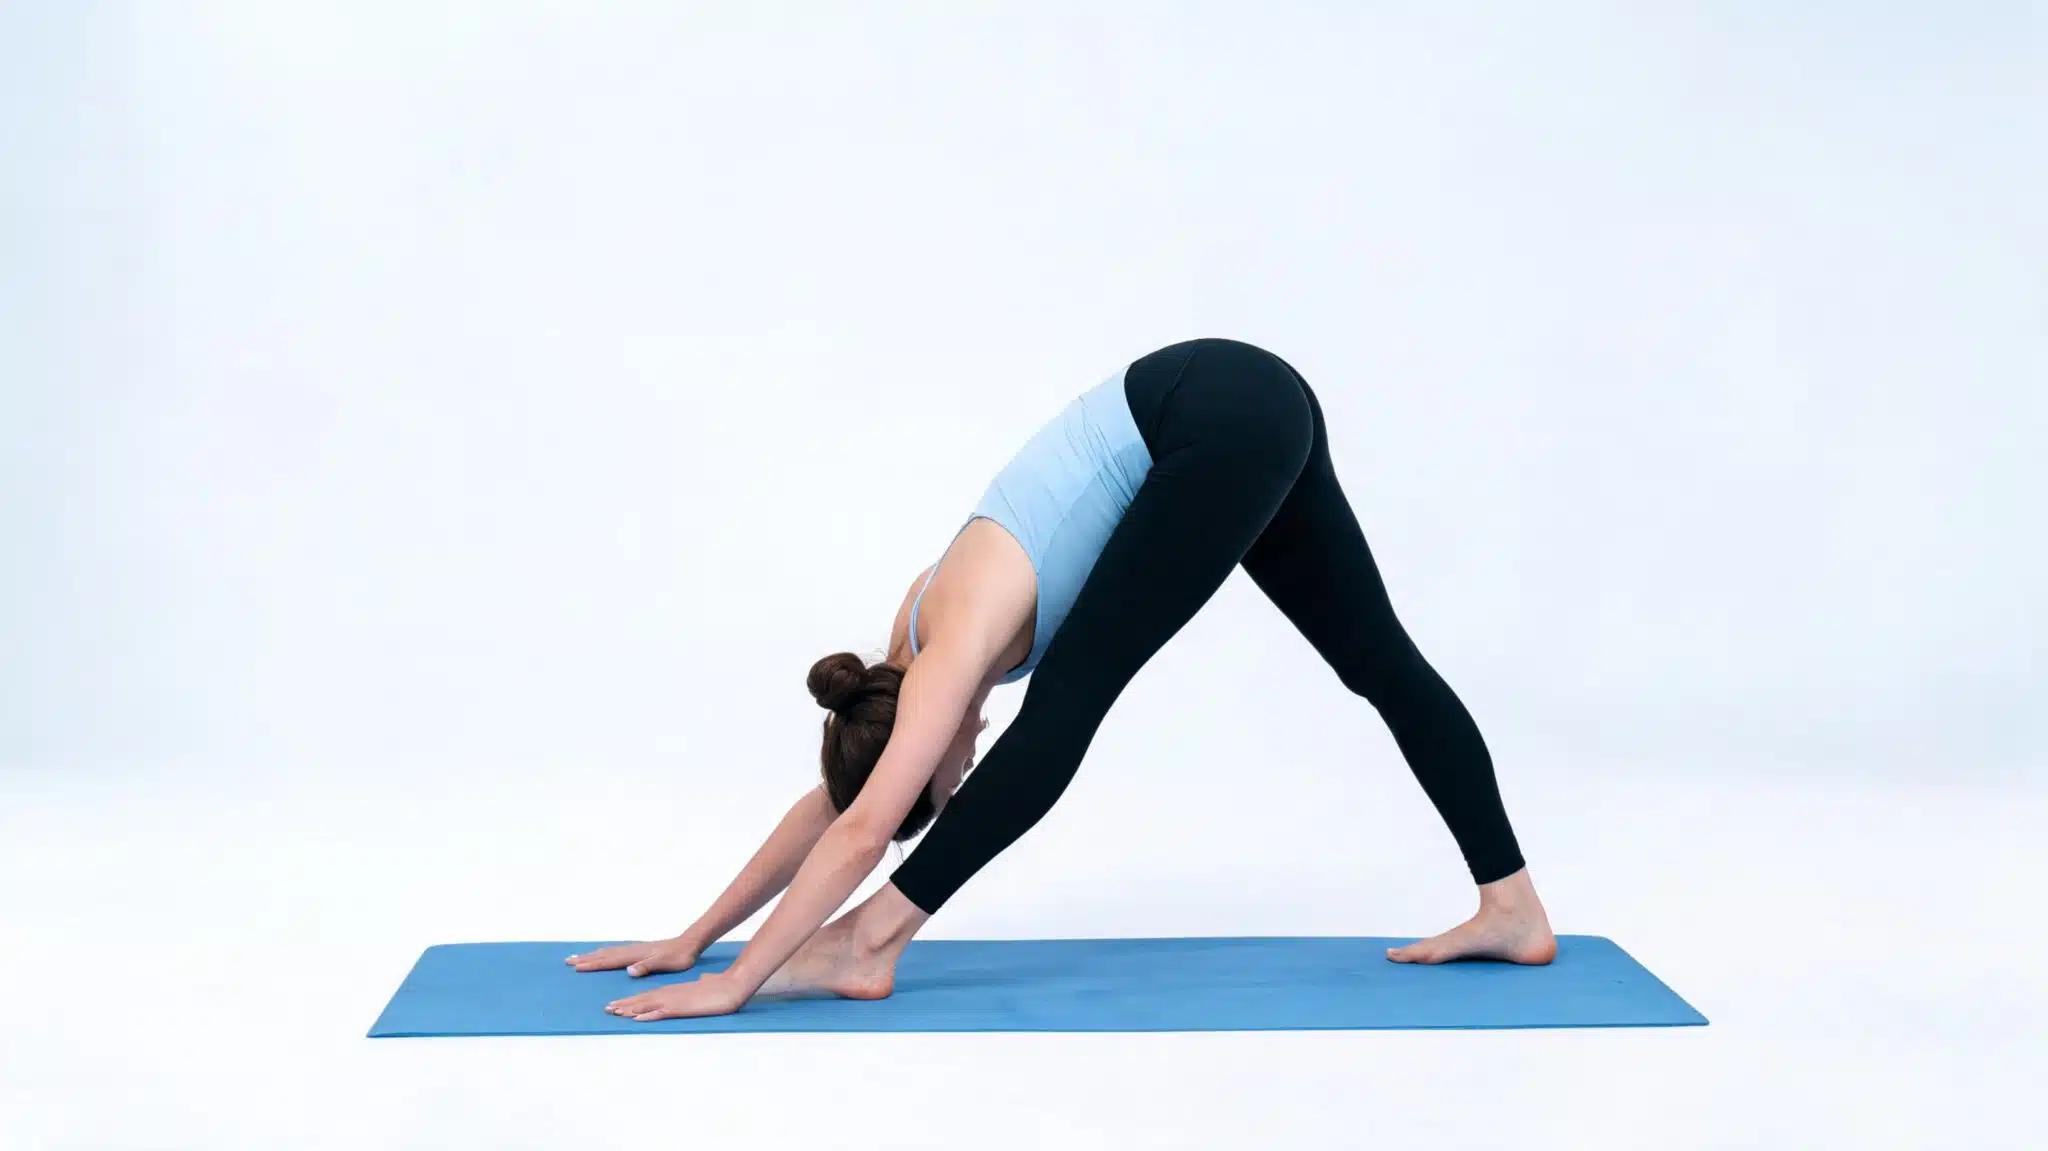
Pyramid Pose is a standing forward fold performed with one foot forward and the other back. The front foot points ahead, while the back foot turns slightly outward to help you stay grounded. From there, you fold over the front leg while keeping the spine long and the legs active.
The Sanskrit name for Pyramid Pose is Parsvottanasana. “Parsva” means side or flank, “uttana” means intense stretch, and “asana” means pose. That is why the pose is also called the Intense Side Stretch Pose.
You will often see Pyramid Pose in Hatha, Vinyasa, Ashtanga, and Iyengar yoga classes. It usually appears in standing yoga sequences because it combines several skills at once: hamstring stretching, hip control, spinal length, balance, and steady breathing. The pose may look still, but the body is working carefully to stay aligned and supported.
What is the Purpose of the pyramid pose?
The purpose of Pyramid Pose is not to touch the floor or push your body into the deepest stretch possible. Its real purpose is to teach you how to fold forward with stability, length, and control.
- Stretches the hamstrings, calves, hips, and back: Pyramid Pose provides the strongest stretch to the front hamstrings, but you may also feel length in the calves, outer hips, lower back, and spine.
- Teaches safer forward folding: Instead of dropping the chest and rounding the back, Pyramid Pose teaches you to fold from the hip creases.
- Builds balance in a staggered stance: Because one foot is forward and one foot is back, your body has to work harder to stay steady. The feet, ankles, legs, hips, and core all help you hold the pose without wobbling.
- Improves hip awareness: Pyramid Pose helps you notice how your hips move. One hip may pull back, one side may feel tighter, or your pelvis may turn slightly.
- Strengthens the feet, legs, glutes, and core: Even though the pose is often seen as a stretch, it also requires strength. Your feet press down, your thighs stay active, your glutes support the pelvis, and your core helps keep the spine long.
- Prepares the body for deeper forward folds: Pyramid Pose is a useful preparation for poses like Standing Forward Fold, Half Splits, and seated hamstring stretches.
- Helps you notice side-to-side differences: Many people feel one side is tighter, weaker, or less balanced than the other.
- Develops patience, breath control, and body awareness: This pose asks you to slow down. When you breathe steadily and move with care, the pose becomes calmer, safer, and more effective.
Pyramid Pose works best when you treat it as a skill-building pose, not a flexibility test. Over time, this controlled approach helps you build safer forward folds and better awareness in your yoga practice.
Benefits of Pyramid Pose
Pyramid Pose is useful because it does more than stretch the back of the leg. When the pose is practiced with control, you get flexibility, balance, and alignment benefits at the same time.
- Improves hamstring flexibility: Deeply stretches the front hamstrings while keeping the body supported in a standing position.
- Builds balance and stability: Challenges the feet, ankles, legs, and core in a staggered stance.
- Supports better hip control: Helps you notice when one hip rotates, lifts, or shifts out of place.
- Encourages a longer spine: Teaches you to fold forward with length instead of collapsing into the lower back.
- Strengthens the lower body: Keeps the feet, thighs, glutes, and back leg active during the stretch.
- Prepares the body for other poses: Builds control for Half Splits, Standing Forward Fold, Triangle Pose, and seated forward folds.
- Builds mindful body awareness: Helps you breathe, slow down, and notice differences between both sides.
The real benefit of Pyramid Pose comes from how you practice it. A steady stance, a soft front knee, a long spine, and a calm breath will give you more value than trying to fold as low as possible.
How to Do Pyramid Pose Step by Step
Pyramid Pose is easier to understand when you build it slowly. The goal is not to force your hands to the floor. The goal is to set your feet well, lengthen your spine, and fold with control. Move slowly through each step, and use blocks if your hands do not comfortably reach the mat.
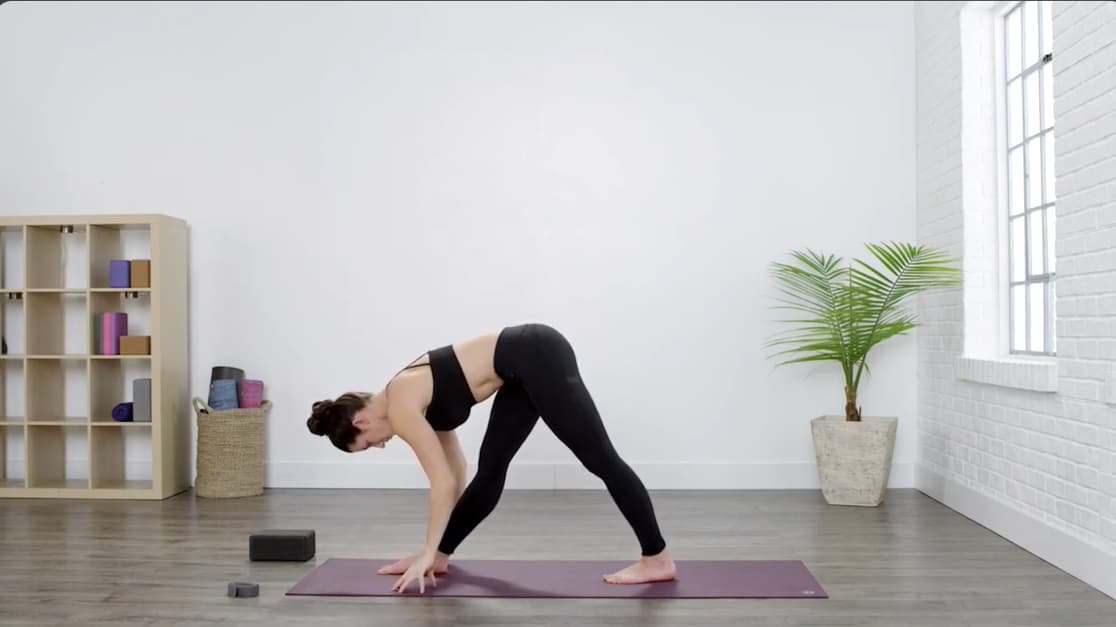
Step 1: Step One Foot Halfway Back on Your Mat
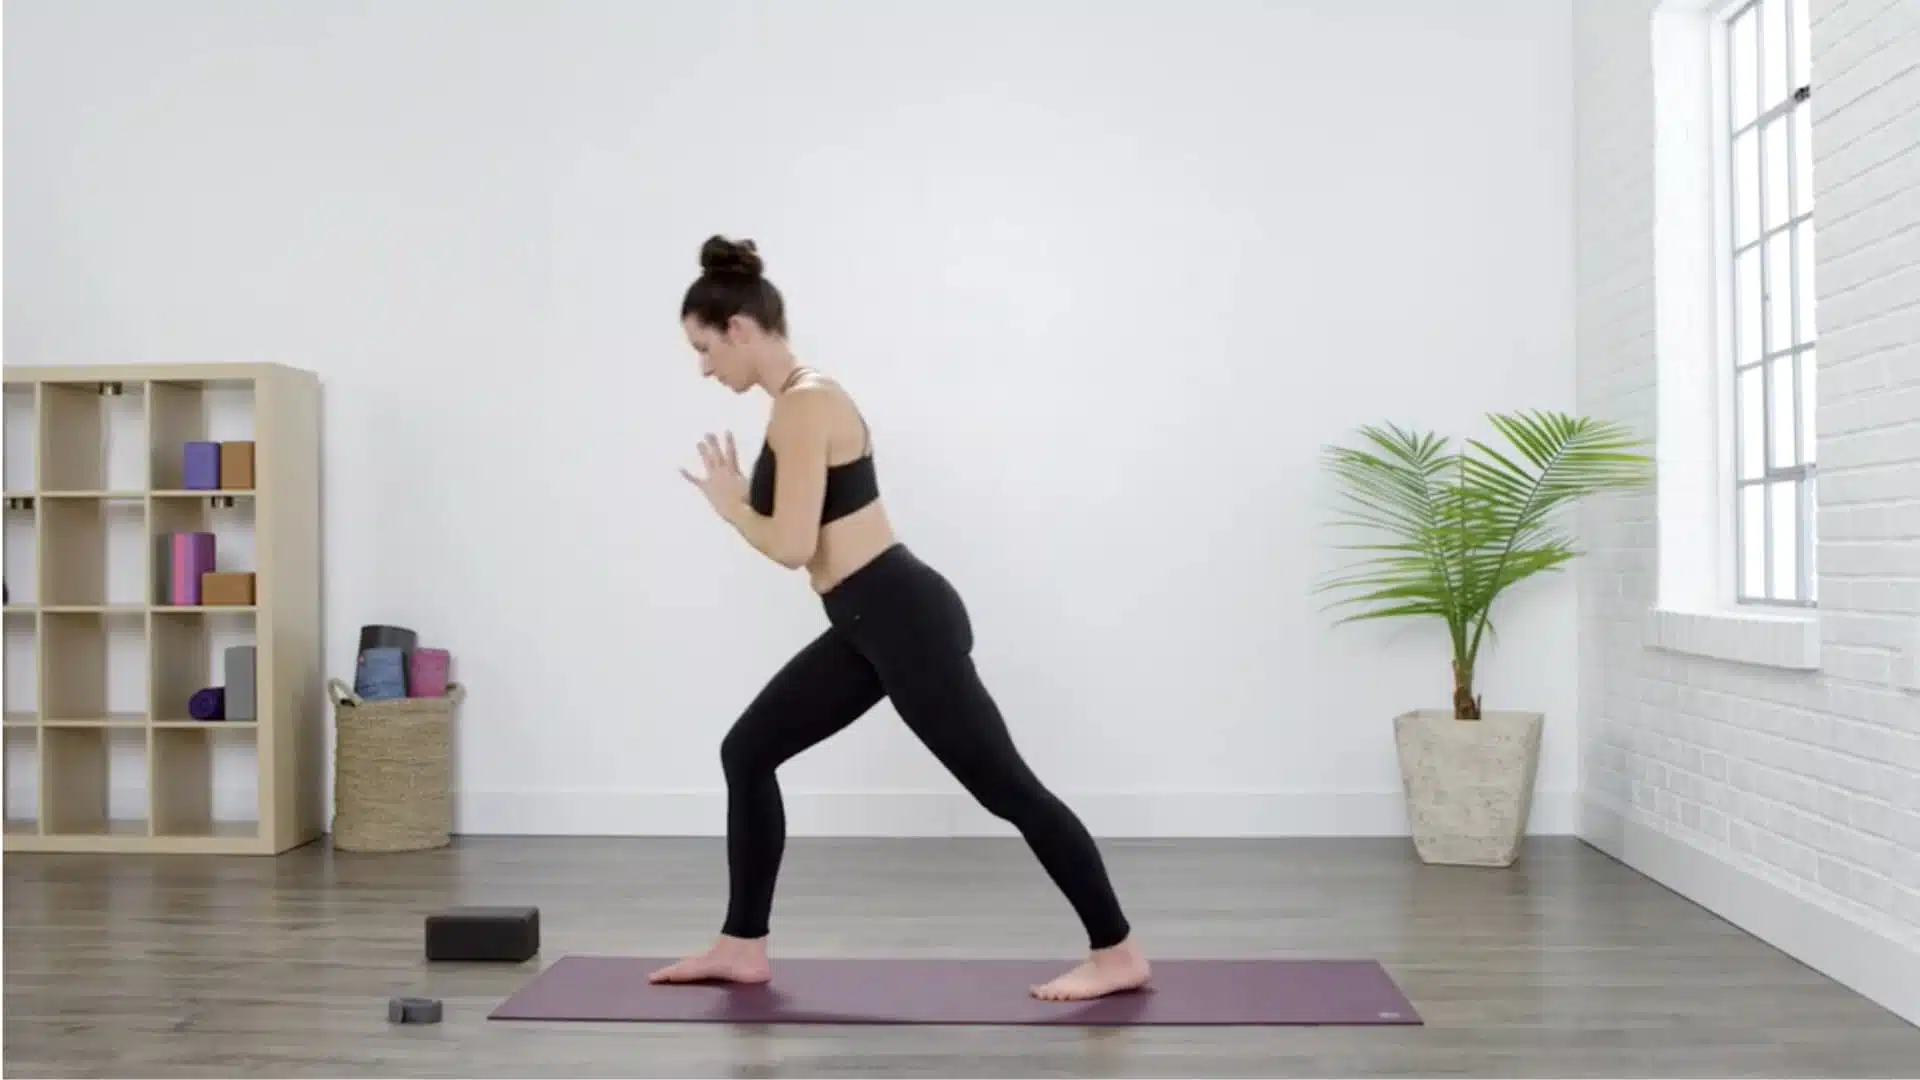
Start standing near the top of your mat. Step one foot halfway back, creating a short staggered stance. Your front foot stays toward the top of the mat, and your back foot gives you support behind you.
Keep the stance shorter if your balance feels unsteady or your hamstrings feel tight. Turn your back toes slightly out, then press through the outer edge of your back foot.
Keep both legs active and point your hips toward the front of the mat. Lift your chest before folding so your spine stays long, and place blocks under your hands if the floor feels too far away.
Step 2: Point All Ten Toes Forward
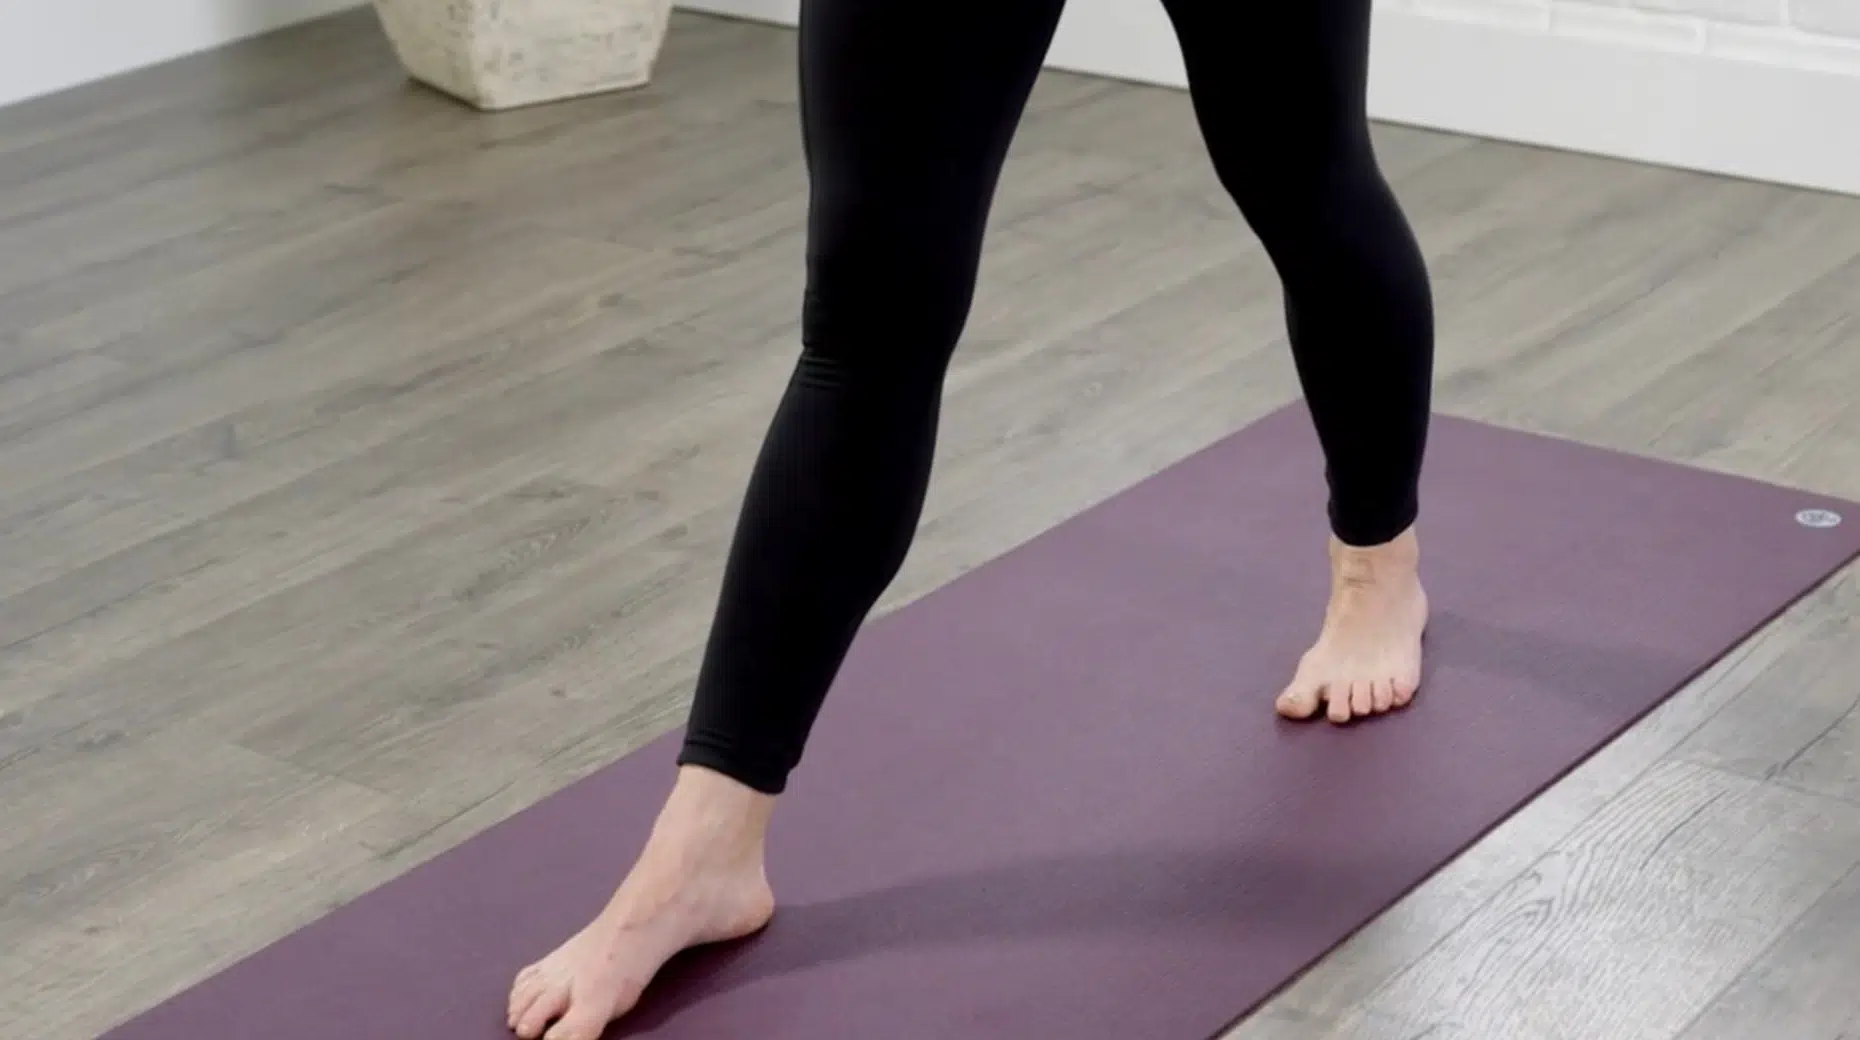
Turn both feet so your toes point toward the front of the mat. Keep your front foot steady and your back foot grounded.
If this feels uncomfortable in your back ankle or hip, allow the back foot to turn slightly outward. Your feet do not need to be on one straight line. A little width between them can help you balance.
Press evenly through the front heel and the outer edge of the back foot. Keep your hips facing forward as much as feels natural, without forcing them square.
Step 3: Inhale and Reach Your Arms Up
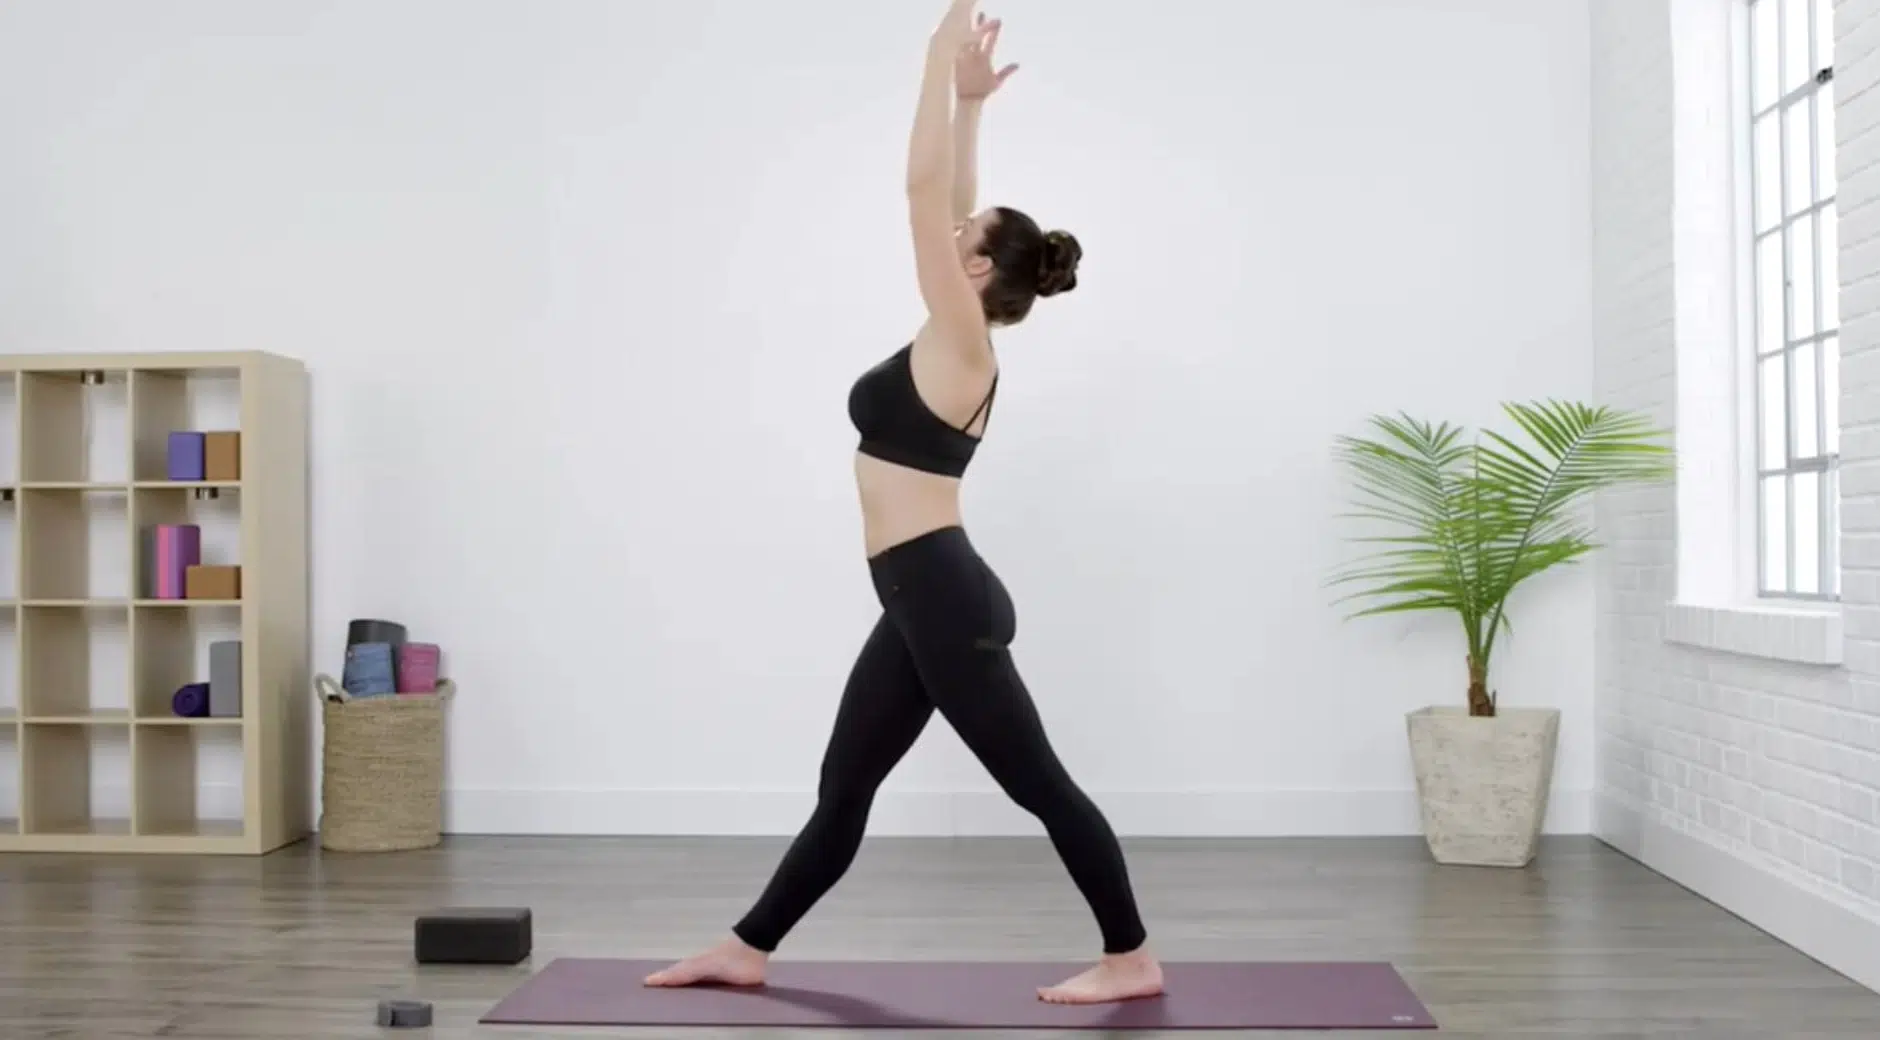
Take a breath in and reach both arms overhead. As you lift your arms, lengthen through your spine. Imagine your chest rising away from your hips before you fold.
This small lift helps create space through the front body. It also keeps the fold from starting with a rounded back, which can make the pose feel tighter in your hamstrings and lower back.
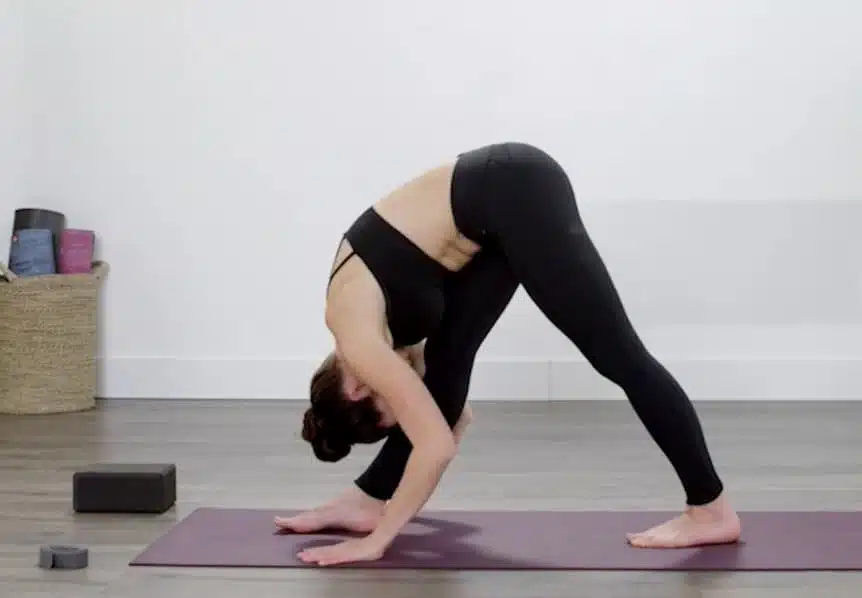
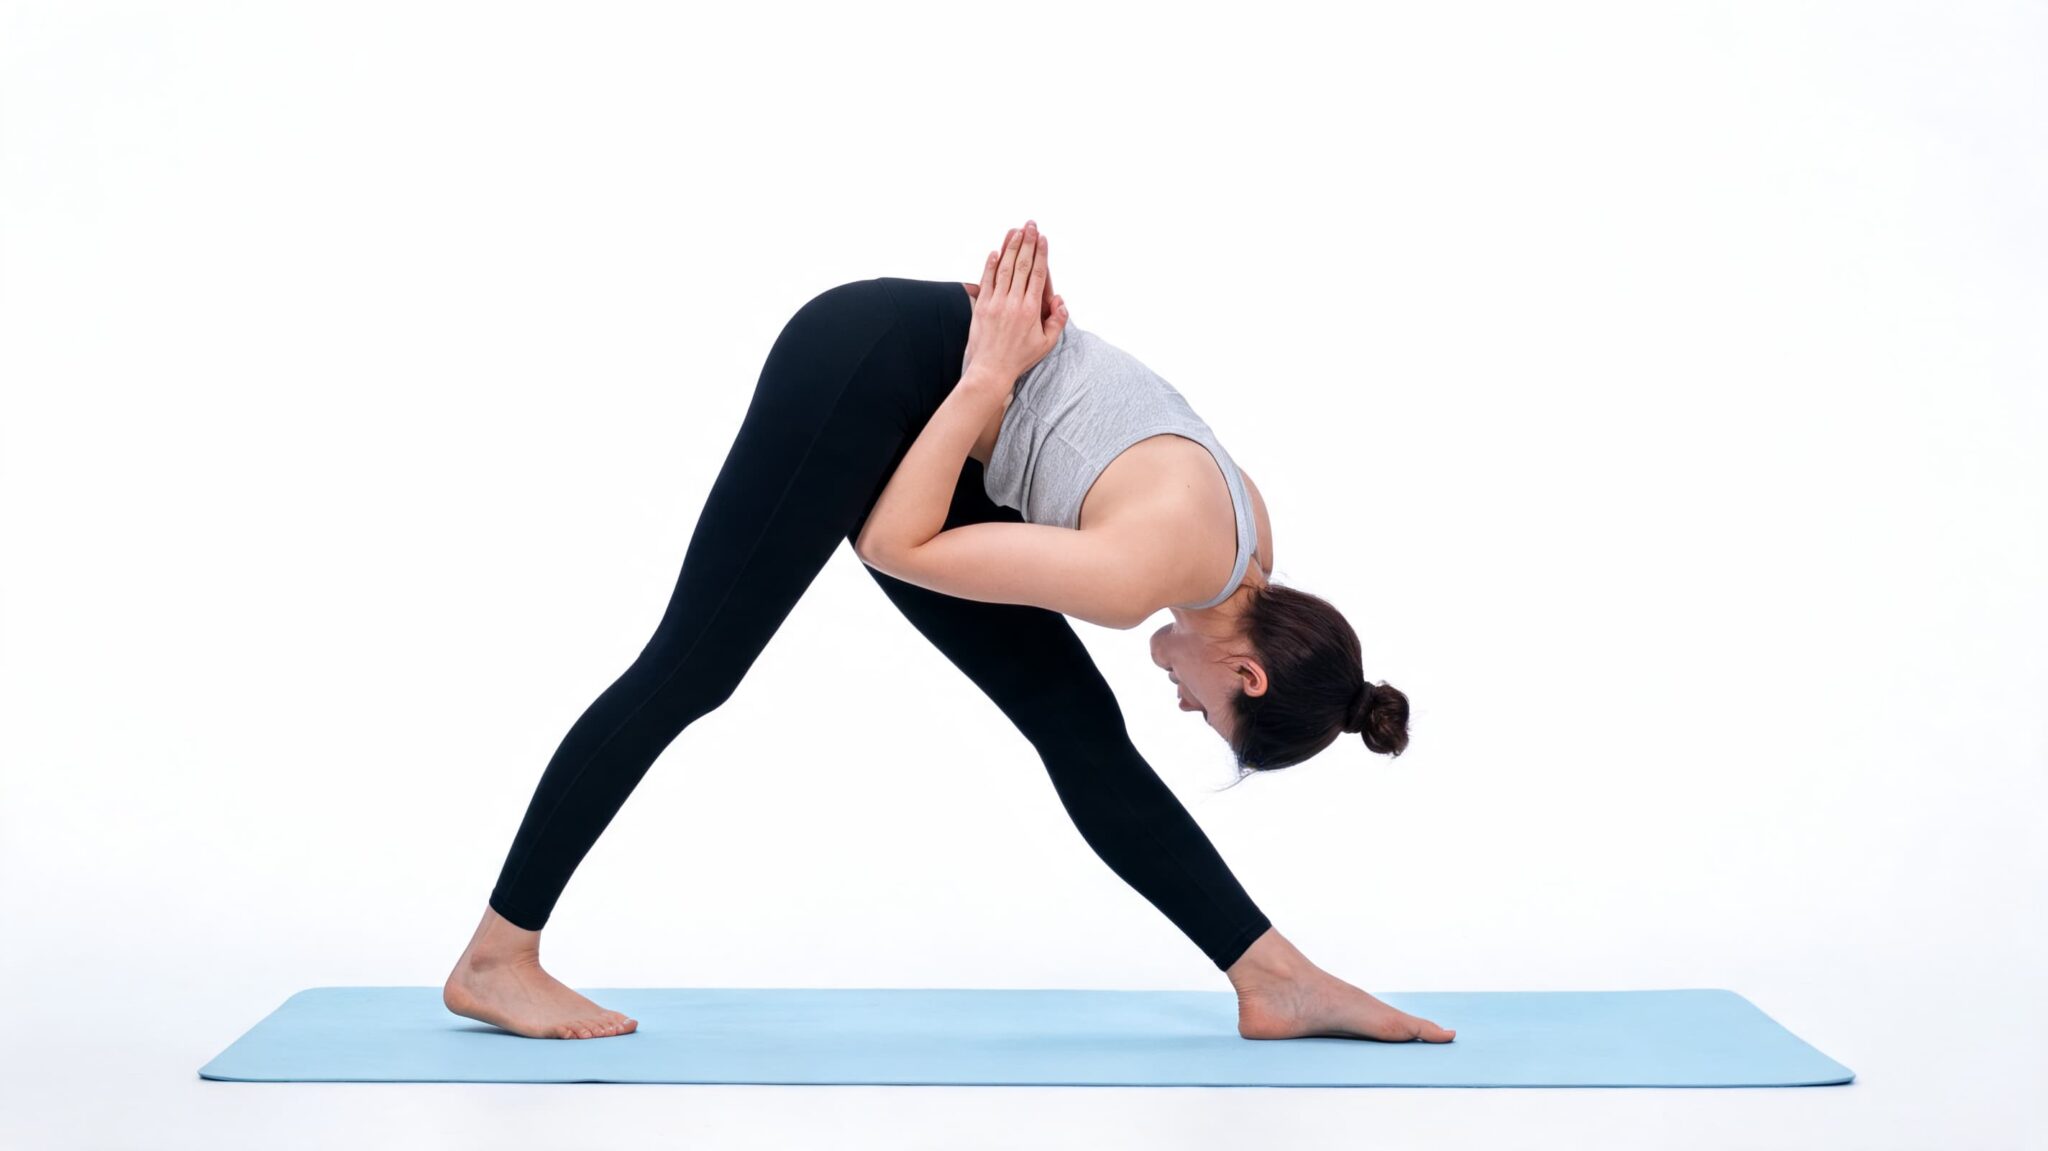
Step 4: Exhale and Fold Forward

As you breathe out, begin to fold forward over your front leg. Move from your hips rather than dropping from your waist. Keep your spine long as you lower your torso.
You do not need to fold deeply right away. A smaller fold with control is more useful than forcing your body down.
Keep your front knee slightly soft if your hamstring feels tight. Let your hands come to your hips, blocks, a chair, or the floor. Pause when you feel a steady stretch through the back of your front leg, then breathe there without pushing deeper.
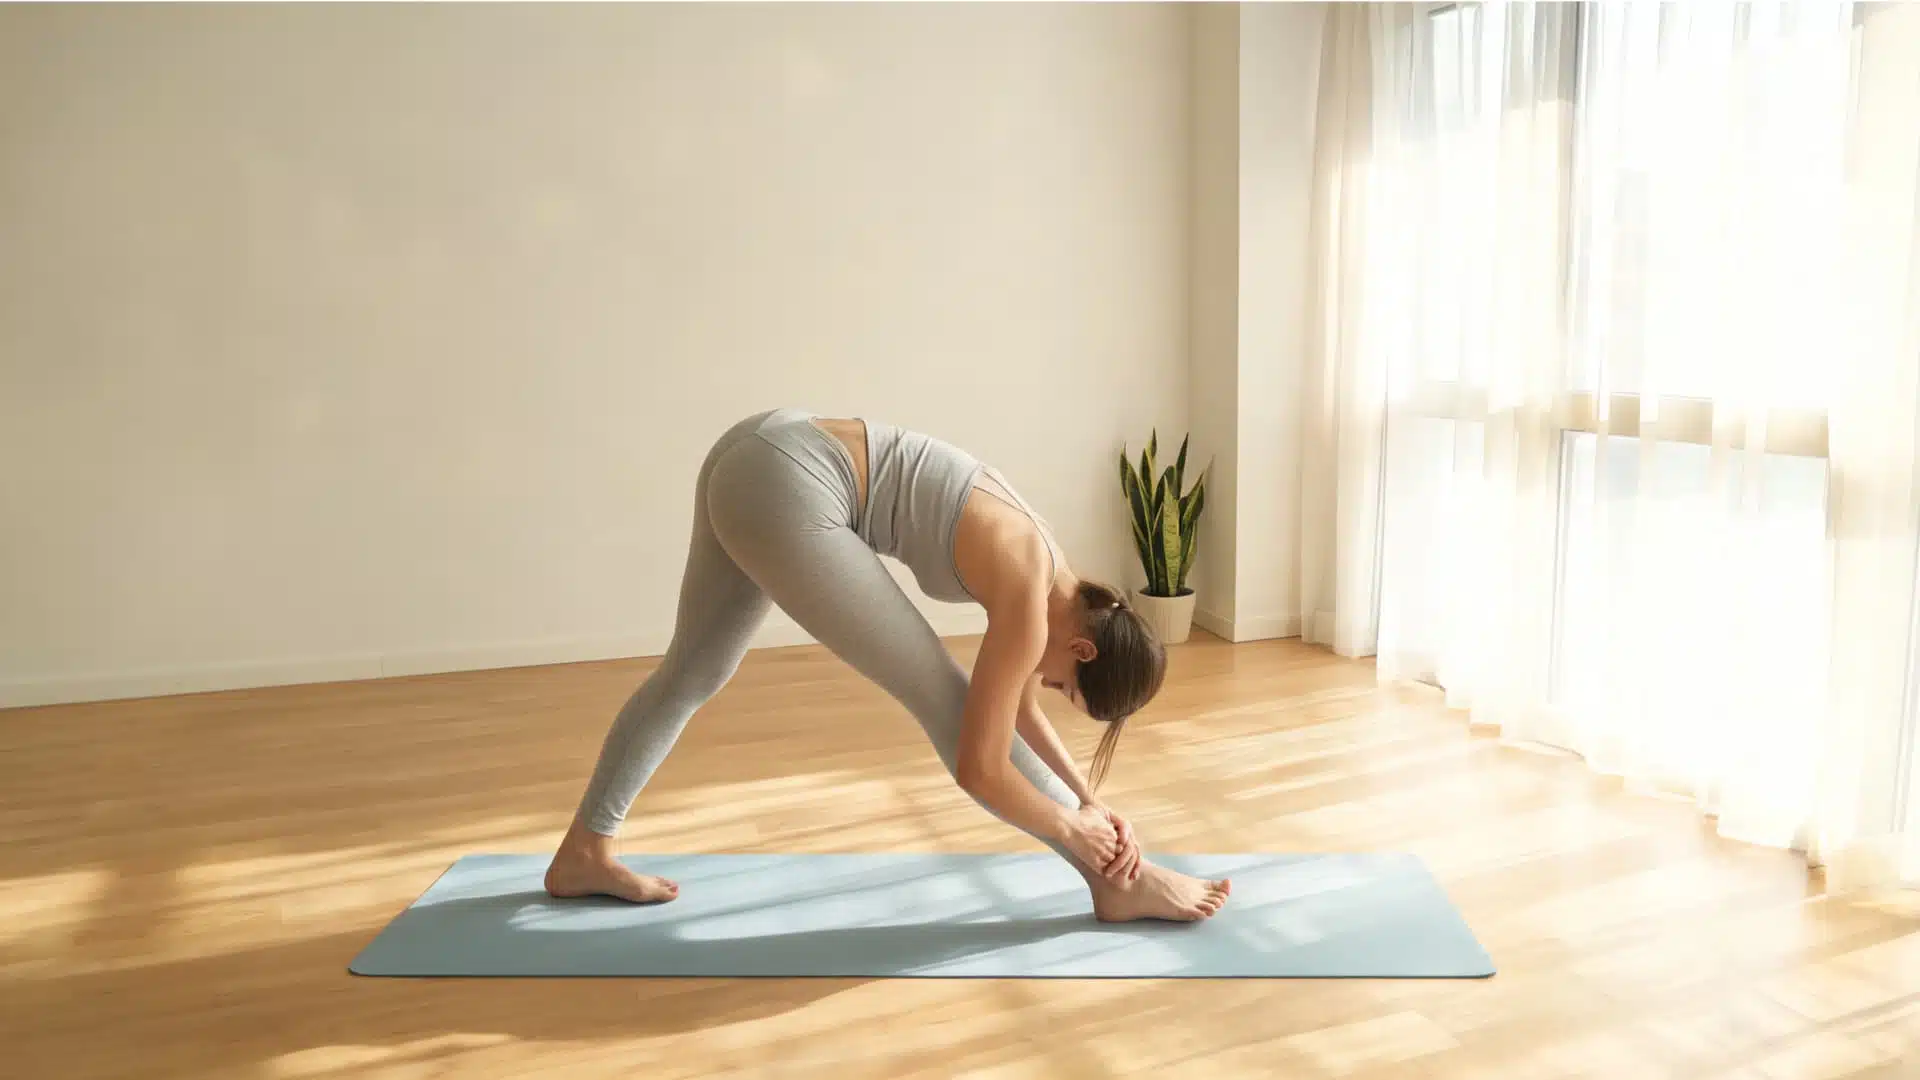
Step 5: Rest Your Hands Beside Your Front Foot
Place your hands on either side of your front foot. If the floor feels too far away, place yoga blocks under your hands. Blocks help you keep your chest reaching forward and stop your back from rounding.
Your hands are there for support, not to pull your body lower. Press your fingertips or palms lightly into the floor or blocks, then lengthen your chest forward. Keep your shoulders away from your ears and let your neck stay relaxed.
Step 6: Let Your Chest Soften Toward Your Front Thigh
Allow your chest to move toward your front thigh while keeping the movement gentle. You can drape your torso slightly over the front leg, but avoid collapsing heavily.
Think of lengthening forward first, then softening down only as much as your body allows. Keep your front knee slightly soft if needed, and use your breath to ease into the pose instead of pushing. Your goal is a steady hamstring stretch, not touching your head to your leg.
Step 7: Relax Your Neck
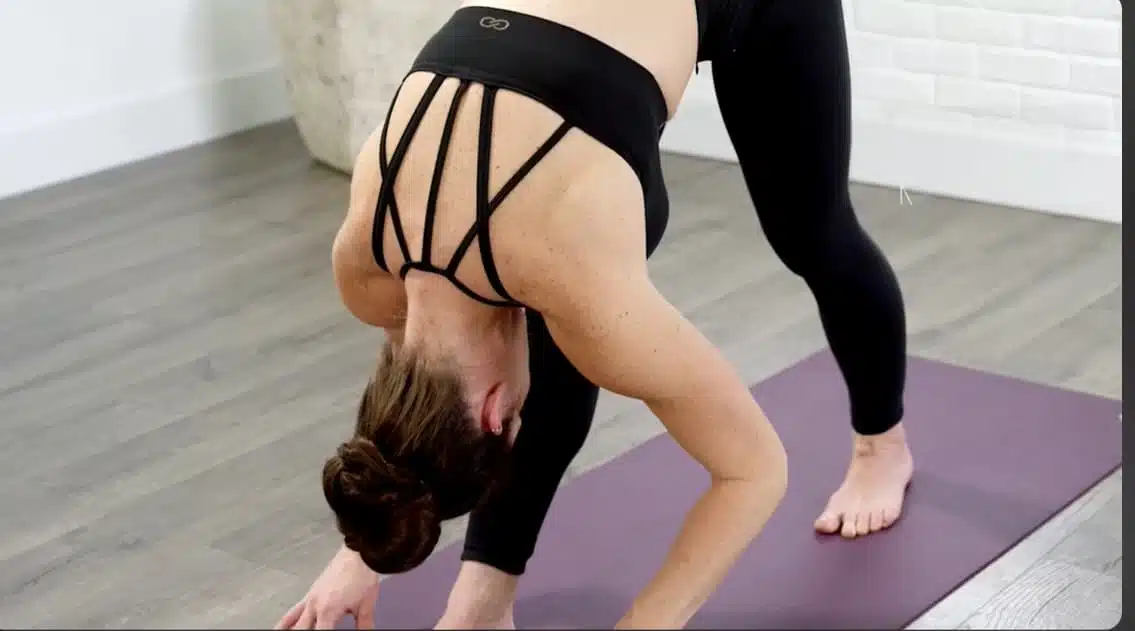
Let your neck relax naturally once you are in the fold. Avoid lifting the chin too high or dropping the head with tension.
Keep the back of the neck soft so the whole spine can feel more at ease. Let your gaze fall toward your front foot or the mat. If your shoulders creep up, soften them down and take a slower breath before going any deeper.
Step 8: Hold and Breathe
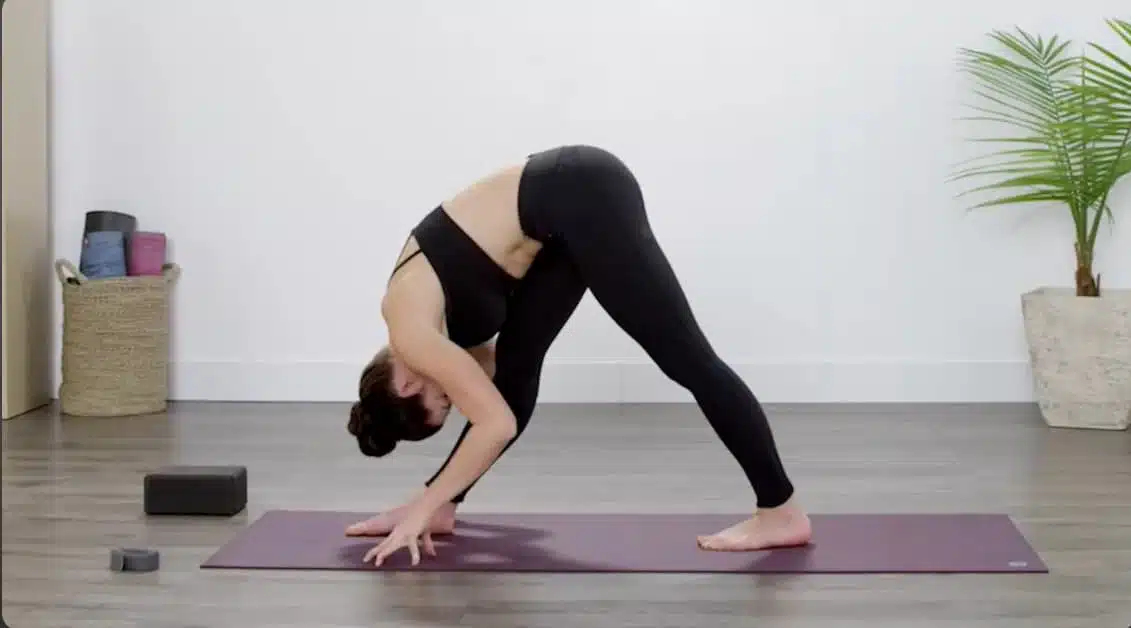
Stay in Pyramid Pose for a few slow breaths. Keep both feet grounded, your legs active, and your breath steady.
If your breath becomes tight or the stretch turns sharp, ease out of the pose or use more support. You can lift your torso higher, bend your front knee, or place blocks under your hands. Hold the pose with control, then come out slowly on an inhale.
To come out, bend the front knee slightly and press into both feet. Lift your torso with a long spine, step the back foot forward, pause, and repeat on the other side. Move slowly and notice if one side feels tighter.
| Note: Hold Pyramid Pose for 3 slow breaths if you are a beginner, about 5 breaths in regular practice, or 30 to 60 seconds with props. Come out sooner if your breath feels tense or pain appears. |
For a clearer visual, watch the video below. It shows how to set up Pyramid Pose step by step, fold over the front leg, relax the neck, and adjust the knees to make the pose feel more supported.
Key Alignment Cues for Pyramid Pose
Good alignment in Pyramid Pose helps you stretch with control instead of strain. Use these cues to keep the pose steady, supported, and safe for your hamstrings and lower back.
- Keep the front foot pointing forward.
- Keep the back foot angled and grounded.
- Step the feet onto two separate tracks.
- Keep the front knee slightly soft.
- Square the hips gently, not forcefully.
- Lengthen the spine before folding.
- Fold from the hip creases.
- Use blocks if the floor is out of reach.
- Keep the neck relaxed.
- Choose control over depth.
These small cues can make Pyramid Pose feel more stable and useful. Focus on a long spine, steady legs, and smooth breathing before trying to fold deeper.
What Pyramid Pose Should Feel Like
Pyramid Pose should feel steady, strong, and controlled. You may feel a deep stretch, especially in the front leg, but the pose should not feel sharp, forced, or painful. The goal is to stay connected to your breath while keeping the spine long and the legs active.
| Safe Sensations | Warning Signs |
|---|---|
| Strong stretch in the front hamstring | Sharp pain behind the knee |
| Mild stretch through the front calf | Pulling near the hamstring attachment |
| Active work in both legs | Pinching in the lower back |
| Length through the spine | Numbness or tingling |
| Gentle effort in the hips and core | Dizziness |
| Steady, controlled breathing | Breath becoming tense or held |
If any warning sign appears, ease out of the pose right away. Bend the front knee, use blocks, shorten your stance, or practice with chair support to make the stretch feel safer and more controlled.
Pyramid Pose Variations and Modifications
Pyramid Pose does not have to look the same for every body. Props, stance changes, and hand positions can make the pose safer and more useful. Choose the variation that helps you keep a long spine, steady legs, and smooth breathing.
1. Pyramid Pose with Blocks
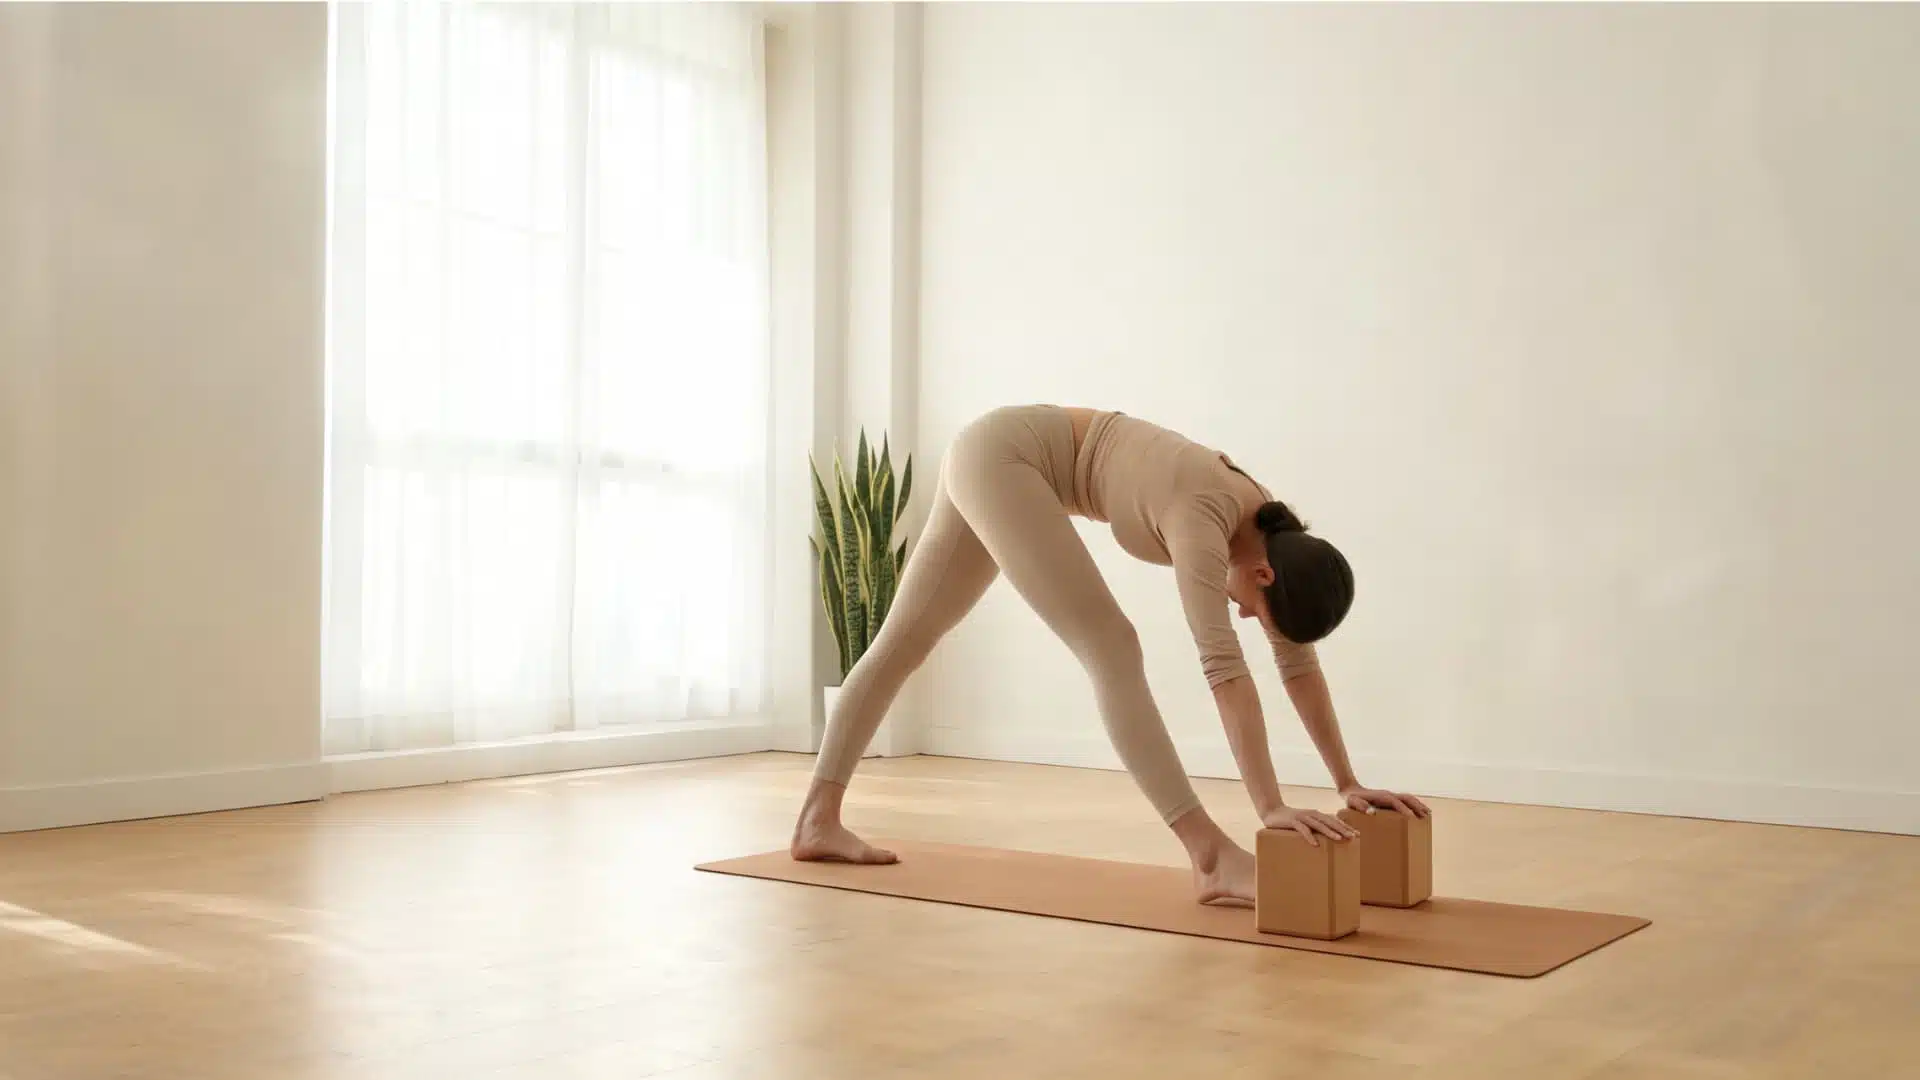
Pyramid Pose with blocks helps you keep your spine long without forcing your hands to the floor. Place one block under each hand on either side of your front foot. Use the height that lets your chest reach forward and your back stay broad.
This variation is especially helpful if your hamstrings feel tight or your back rounds when you fold. The blocks reduce strain and let you focus on control instead of depth.
Best for: beginners, tight hamstrings, a rounded back, and limited flexibility.
2. Short-Stance Pyramid Pose
In Short-Stance Pyramid Pose, the back foot steps closer to the front foot. This reduces the intensity of the hamstring stretch and makes the pose easier to balance.
Use this version if the full stance feels too strong or unstable. Keep both feet grounded, soften the front knee, and fold only as far as you can keep your spine long.
Best for: new students, stiff hips, shaky balance, and lower body tightness.
3. Wide-Track Pyramid Pose
Wide-Track Pyramid Pose provides greater stability by placing the feet on two separate lines rather than one narrow line. Think of your feet standing on train tracks, not a tightrope.
This version is useful if you wobble, feel off-center, or struggle to square your hips. The wider base helps your legs support the fold more evenly.
Best for: balance issues, wobbly stance, and students who feel unstable on one line.
4. Hands-on-Hips Pyramid Pose
Hands-on-Hips Pyramid Pose helps you understand what your pelvis is doing before you fold deeper. Place both hands on your hips and notice if one hip shifts forward, pulls back, or drops.
This variation teaches awareness and control. It is a good choice when you want to focus on alignment instead of reaching the floor.
Best for: learning alignment, understanding pelvis position, and slower practice.
5. Chair-Supported Pyramid Pose
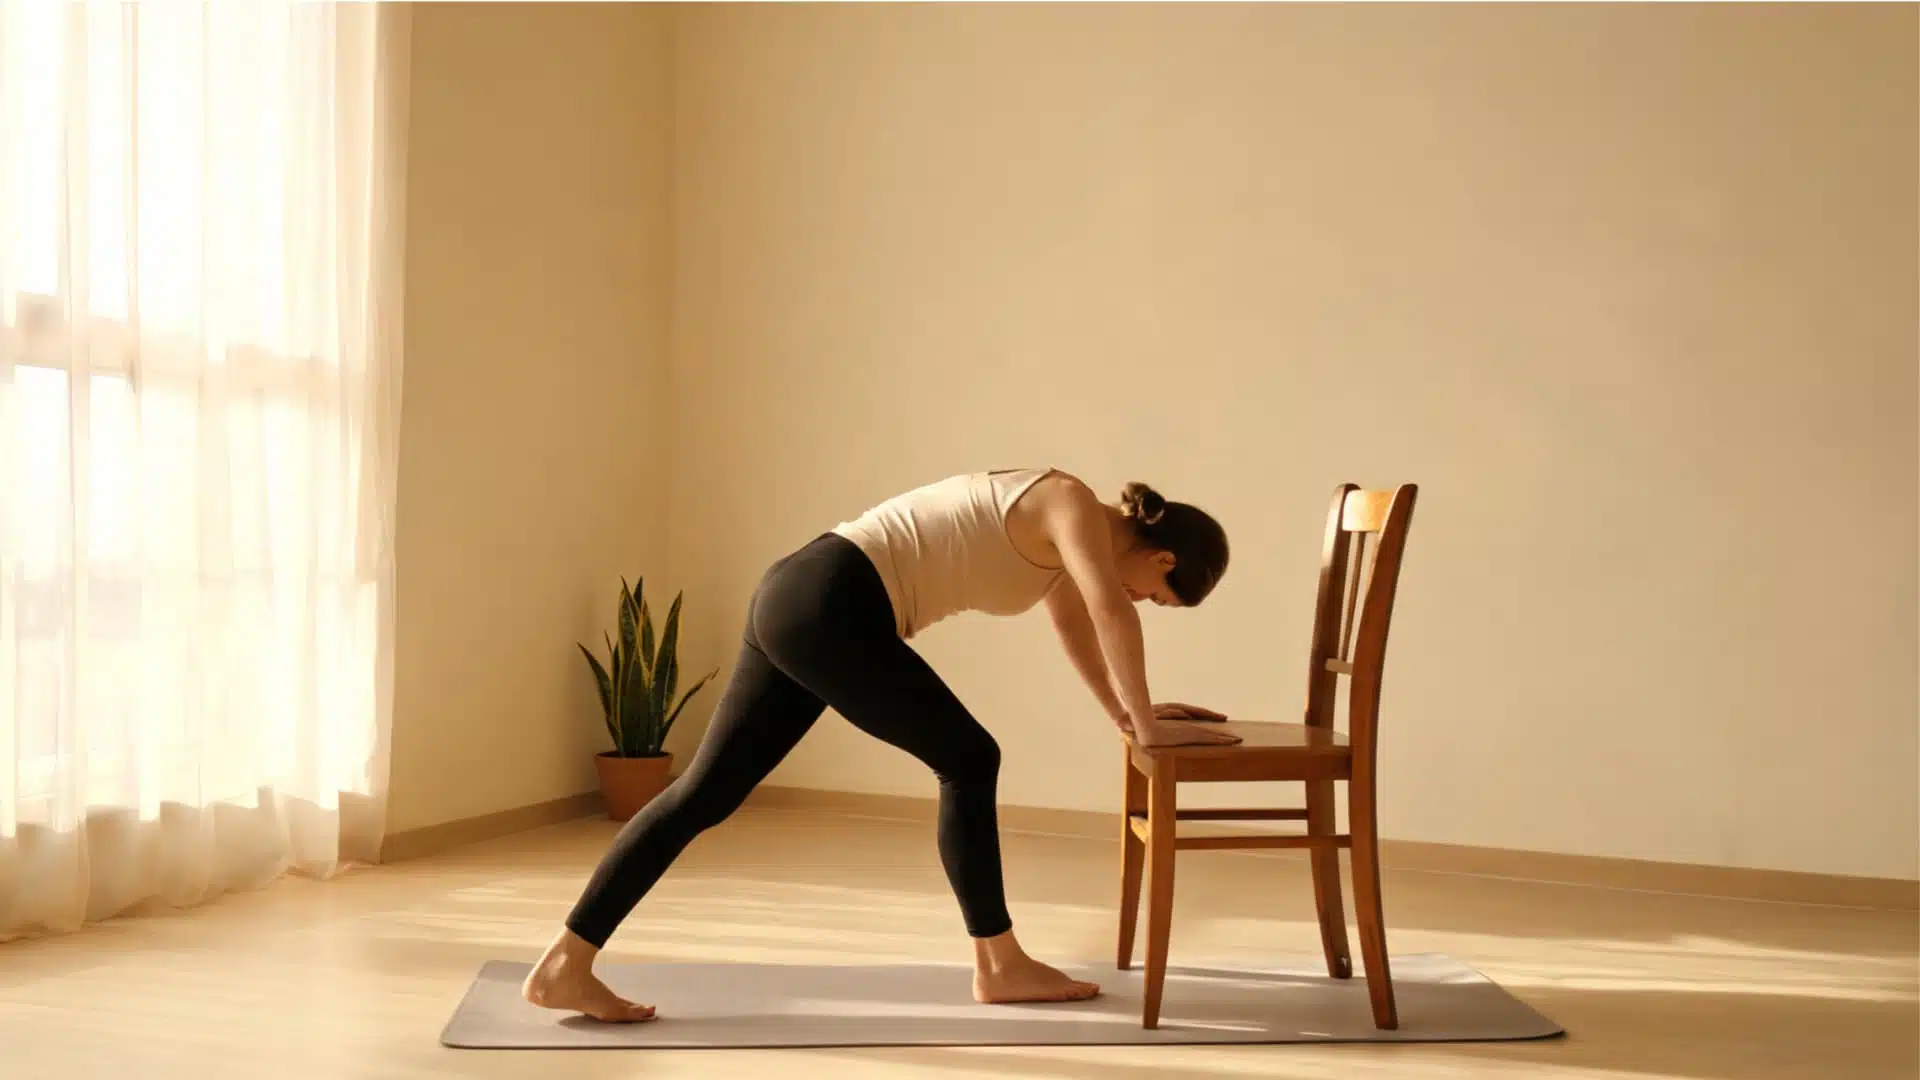
Chair-Supported Pyramid Pose keeps the forward fold higher and gentler. Place your hands on the seat or back of a chair and fold only as far as your body feels steady.
This version reduces pressure on the hamstrings and lower back. It can also make the pose more accessible when balance, mobility, or pregnancy changes make the full pose difficult.
Best for: seniors, pregnancy modifications, lower back sensitivity, and limited mobility.
6. Wall-Supported Pyramid Pose
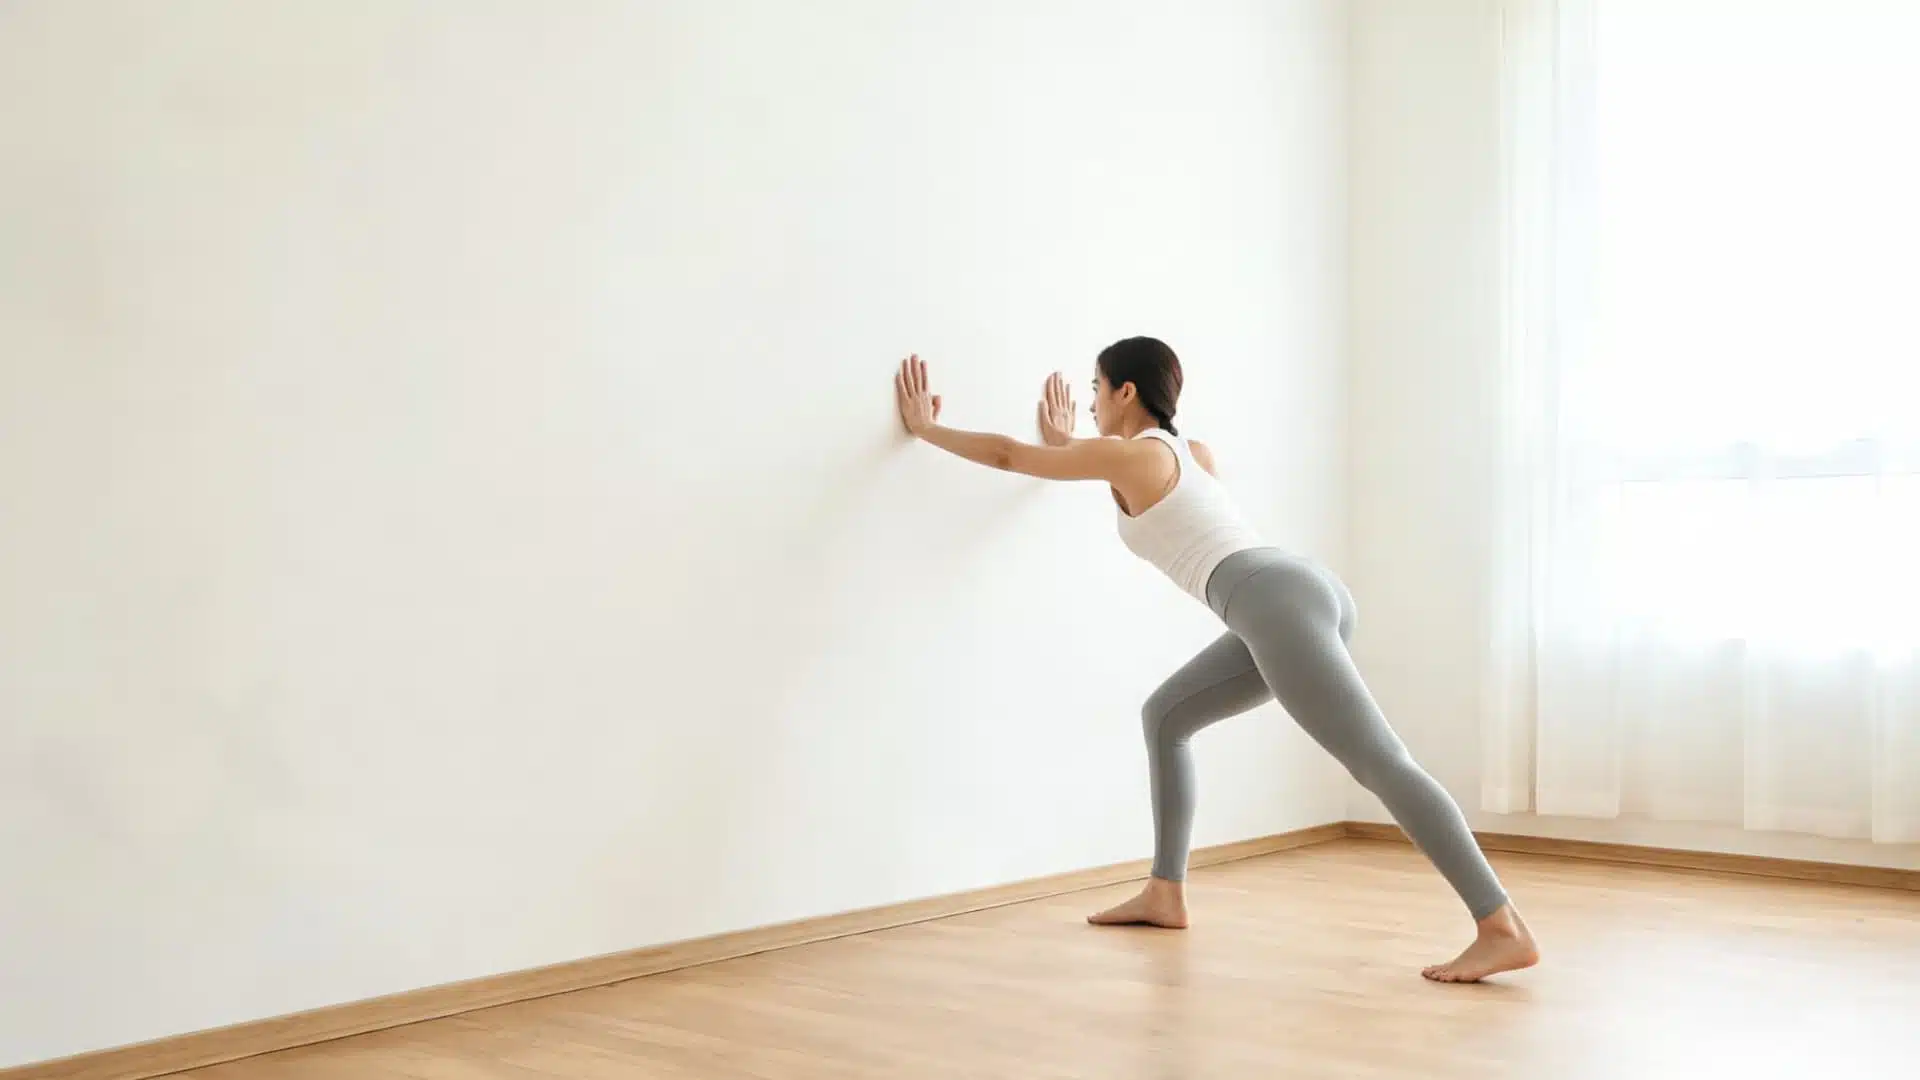
Wall-Supported Pyramid Pose adds balance support and makes the fold feel less intimidating. Stand facing a wall, step one foot back, and place your hands on the wall as you hinge forward.
The wall helps you stay steady while keeping your head higher than a deep fold. This can make the pose feel calmer and more controlled.
Best for: beginners, balance concerns, high blood pressure modifications, and gentle practice.
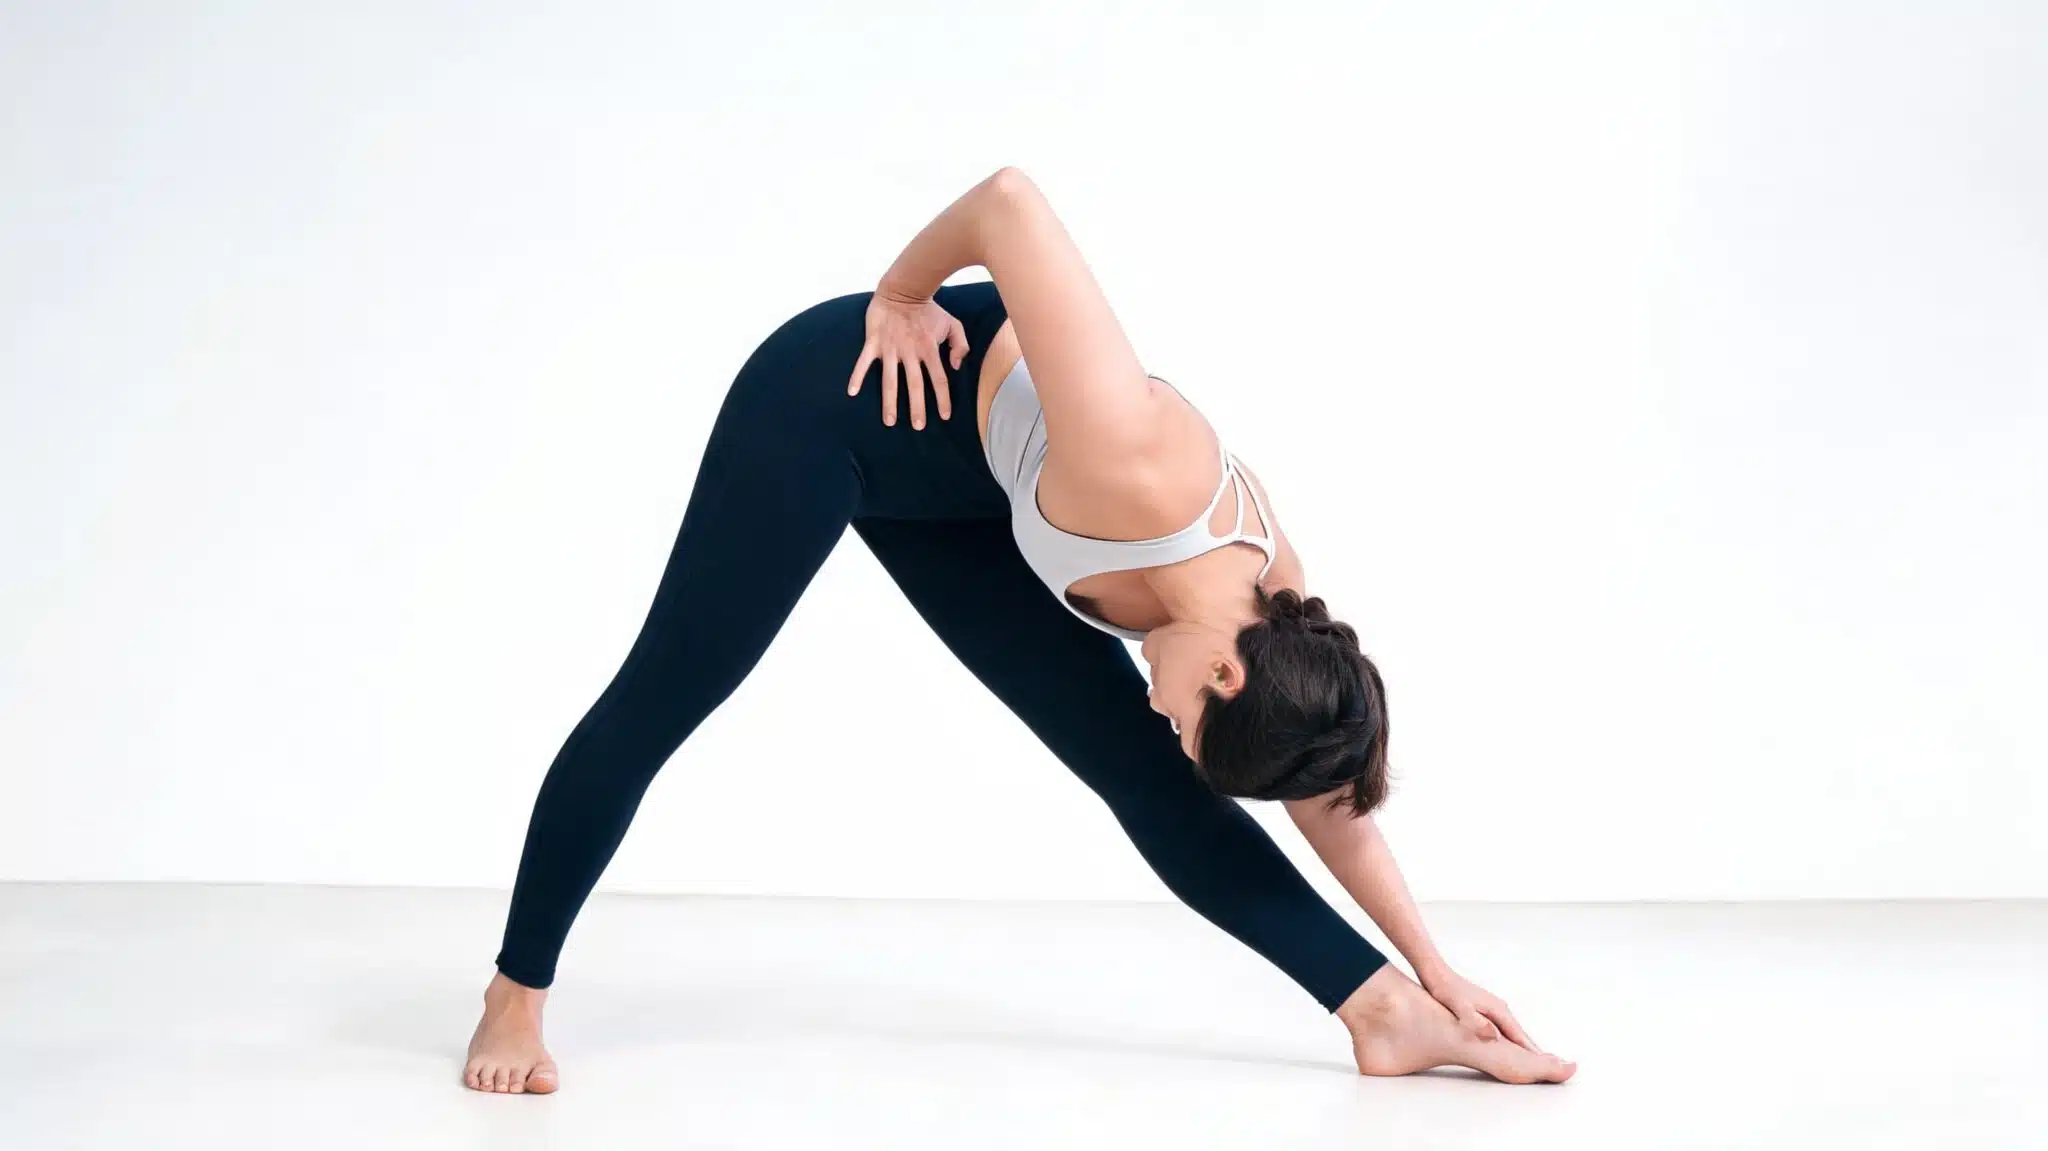
7. Reverse Prayer Pyramid Pose
Reverse Prayer Pyramid Pose adds a chest and shoulder opening to the traditional hamstring stretch. Bring your palms together behind your back with the fingers pointing upward, or hold opposite elbows if Reverse Prayer feels too intense.
This version is stronger for the shoulders and wrists, so move slowly and avoid forcing the hands. Keep the chest broad and the spine long as you fold.
Best for: intermediate students, shoulder mobility, and Ashtanga-style practice.
These variations let you match Pyramid Pose to your body rather than forcing it into a single shape. The best version is the one that keeps your breath steady, your spine long, and your stretch controlled. From here, understanding what goes wrong in the pose is just as important as knowing what goes right.
Common Pyramid Pose Mistakes and Fixes
Small mistakes in Pyramid Pose can change how the pose feels. The good news is that simple adjustments can make the pose safer and steadier.
| Mistake | Why It Happens | Fix |
| Rounding the back | Folding too low too soon | Use blocks and lengthen the chest. |
| Locking the front knee | Forcing the hamstring stretch | Keep a soft bend in the knee. |
| Feet too narrow | Trying to stand on one line | Step the feet hip-width apart. |
| Back heel lifts | The stance is too long, or the foot angle is off | Shorten the stance or adjust the back foot. |
| Hips are forced square | Overcorrecting alignment | Let the hips guide forward gently. |
| Breath is held | Too much strain | Ease out slightly and breathe slowly. |
When the pose feels strained, use props or reduce the depth instead of pushing harder.
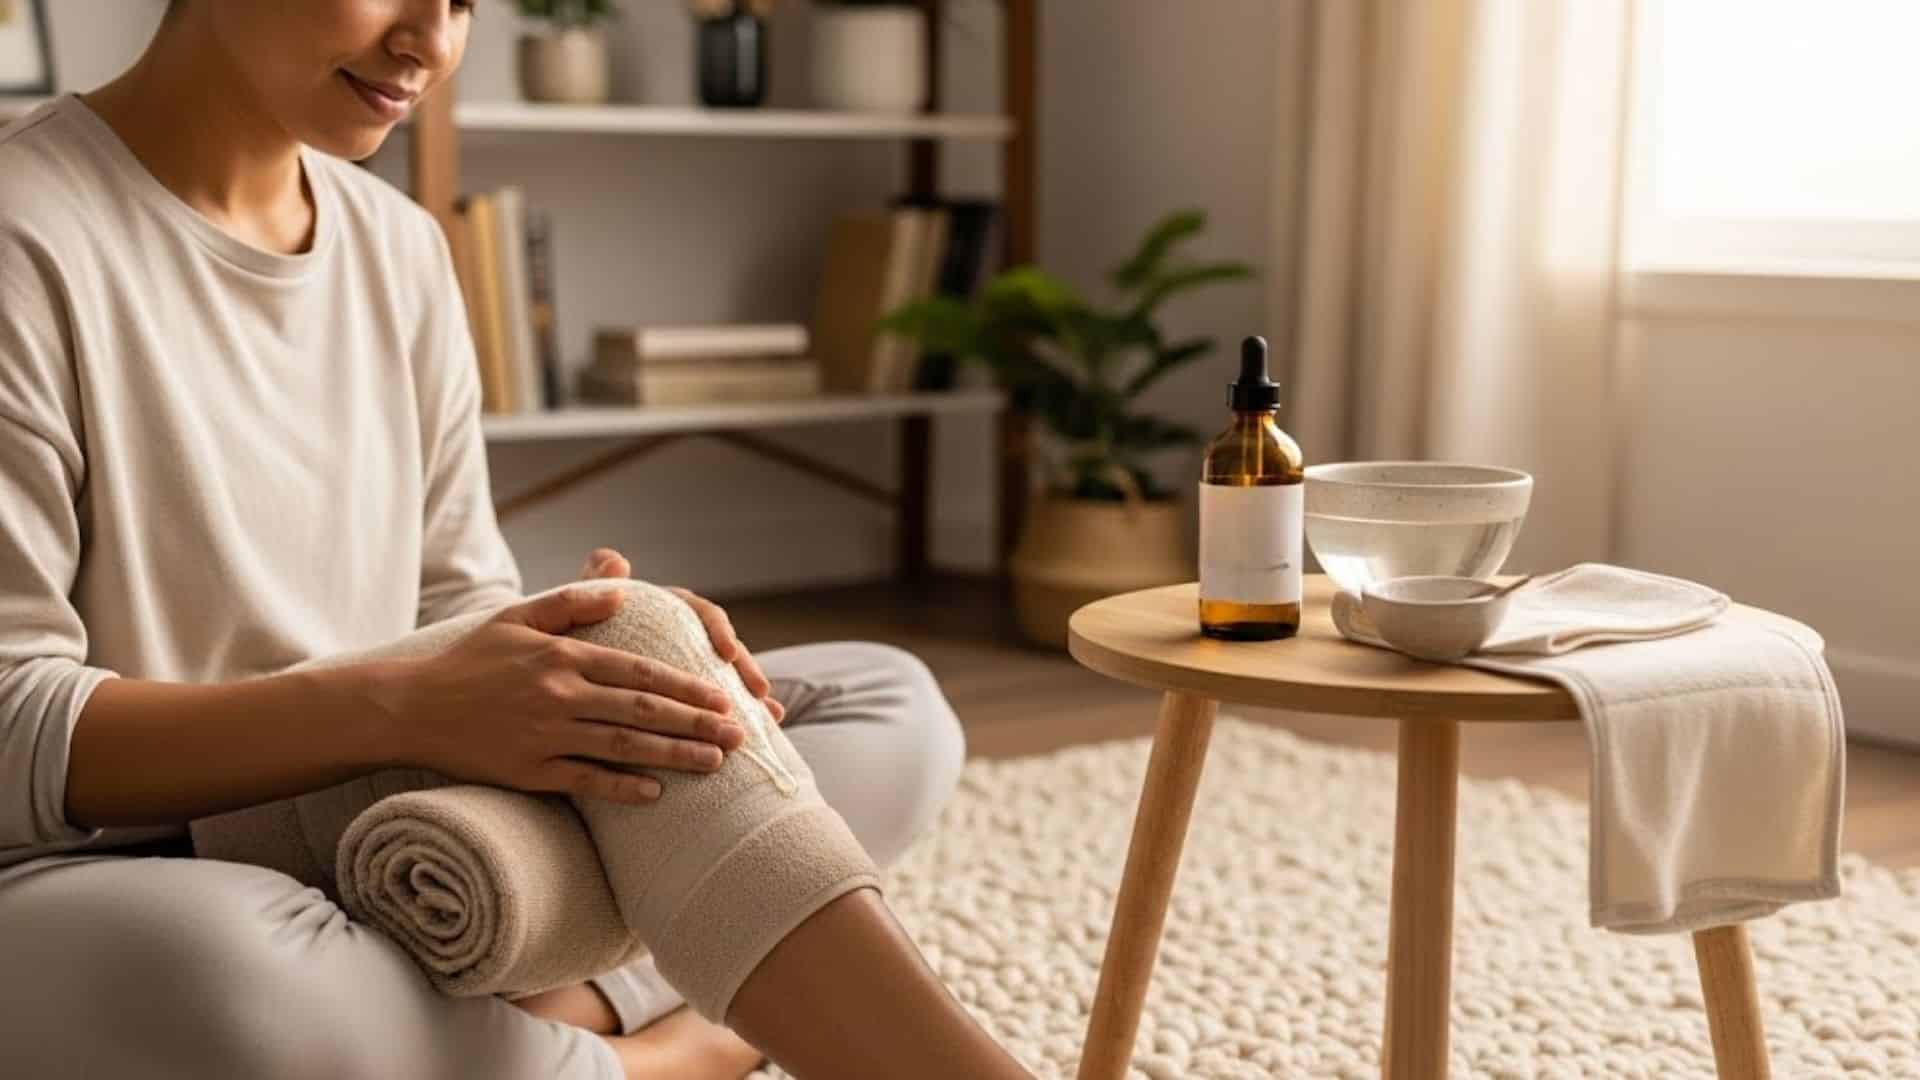
Who Should Avoid or Modify the Pyramid Pose?
Some people should use props or avoid deep versions of the Pyramid Pose. Modify the pose if you feel pain, strain, dizziness, or pressure. This includes people with:
- Recent hamstring injury
- Acute sciatica
- Lower back pain
- Hip or knee pain
- Balance problems
- Uncontrolled high blood pressure
- Pregnancy, especially in the later stages
If you have pain, an injury, or a medical condition, check with a healthcare provider or trained yoga teacher before practicing. People with acute sciatica pain in particular should approach standing forward folds with extra caution, as nerve sensitivity along the sciatic path can intensify with hamstring loading.
Pyramid Pose vs. Similar Poses
Pyramid Pose is sometimes confused with other standing or hamstring-focused poses. The main difference is that Pyramid Pose folds forward over one front leg while still asking for balance and hip control. This comparison can help you understand where each pose fits in practice.
| Pose | Main Purpose | Key Difference |
| Pyramid Pose | Hamstring stretch, hip control, and balance | Standing fold over one front leg |
| Half Splits | Gentle hamstring preparation | One knee stays on the mat |
| Triangle Pose | Side-body opening and balance | Torso opens sideways |
| Standing Forward Fold | Full back-body release | Both feet stay parallel |
| Warrior I | Leg strength and hip opening | Torso stays upright |
Pyramid Pose sits at the intersection of strength and flexibility work. It is more active than Half Splits, more forward-facing than Triangle Pose, and more targeted than a regular Standing Forward Fold.
Once this pose feels controlled and comfortable, you may be ready to explore harder standing yoga poses that build on the same hip and balance foundations.
Frequently Asked Questions
Can I practice Pyramid Pose every day?
Yes, you can practice Pyramid Pose daily if it feels comfortable and pain-free. Keep the hold short, use props when needed, and avoid pushing into deep stretches every day if your hamstrings feel sore.
Why do I feel the Pyramid Pose more on one side?
One side may feel tighter because of posture habits, past injuries, sports, or daily movement patterns. This is common. Move slowly, use support, and let each side work at its own comfortable range.
Should I do Pyramid Pose before or after running?
Pyramid Pose is usually better after running, when the legs are warm. Before running, use gentle dynamic movements instead of long static holds, especially if your hamstrings tend to feel tight.
Can Pyramid Pose help with posture?
Pyramid Pose may support better posture by teaching spinal length, active legs, and hip awareness. It will not fix posture on its own, but it can help you notice how your spine and pelvis align.
Is Pyramid Pose safe for beginners?
Yes, with the right setup. Beginners do best with a shorter stance, blocks under their hands, and a soft bend in the front knee. Holding for just 3 breaths per side is enough to feel the benefit without overdoing the stretch.
What is the difference between Pyramid Pose and Parsvottanasana?
They are in the same pose. Parsvottanasana is the Sanskrit name, translated loosely as Intense Side Stretch Pose. Pyramid Pose is the common English name. Both refer to the standing forward fold over one leg that this guide covers.
How do I stop my back from rounding in Pyramid Pose?
Place blocks under your hands to raise the floor, which gives you room to keep the chest reaching forward. Lengthen the spine on an inhale before each exhale fold. If rounding still happens, shorten your stance and try the hands-on-hips variation to reset your pelvis first.
Final Verdict
Pyramid Pose is most helpful when you treat it as a controlled stretch, not a test of how far you can fold. I like this pose because it teaches you to slow down, hinge from the hips, keep the spine long, and notice how each side of the body feels.
You learned how to set up your stance, soften the front knee, use blocks, avoid rounding the back, and choose safer variations when needed.
Pyramid Pose can support hamstring flexibility, balance, and better forward-folding habits when practiced with patience. Try the short-stance version with blocks first, then share how it feels on each side.
Sources
YogaUOnline, “How to Do Pyramid Pose (Parsvottanasana).” https://yogauonline.com/yoga-poses/intense-side-stretch-pyramid-pose/
Yoga Journal, “Pyramid Pose: How to Practice Parsvottanasana.” https://www.yogajournal.com/poses/intense-side-stretch-pose/
National Institutes of Health, National Library of Medicine, “Effectiveness of yoga-based programs for flexibility and balance.” PubMed. https://pubmed.ncbi.nlm.nih.gov/